4.3.25. X5 USB User Manual
4.3.25.1. Introduction
The x5 USB has two controllers
Both support DRD dual-role (host/device) mode
One is connected to a USB2.0 PHY, and the other to a USB3.0 PHY
Therefore, one controller supports only USB2.0, while the other supports USB3.0
4.3.25.2. Role Switching (Host/Device)
How to switch between host and device modes?
For interfaces supporting OTG, plug in an OTG cable. The Linux system will automatically switch the USB mode to host mode based on the USB ID pin status.
Other interfaces can be statically configured via the device tree
dr_modeparameter.
dr_mode = "otg"; // peripheral/host/otg
Role control via sysfs nodes:
# Switch USB3.0 port to device mode
echo device > /sys/class/usb_role/35100000.usb-role-switch/role

# Switch USB3.0 port to host mode
echo host > /sys/class/usb_role/35100000.usb-role-switch/role

# Switch USB2.0 port to device mode
echo device > /sys/class/usb_role/35300000.usb-role-switch/role

# Switch USB2.0 port to host mode
echo host > /sys/class/usb_role/35300000.usb-role-switch/role
4.3.25.3. Host Mode
By default supports USB flash drives, mice, keyboards, UVC cameras, common USB-to-serial adapters, USB-to-Ethernet adapters, and other peripherals.
For additional device support, users can enable corresponding kernel configurations and port relevant device drivers.
4.3.25.4. Device Mode
Please refer to the above section on role switching to ensure the USB controller is operating in device mode.
This is usually related to the development board’s interface design. Refer to the corresponding hardware design.
Two scripts,
usb-gadget.shandusb3.0-gadget.sh, are provided as reference for starting USB gadget functions.These scripts can be used to launch common gadget configurations such as ADB, RNDIS, etc.
For custom gadget configurations, customers may modify or develop their own scripts based on these examples.
Common Gadget Configuration Commands
ADB Device
# Start ADB gadget on USB2.0 port (default mode is already ADB on USB2.0)
/etc/init.d/usb-gadget.sh stop
/etc/init.d/usb-gadget.sh start adb

# Disable USB2.0 gadget and start ADB gadget on USB3.0 port
/etc/init.d/usb-gadget.sh stop
/etc/init.d/usb3.0-gadget.sh stop
/etc/init.d/usb3.0-gadget.sh start adb
RNDIS Virtual Network Card # Recommended for Windows 10
# Enable RNDIS virtual network interface on USB2.0 port
/etc/init.d/usb-gadget.sh stop
/etc/init.d/usb-gadget.sh start rndis

# Start RNDIS virtual network card gadget on USB3.0 port
/etc/init.d/usb3.0-gadget.sh stop
/etc/init.d/usb3.0-gadget.sh start rndis
ECM Virtual Network Card # Recommended for Ubuntu/Linux systems
# Enable ECM virtual network interface on USB2.0 port
/etc/init.d/usb-gadget.sh stop
/etc/init.d/usb-gadget.sh start ecm

# Start ECM virtual network card gadget on USB3.0 port
/etc/init.d/usb3.0-gadget.sh stop
/etc/init.d/usb3.0-gadget.sh start ecm
Notes:
Current limitations on enabling gadgets separately or simultaneously on USB2.0 and USB3.0 ports:
Some devices, such as ADB, rely on user-space daemons (e.g.,adbd), so currently it is not supported to run two ADB connections simultaneously.
One gadget must be stopped before starting another.
For non-conflicting configurations, such as two RNDIS interfaces, or one ADB plus one RNDIS, simultaneous operation is theoretically possible.
Actual usability should be verified in practice.Regarding various USB virtual network protocols like RNDIS, ECM, NCM:
It is recommended to use RNDIS when connecting to a Windows host, as Windows 10 does not natively support drivers for ECM and similar protocols. Custom drivers would need to be found or created online.
Ubuntu or Linux-based hosts can use ECM or similar virtual network gadgets.
4.3.25.5. USB Compliance Testing
USB compliance testing ensures that USB devices strictly adhere to the USB standard protocols defined by the USB-IF organization, guaranteeing interoperability and stability across devices. This testing focuses on the physical layer (signal quality, electrical characteristics) and protocol layer (data transmission specifications), and is a prerequisite for obtaining official USB certification marks (e.g., SuperSpeed USB).
USB 2.0
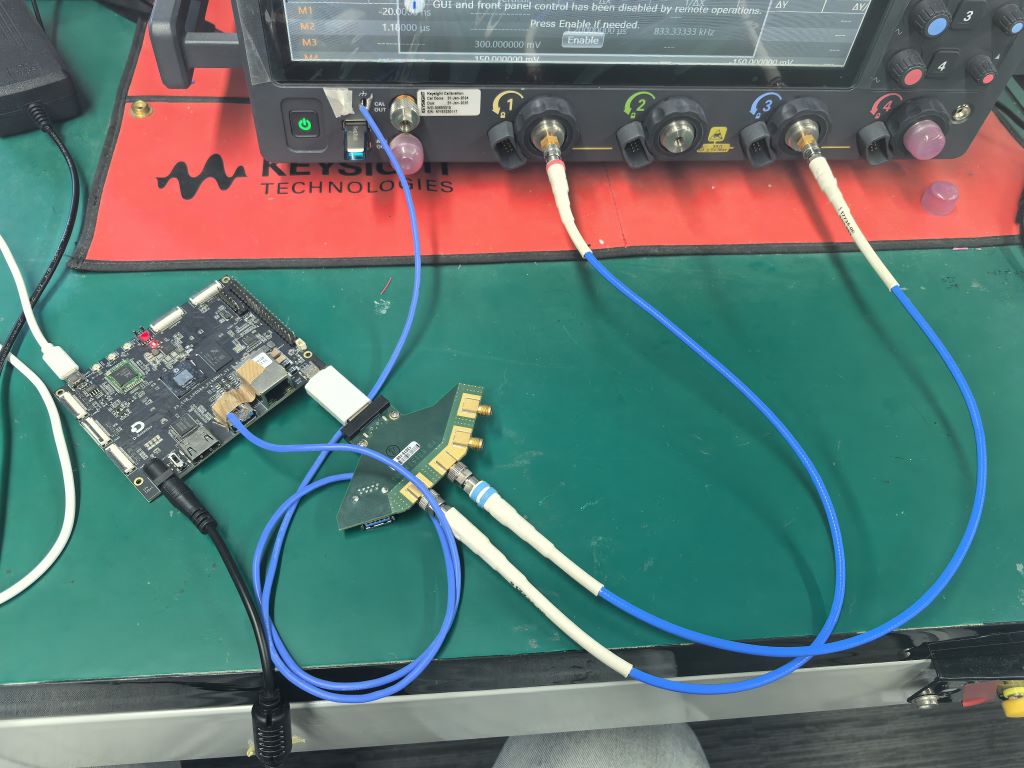
Hardware Connection
Software Configuration
Principle Explanation
The X5 USB 2.0 Host enters Test Packet Mode by configuring the portpmsc register.
Operation Example
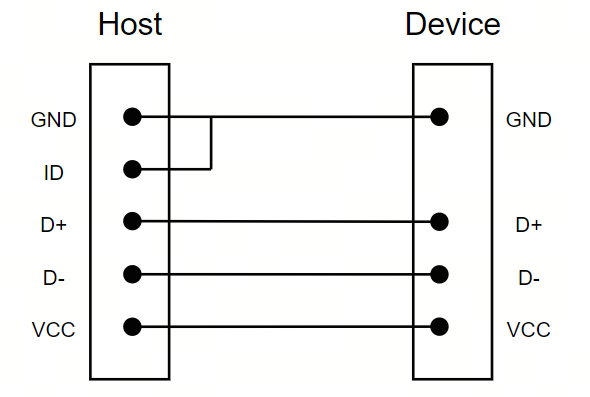
The X5 USB 2.0 enters Host mode by pulling down the USB ID pin (AON_USB2_ID). This can be achieved by connecting a USB OTG cable. The definition of the USB OTG cable is shown below:
Configure Test Packet Mode:
# Assert reset (usbcmd bit[1])
devmem 0x35300020 32 0x7

# Wait for 1 second
sleep 1

# De-assert reset (usbcmd bit[1])
devmem 0x35300020 32 0x5

# Disable test mode on USB2.0 portpmsc
devmem 0x35300424 32 0x0

# Enable test packet mode on USB2.0 portpmsc
devmem 0x35300424 32 0x40000000
Verify Port Status
cat /sys/kernel/debug/usb/xhci/xhci-hcd.4.auto/ports/port01/portsc
Powered Connected Enable Link:Test mode PortSpeed:3 Change: CSC Wake:
From the output: USB 2.0 Host has entered Test Packet Mode.
USB 3.0
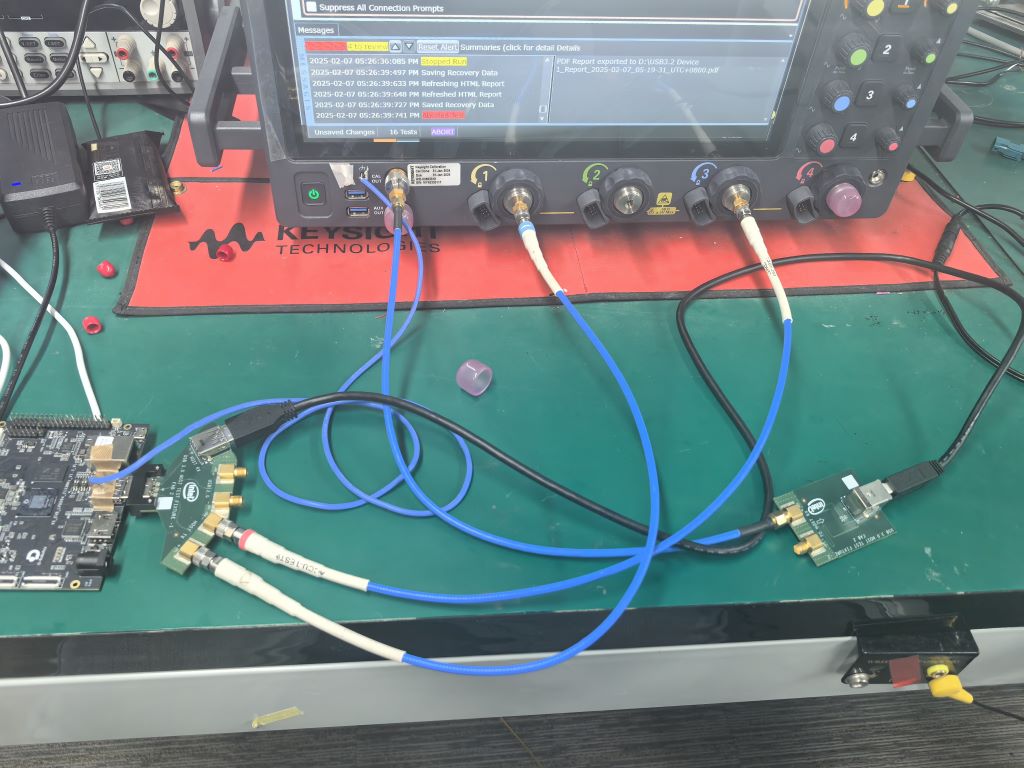
Hardware Connection
Software Configuration
Principle Explanation
The USB 3.0 Host enters Compliance Mode by configuring the portpmsc register.
Operation Example
The USB 3.0 automatically operates in Host mode upon initialization.
Configure Compliance Mode:
# Assert reset (usbcmd bit[1])
devmem 0x35100020 32 0x7

# Wait for 1 second
sleep 1

# De-assert reset (usbcmd bit[1])
devmem 0x35100020 32 0x5

# Set portpmsc to compliance mode
devmem 0x3510c2c0 32 0x140

# Perform host reset via pipectrl
devmem 0x3510c2c0 32 0x410c0102
Verify Port Status
cat /sys/kernel/debug/usb/xhci/xhci-hcd.3.auto/ports/port02/portsc
Powered-off Not-connected Disabled Link:Compliance mode PortSpeed:0 Change: Wake:
From the output: USB 3.0 Host has entered Compliance Test Mode.
USB Eye Diagram Test
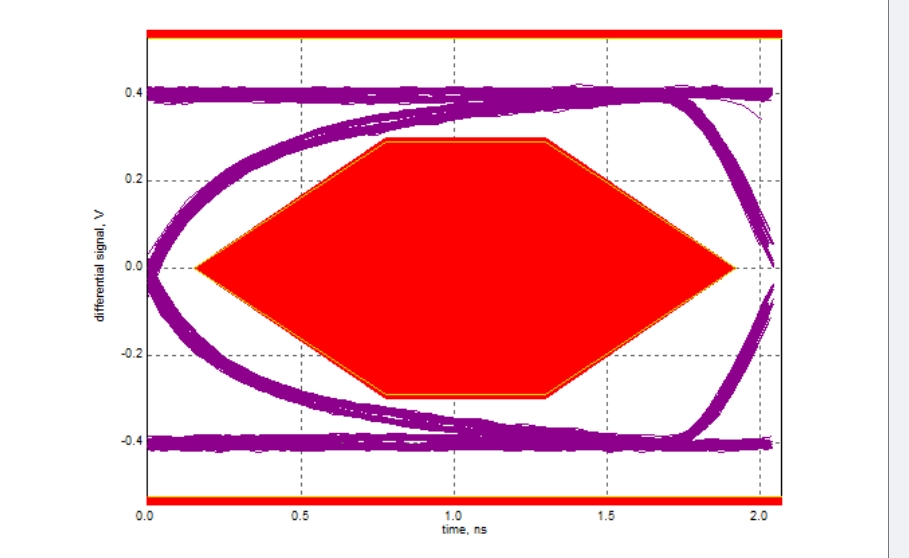
The USB eye diagram test results are shown below: