3.10. sample_gpu_2d Instructions
sample_gpu_2d implements the following functions by calling the 2D GPU Interface:
Rotation
Rectangle Fill
Alpha Blending
Color Space Conversion
Bit Block Transfer
Cropping
Stitching
Scaling (Up and Down)
Multi-source Alpha Blending
External Memory to GPU Memory Conversion
Next, each function will be described in detail.
Note:
Performance testing code has been added to each sample. The script
performance_test.shcan measure performance data for the corresponding interfaces in all samples.
You can modify the resolution of interest inperformance_test.shbefore testing.
[Case copy                          ] [Input 1*1920*1080] [Output 1920*1080] [TestTimes   100] [TotalConsume 344412    us] [AverageConsume 3444   us] [FPS   290.3]
[Case format_convert                ] [Input 1*1920*1080] [Output 1920*1080] [TestTimes   100] [TotalConsume 313243    us] [AverageConsume 3132   us] [FPS   319.2]
[Case multi_source_alphablend       ] [Input 4*1920*1080] [Output 1920*1080] [TestTimes   100] [TotalConsume 541909    us] [AverageConsume 5419   us] [FPS   184.5]
[Case resize                        ] [Input 1*1920*1080] [Output 3840*2160] [TestTimes   100] [TotalConsume 1287105   us] [AverageConsume 12871  us] [FPS    77.7]
[Case resize                        ] [Input 1*1920*1080] [Output  960*540 ] [TestTimes   100] [TotalConsume 81144     us] [AverageConsume 811    us] [FPS  1232.4]
[Case stitch                        ] [Input 4*1920*1080] [Output 1920*1080] [TestTimes   100] [TotalConsume 351719    us] [AverageConsume 3517   us] [FPS   284.3]
[Case stitch                        ] [Input 2*1920*1080] [Output 1920*540 ] [TestTimes   100] [TotalConsume 176619    us] [AverageConsume 1766   us] [FPS   566.2]
[Case alphablend                    ] [Input 1*1920*1080] [Output 1920*1080] [TestTimes   100] [TotalConsume 412188    us] [AverageConsume 4121   us] [FPS   242.6]
[Case crop                          ] [Input 1*3840*2160] [Output 1920*1080] [TestTimes   100] [TotalConsume 314460    us] [AverageConsume 3144   us] [FPS   318.0]
[Case rectangle_fill                ] [Input 1*1920*1080] [Output 1920*1080] [TestTimes   100] [TotalConsume 298156    us] [AverageConsume 2981   us] [FPS   335.4]
[Case rotation                      ] [Input 1*1920*1080] [Output 1920*1080] [TestTimes   100] [TotalConsume 609109    us] [AverageConsume 6091   us] [FPS   164.2]
Function description: Most samples use the function
n2d_util_load_buffer_from_raw_file. This function is used to load image files without data headers. It does not mean loading the raw images output by the Camera Sensor.
3.10.1. sample_rotation
3.10.1.1. Function Overview
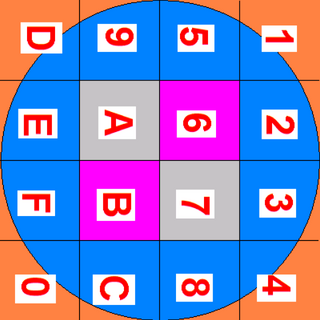
Function Description: sample_rotation performs a 90-degree clockwise rotation on an image.
Software Architecture
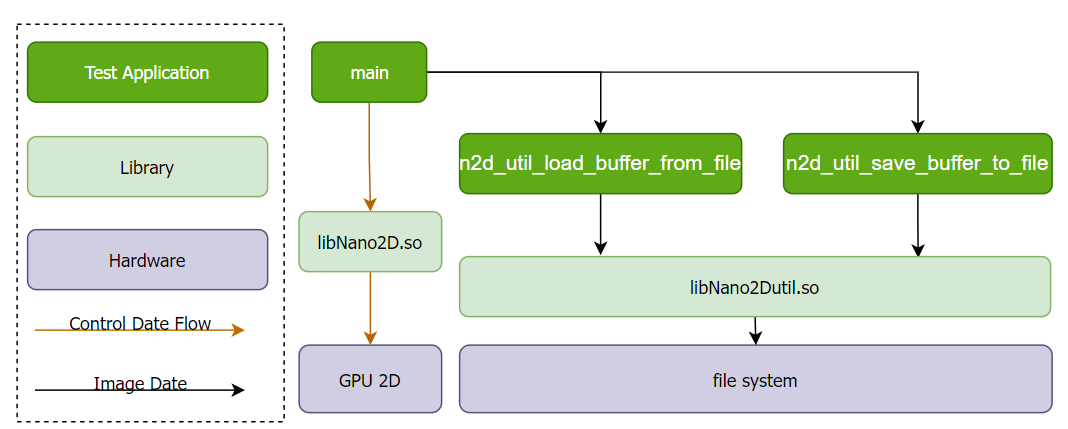
Code Location and Directory Structure
Code Location:
app/samples/platform_samples/sample_gpu_2dDirectory Structure:
sample_gpu_2d/
├── resource
│   ├── R5G6B5_640x640.bmp
│   ├── RGBA8888_640x480.bmp
│   ├── scenery01.bmp
│   ├── scenery02.bmp
│   ├── scenery03.bmp
│   └── scenery04.bmp
└── sample_rotation
    ├── Makefile
    └── rotation.c
API Workflow Explanation
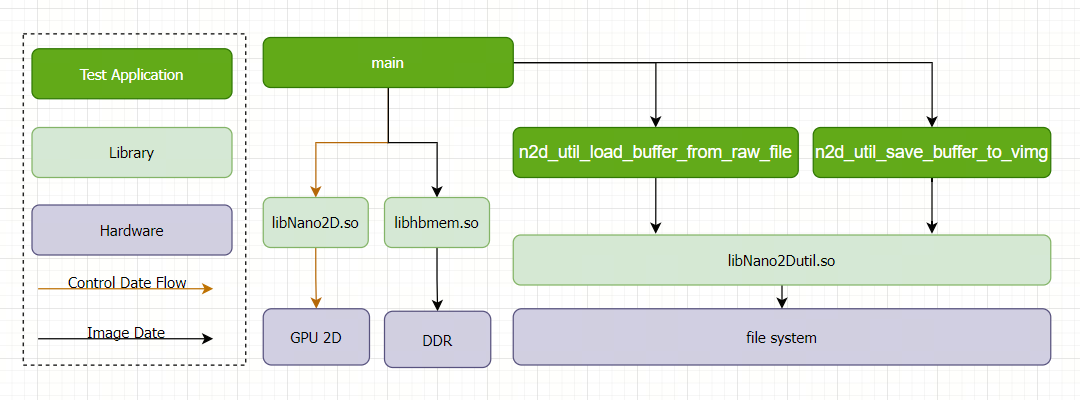
The core steps for using the GPU 2D API are:
Prepare source and destination buffers. The buffer structures are defined using n2d_buffer_t.
Execute blit operations: Send commands to the command buffer.
Execute commit operation: Submit pending commands in the command buffer to the GPU hardware and block until processing is complete.
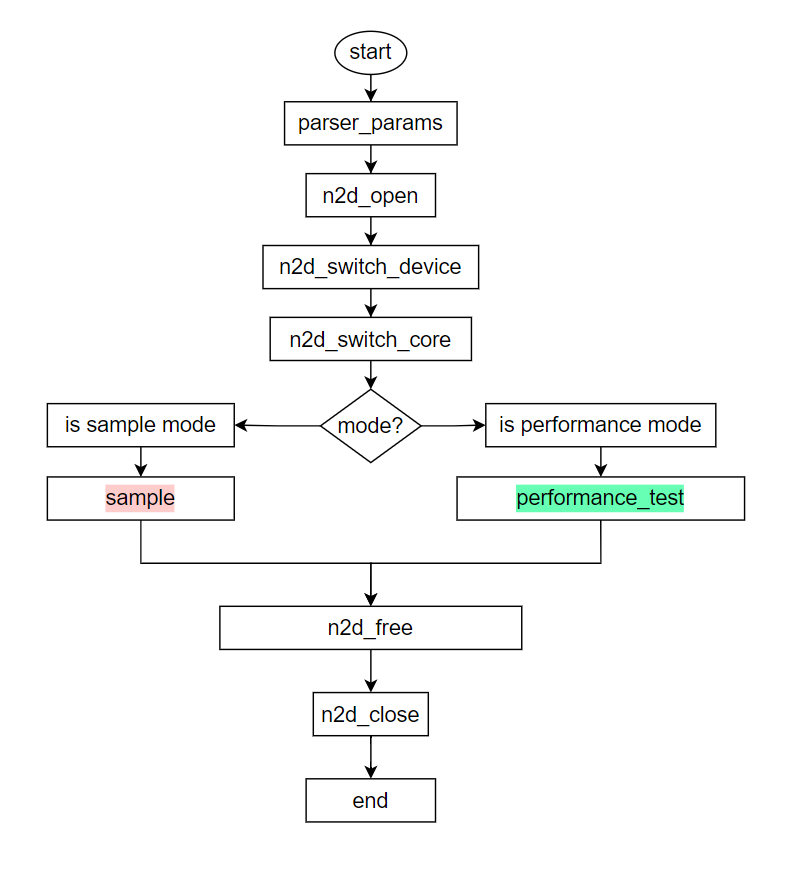
The example program mainly has two branches:
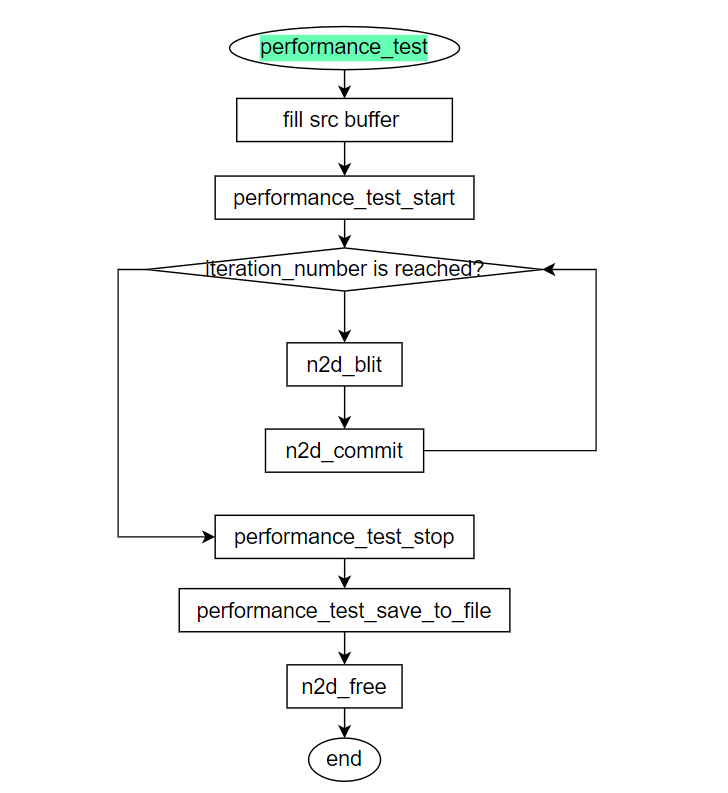
Performance test
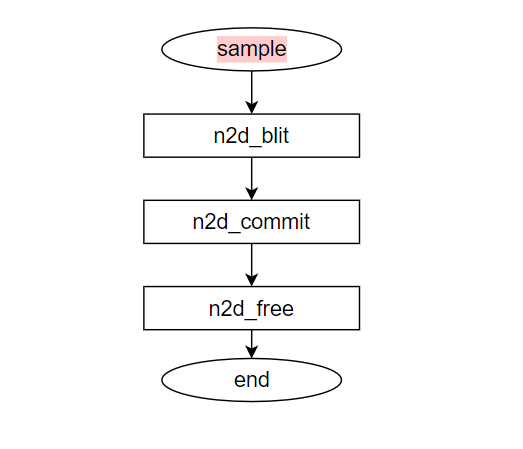
Sample program
Overall Workflow
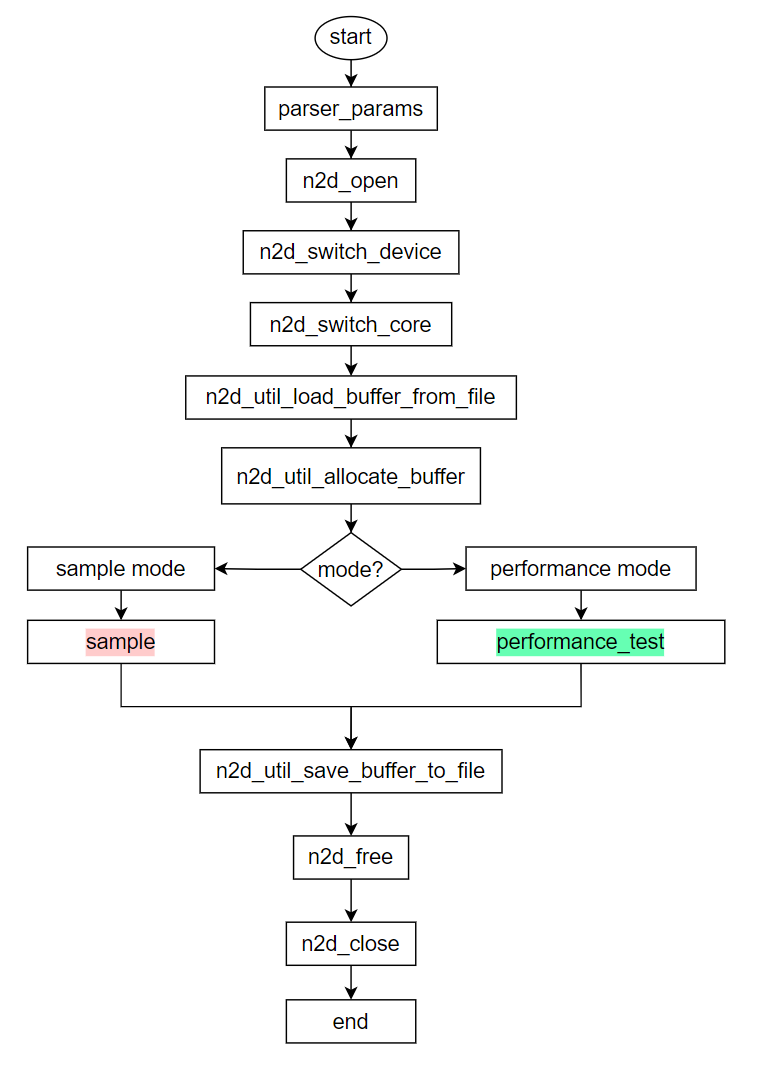
Performance Test Workflow
Sample Workflow
3.10.1.2. Compilation and Deployment
Compilation
Enter the
sample_rotationdirectory and runmaketo compile.The output binary is
rotation, located in thesample_rotationsource directory.For detailed compilation methods, refer to the Build Instructions section.
Program Deployment
Upload the directories
sample_rotationandresourceto the development board’s/userdatadirectory.Enter the
sample_rotationdirectory and runchmod +x rotationto grant execution permissions.
3.10.1.3. Execution
How to Run the Program
Run the program: ./rotation.
The program reads the file R5G6B5_640x640.bmp from the resource directory, rotates it, and saves the result to the current directory as R5G6B5_640x640_rotated.bmp.
Program Parameter Options
./rotation -h
Usage: rotation [OPTIONS]
Options:
  -m <mode>              Specify running mode (0: sample, 1: performance test)
  -c <image_width>       Specify image width (columns)
  -r <image_height>      Specify image height (rows)
  -i <iteration_number>  Specify number of iterations
  -h <help>              Show this help message
     For Example, performance test: ./rotation -m 1 -c 1920 -r 1080 -i 1000
     For Example, sample          : ./rotation (not need input param)
Examples:
./rotation -m 1 -c 1920 -r 1080 -i 1000: Performance test mode, specifying resolution 1920×1080, runs 1000 times, and prints average execution time and FPS../rotation: Rotates the input image 90 degrees clockwise.
Execution Results
Command:
./rotation
Log Output:
./rotation
Start !!!
Save file to [./R5G6B5_640x640_rotated.bmp].
Stop !!!
Result Description:
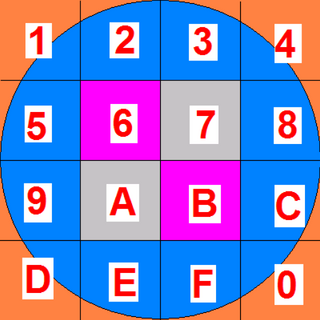
After reading the input file, the program rotates it 90 degrees clockwise and saves the result. The effect is as follows:
Input File:
Output File:
3.10.2. sample_rectangle_fill
3.10.2.1. Function Overview
Function Description: sample_rectangle_fill performs rectangle filling on an image.
Software Architecture
Code Location and Directory Structure
Code Location:
app/samples/platform_samples/sample_gpu_2dDirectory Structure:
sample_gpu_2d/
├── resource
│   ├── R5G6B5_640x640.bmp
│   ├── RGBA8888_640x480.bmp
│   ├── scenery01.bmp
│   ├── scenery02.bmp
│   ├── scenery03.bmp
│   └── scenery04.bmp
└── sample_rectangle_fill
    ├── Makefile
    └── rectangle_fill.c
API Workflow Explanation
The core steps for using the GPU 2D API are:
Prepare source and destination buffers. The buffer structures are defined using n2d_buffer_t.
Execute blit operations: Send commands to the command buffer.
Execute commit operation: Submit pending commands in the command buffer to the GPU hardware and block until processing is complete.
The example program mainly has two branches:
Performance test
Sample program
Overall Workflow
Performance Test Workflow
Sample Workflow
3.10.2.2. Compilation and Deployment
Compilation
Enter the
sample_rectangle_filldirectory and runmaketo compile.The output binary is
rectangle_fill, located in thesample_rectangle_fillsource directory.For detailed compilation methods, refer to the Build Instructions section.
Program Deployment
Upload the directories
sample_rectangle_fillandresourceto the development board’s/userdatadirectory.Enter the
sample_rectangle_filldirectory and runchmod +x rectangle_fillto grant execution permissions.
3.10.2.3. Execution
How to Run the Program
Run the program: ./rectangle_fill. The program reads the file R5G6B5_640x640.bmp from the resource directory, fills rectangles, and saves the result to the current directory as R5G6B5_640x640_rectangle_fill.bmp.
Program Parameter Options
Usage: rectangle_fill [OPTIONS]
Options:
  -m <mode>              Specify running mode (0: sample, 1: performance test)
  -c <image_width>       Specify image width (columns)
  -r <image_height>      Specify image height (rows)
  -i <iteration_number>  Specify number of iterations
  -h <help>              Show this help message
     For Example, performance test: ./rectangle_fill -m 1 -c 1920 -r 1080 -i 1000
     For Example, sample          : ./rectangle_fill (not need input param)
Examples:
./rectangle_fill -m 1 -c 1920 -r 1080 -i 1000: Performance test mode, specifying resolution 1920×1080, runs 1000 times, and prints average execution time and FPS../rectangle_fill: Performs rectangle fill on the input image.
Execution Results
Command:
./rectangle_fill
Log Output:
./rectangle_fill
Start !!!
Save file to [./R5G6B5_640x640_rectangle_fill.bmp].
Stop !!!
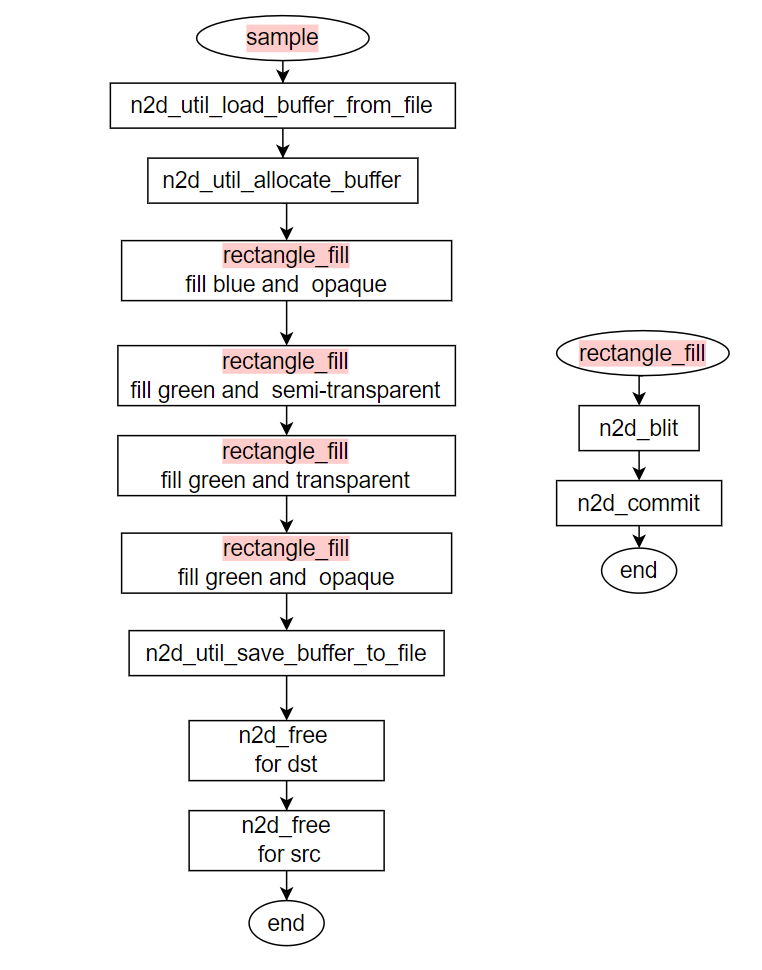
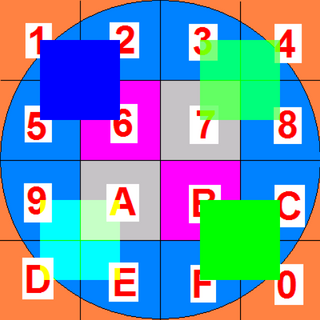
Result Description:
After reading the input file, the program performs the following operations:
Adds an opaque blue rectangle at the top-left corner.
Adds a semi-transparent green rectangle at the top-right corner.
Adds a transparent green rectangle at the bottom-left corner.
Adds an opaque green rectangle at the bottom-right corner.
Input File:
Output File:
3.10.3. sample_alphablend
3.10.3.1. Function Overview
Function Description: sample_alphablend performs alpha blending on images.
Software Architecture
Code Location and Directory Structure
Code Location:
app/samples/platform_samples/sample_gpu_2dDirectory Structure:
sample_gpu_2d/
├── resource
│   ├── R5G6B5_640x640.bmp
│   ├── RGBA8888_640x480.bmp
│   ├── scenery01.bmp
│   ├── scenery02.bmp
│   ├── scenery03.bmp
│   └── scenery04.bmp
└── sample_alphablend
    ├── alphablend.c
    └── Makefile
API Workflow Explanation
The core steps for using the GPU 2D API are:
Prepare source and destination buffers. The buffer structures are defined using n2d_buffer_t.
Execute blit operations: Send commands to the command buffer.
Execute commit operation: Submit pending commands in the command buffer to the GPU hardware and block until processing is complete.
The example program mainly has two branches:
Performance test
Sample program
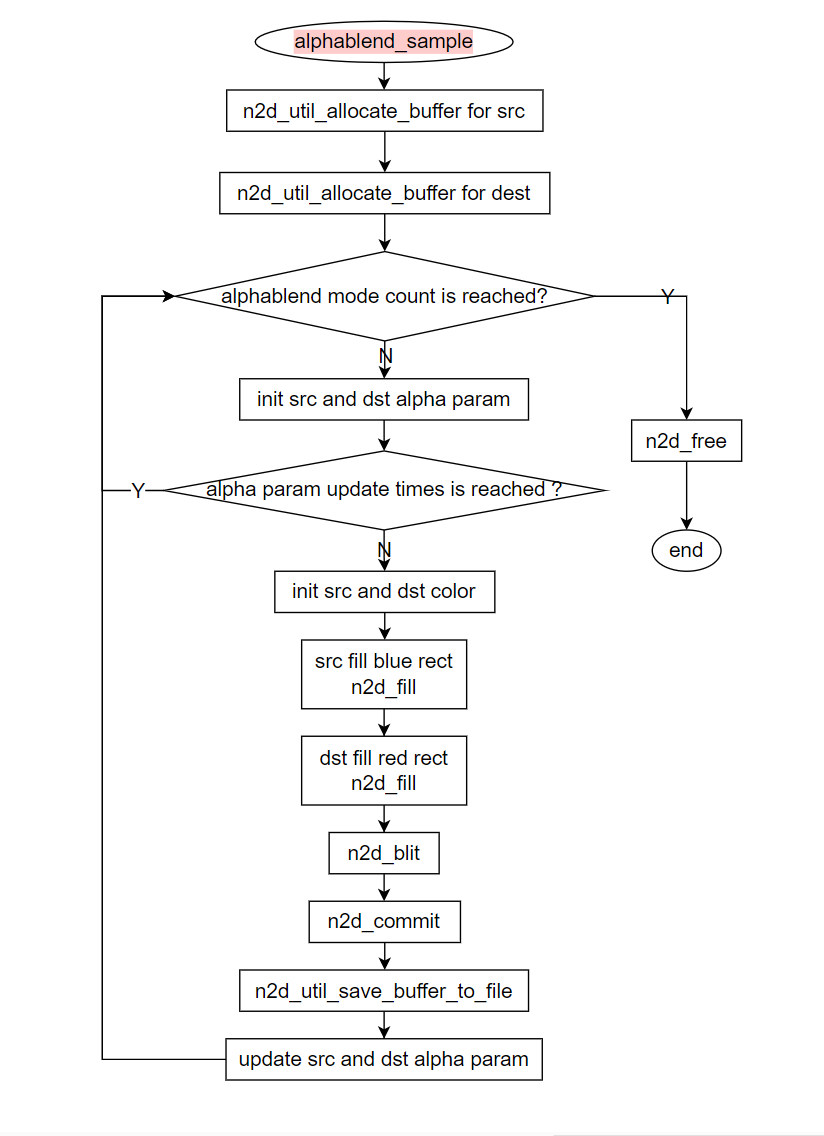
Overall Workflow
Performance Test Workflow
Sample Workflow
3.10.3.2. Compilation and Deployment
Compilation
Enter the
sample_alphablenddirectory and runmaketo compile.The output binary is
alphablend, located in thesample_alphablendsource directory.For detailed compilation methods, refer to the Build Instructions section.
Program Deployment
Upload the directory
sample_alphablendto the development board’s/userdatadirectory.Enter the
sample_alphablenddirectory and runchmod +x alphablendto grant execution permissions.
3.10.3.3. Execution
How to Run the Program
Run the program:
./alphablend
Program Parameter Options
Usage: alphablend [OPTIONS]
Options:
  -m <mode>              Specify running mode (0: sample, 1: performance test)
  -c <image_width>       Specify image width (columns)
  -r <image_height>      Specify image height (rows)
  -i <iteration_number>  Specify number of iterations
  -h <help>              Show this help message
     For Example, performance test: ./alphablend -m 1 -c 1920 -r 1080 -i 1000
     For Example, sample          : ./alphablend (not need input param)
Examples:
./alphablend -m 1 -c 1920 -r 1080 -i 1000: Performance test mode, specifying resolution 1920×1080, runs 1000 times, and prints average execution time and FPS../alphablend: Runs an example of alpha blending.
Execution Results
Command:
./alphablend
Log Output:
./alphablend
Start !!!
Stop !!!
Result Description:
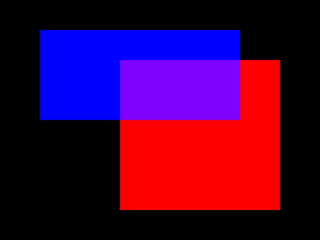
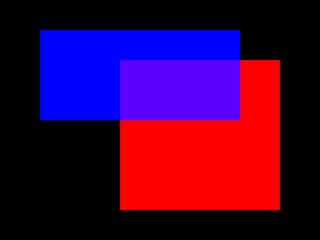
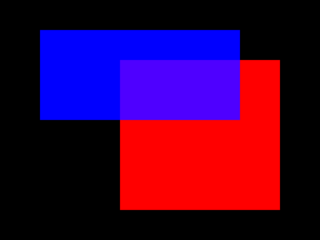
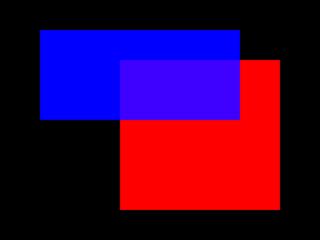
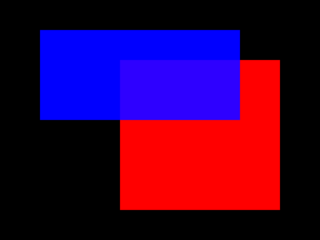
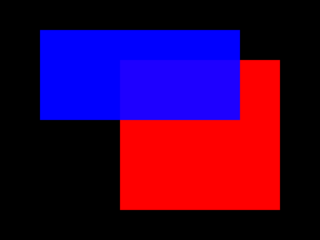
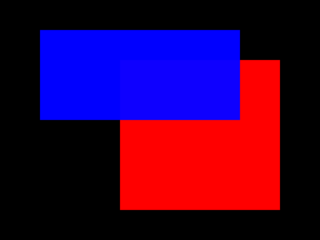
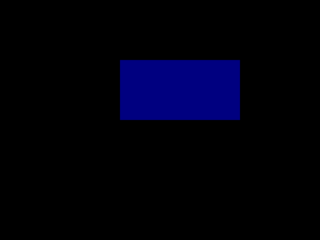
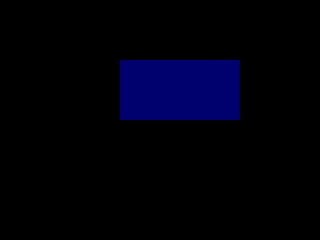
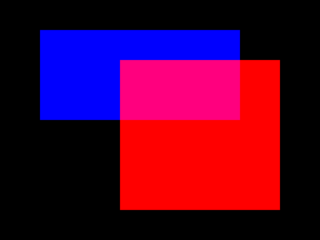
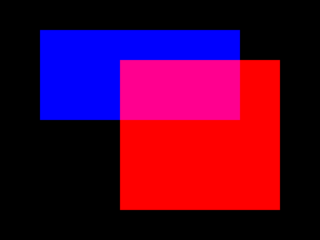
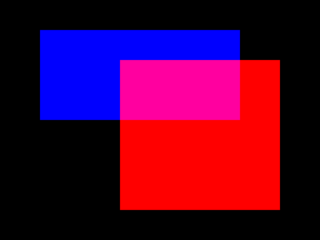
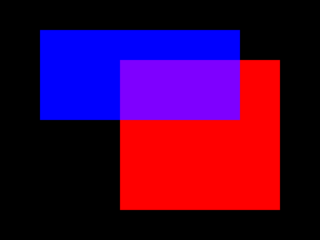
First, create two buffers of size
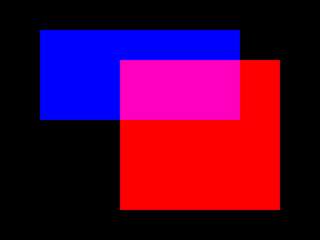
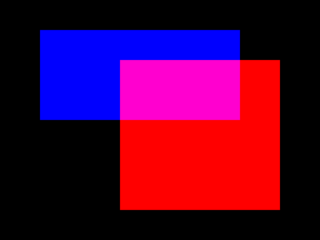
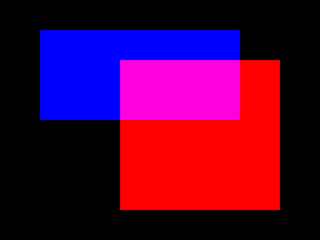
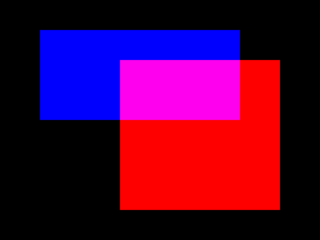
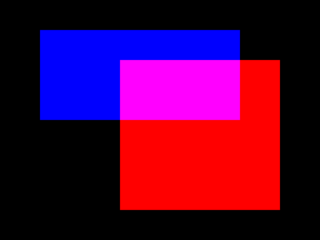
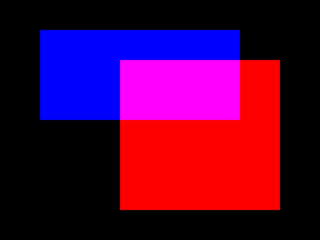
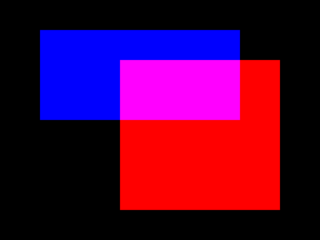
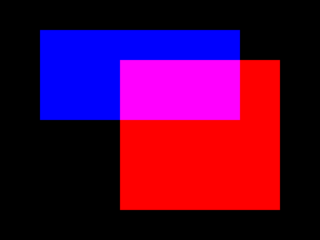
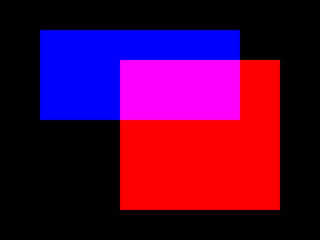
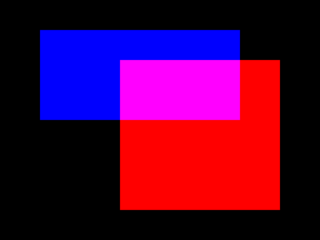
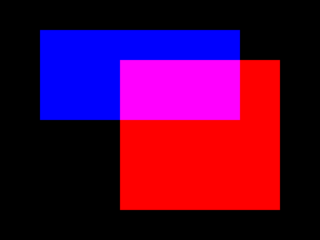
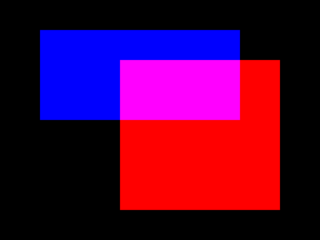
640×480inN2D_BGRA8888format.Draw a blue rectangle in one buffer and a red rectangle in the other. The rectangles overlap (to show blending effect).
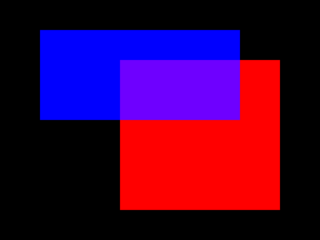
Iterate through all blending modes, varying the transparency in each mode.
Save the results of different blending modes and transparency combinations to files (filenames are generated by combining blending mode and transparency parameters).
src_over Mode
src_in Mode






dst_over Mode
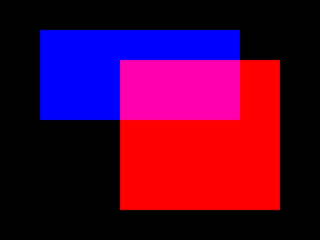
dst_in Mode

subtract Mode
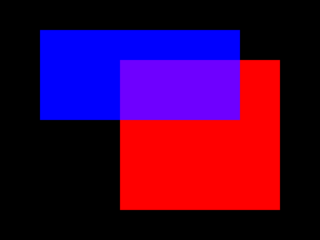
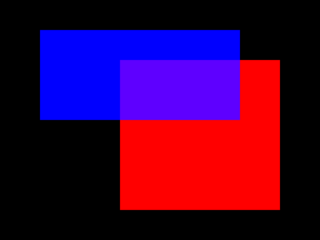
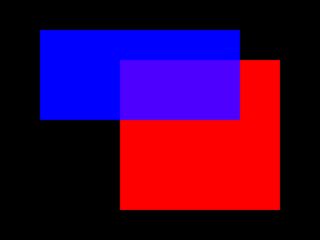
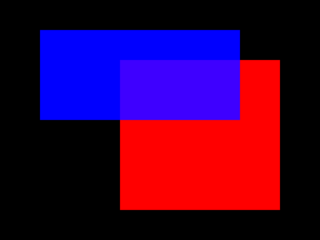
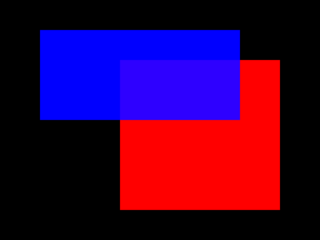
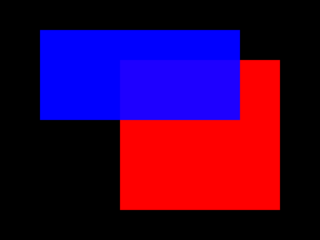
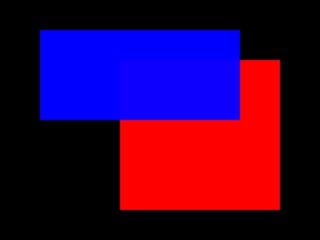
additive Mode
3.10.4. sample_format_convert
3.10.4.1. Function Overview
Function Description: sample_format_convert performs color space conversion on images.
Software Architecture
Code Location and Directory Structure
Code Location:
app/samples/platform_samples/sample_gpu_2dDirectory Structure:
sample_gpu_2d/
├── resource
│   ├── R5G6B5_640x640.bmp
│   ├── RGBA8888_640x480.bmp
│   ├── bit_filter_1920_1080.bmp
│   ├── nv12_1920x1080.yuv
│   ├── scenery01.bmp
│   ├── scenery02.bmp
│   ├── scenery03.bmp
│   └── scenery04.bmp
└── sample_format_convert
    ├── format_convert.c
    └── Makefile
API Workflow Explanation
The core steps for using the GPU 2D API are:
Prepare source and destination buffers. The buffer structures are defined using n2d_buffer_t.
Execute blit operations: Send commands to the command buffer.
Execute commit operation: Submit pending commands in the command buffer to the GPU hardware and block until processing is complete.
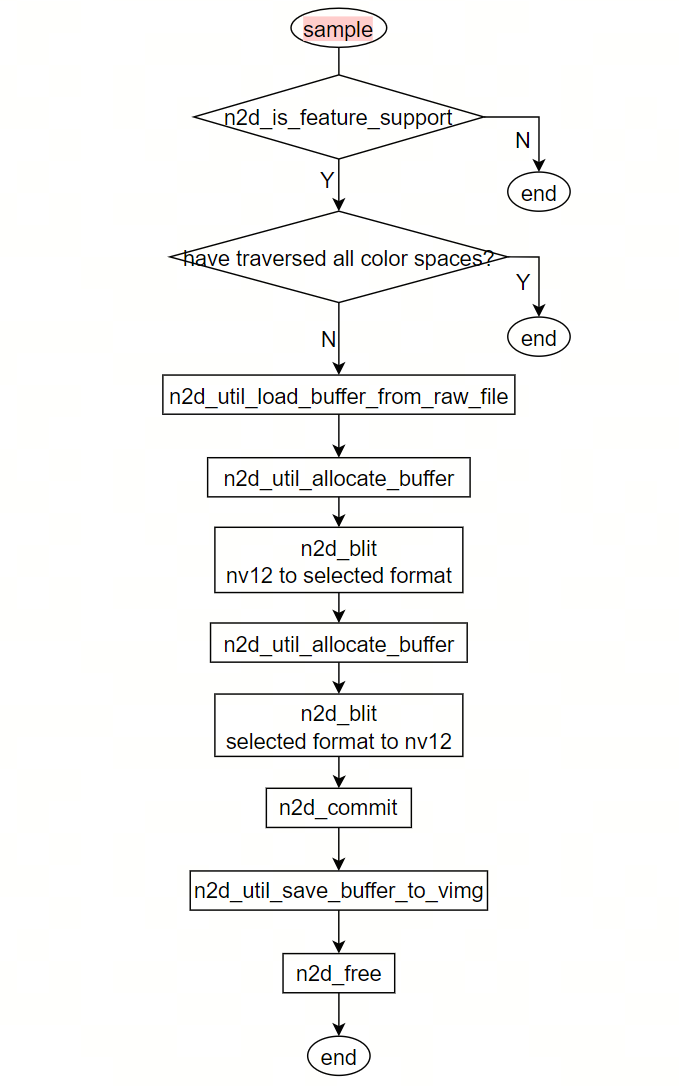
The example program mainly has two branches:
Performance test
Sample program
Overall Workflow
Performance Test Workflow
Sample Workflow
3.10.4.2. Compilation and Deployment
Compilation
Enter the
sample_format_convertdirectory and runmaketo compile.The output binary is
format_convertlocated in thesample_format_convertsource directory.For detailed compilation methods, refer to the Compilation Method section.
Program Deployment
Upload the directories
sample_format_convertandresourceto the development board’s/userdatadirectory.Enter the
sample_format_convertdirectory and runchmod +x format_convertto grant execution permissions.
3.10.4.3. Execution
How to Run the Program
Run the program: ./format_convert
Program Parameter Options
Usage: format_convert [OPTIONS]
Options:
  -m <mode>              Specify running mode (0: sample, 1: performance test)
  -c <image_width>       Specify image width (columns)
  -r <image_height>      Specify image height (rows)
  -i <iteration_number>  Specify number of iterations
  -h <help>              Show this help message
     For Example, performance test: ./format_convert -m 1 -c 1920 -r 1080 -i 1000
     For Example, sample          : ./format_convert (not need input param)
Examples:
./format_convert -m 1 -c 1920 -r 1080 -i 1000: Performance test mode, specifying resolution 1920×1080, runs 1000 times, and prints average execution time and FPS../format_convert: Runs an example of color space conversion.
Execution ResultsExecute command:
./format_convert
Running log:
./format_convert
Start !!!
Stop !!!
Effect description:
The program reads the file
nv12_1920x1080.yuvfrom theresourcedirectory and performs color space conversion among different formats.First, the input image is converted into one of the following formats:
Then, it is converted back to the input file’s original format (
NV12) and saved as a file.
n2d_buffer_format_t yuv_format[] =
{
    N2D_YUYV,
    N2D_UYVY,
    N2D_YV12,
    N2D_I420,
    N2D_NV12,
    N2D_NV21,
    N2D_NV16,
    N2D_NV61,
    N2D_P010_MSB,
    N2D_P010_LSB,
    N2D_I010
};
Input file:

Output file:
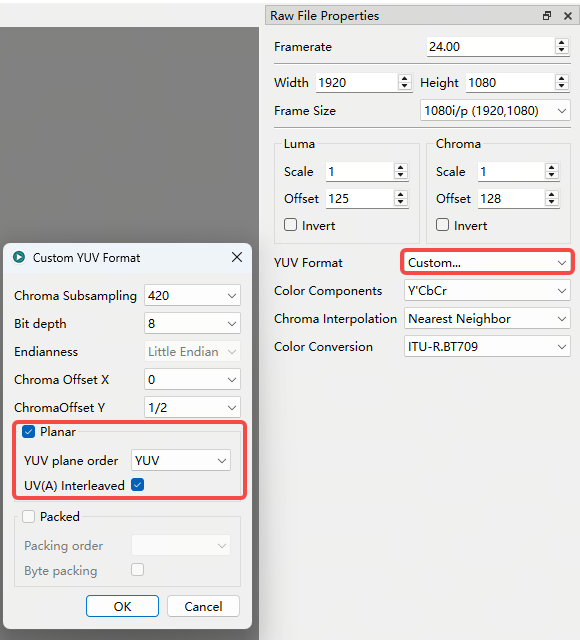
Note:In yuview software, when previewing nv12 format pictures, the format selection is as shown in the figure:
3.10.5. sample_copy
3.10.5.1. Function Overview
Function description: sample_copy implements image memory copy functionality.
Software Architecture Diagram
Code Location and Directory Structure
Code location:
app/samples/platform_samples/sample_gpu_2dDirectory structure
sample_gpu_2d/
├── resource
│   ├── R5G6B5_640x640.bmp
│   ├── RGBA8888_640x480.bmp
│   ├── bit_filter_1920_1080.bmp
│   ├── nv12_1920x1080.yuv
│   ├── scenery01.bmp
│   ├── scenery02.bmp
│   ├── scenery03.bmp
│   └── scenery04.bmp
└── sample_copy
    ├── copy.c
    └── Makefile
API Workflow Description
The core steps for using GPU 2D API are:
Prepare source and destination buffers. The buffer structures are defined using the n2d_buffer_t structure.
Perform blit operations: send execution commands into the command buffer
Perform commit operation: submit pending instructions in the command buffer to GPU hardware and block until GPU processing completes
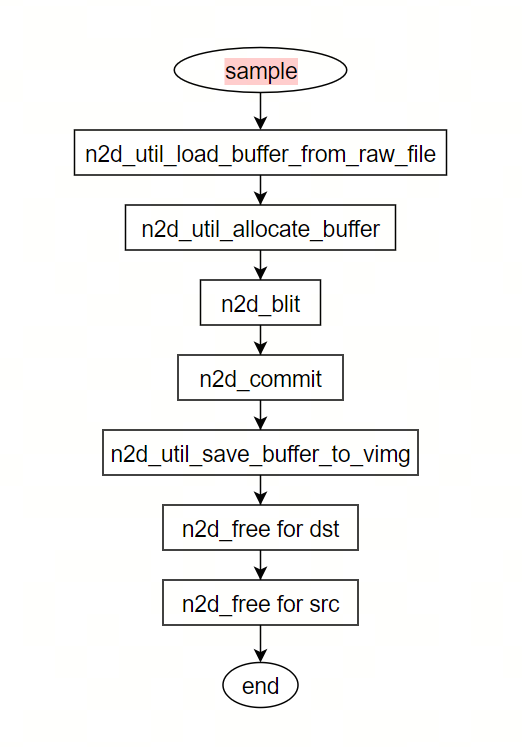
The example program mainly has two branches:
Performance test
Sample program
Overall Flow
Performance Test Flow
Sample Flow
3.10.5.2. Compilation and Deployment
Compilation
Enter the
sample_copydirectory and runmaketo compile.The output binary is
copylocated in thesample_copysource directory.For detailed compilation methods, refer to the Compilation Method section.
Program Deployment
Upload the directories
sample_copyandresourceto the development board’s/userdatadirectory.Enter the
sample_copydirectory and runchmod +x copyto grant executable permissions to the program.
3.10.5.3. Running
How to Run the Program
Execute the program: ./copy
Program Parameter Options
Usage: copy [OPTIONS]
Options:
  -m <mode>              Specify running mode (0: sample, 1: performance test)
  -c <image_width>       Specify image width (columns)
  -r <image_height>      Specify image height (rows)
  -i <iteration_number>  Specify number of iterations
  -h <help>              Show this help message
     For Example, performance test: ./copy -m 1 -c 1920 -r 1080 -i 1000
     For Example, sample          : ./copy (not need input param)
Examples:
./copy -m 1 -c 1920 -r 1080 -i 1000: Performance test mode, specifying resolution 1920*1080, run 1000 times, finally print average execution time and frame rate../copy: Run the memory copy sample.
Running Effect
Execute command:
./copy
Running log:
Run Sample[copy](sample mode ignores input parameters).

Start !!!
copy input file ../resource/nv12_1920x1080.yuv [1920*1080] ==> output file ./copy_sample_1920_1080.yuv [1920*1080]
Stop !!!
Effect description:
The program reads the file
nv12_1920x1080.yuvfrom theresourcedirectory and copies it.The copied image is saved to the file:
copy_sample_1920_1080.yuv
Input file:
Output file:
3.10.6. sample_crop
3.10.6.1. Function Overview
Function description: sample_crop implements image cropping functionality.
Software Architecture Diagram
Code Location and Directory Structure
Code location:
app/samples/platform_samples/sample_gpu_2dDirectory structure
sample_gpu_2d/
├── resource
│   ├── R5G6B5_640x640.bmp
│   ├── RGBA8888_640x480.bmp
│   ├── bit_filter_1920_1080.bmp
│   ├── nv12_1920x1080.yuv
│   ├── scenery01.bmp
│   ├── scenery02.bmp
│   ├── scenery03.bmp
│   └── scenery04.bmp
└── sample_crop
    ├── crop.c
    └── Makefile
API Workflow Description
The core steps for using GPU 2D API are:
Prepare source and destination buffers. The buffer structures are defined using the n2d_buffer_t structure.
Perform blit operations: send execution commands into the command buffer
Perform commit operation: submit pending instructions in the command buffer to GPU hardware and block until GPU processing completes
The example program mainly has two branches:
Performance test
Sample program
Overall Flow
Performance Test Flow
Sample Flow
3.10.6.2. Compilation and Deployment
Compilation
Enter the
sample_cropdirectory and runmaketo compile.The output binary is
croplocated in thesample_cropsource directory.For detailed compilation methods, refer to the Compilation Method section.
Program Deployment
Upload the directories
sample_cropandresourceto the development board’s/userdatadirectory.Enter the
sample_cropdirectory and runchmod +x cropto grant executable permissions.
3.10.6.3. Running
How to Run the Program
Execute the program: ./crop
Program Parameter Options
Usage: crop [OPTIONS]
Options:
  -m <mode>              Specify running mode (0: sample, 1: performance test)
  -c <image_width>       Specify image width (columns)
  -r <image_height>      Specify image height (rows)
  -i <iteration_number>  Specify number of iterations
  -h <help>              Show this help message
     For Example, performance test: ./crop -m 1 -c 1920 -r 1080 -i 1000
     For Example, sample          : ./crop (not need input param)
Examples:
./crop -m 1 -c 1920 -r 1080 -i 1000: Performance test mode, specifying resolution 1920*1080, run 1000 times, finally print average execution time and frame rate../crop: Run the image cropping sample.
Running Effect
Execute command:
./crop
Running log:
Run Sample[crop](sample mode ignores input parameters).

Start !!!
crop input file ../resource/nv12_1920x1080.yuv [1920*1080] ==> output file ./crop_sample_480_270.yuv [480*270]
Stop !!!
Effect description:
The program reads the file
nv12_1920x1080.yuvfrom theresourcedirectory.Crops the input image according to the rectangle (0,0,480,270).
Saves the cropped result to
crop_sample_480_270.bmp.
Input file:
Output file:

3.10.7. sample_multi_source_alphablend
3.10.7.1. Function Overview
Function description: sample_multi_source_alphablend implements alpha blending of multiple input images simultaneously.
Software Architecture Diagram
Code Location and Directory Structure
Code location:
app/samples/platform_samples/sample_gpu_2dDirectory structure
sample_gpu_2d/
├── resource
│   ├── R5G6B5_640x640.bmp
│   ├── RGBA8888_640x480.bmp
│   ├── scenery01.bmp
│   ├── scenery02.bmp
│   ├── scenery03.bmp
│   └── scenery04.bmp
└── sample_multi_source_alphablend
    ├── multi_source_alphablend.c
    └── Makefile
API Workflow Description
The core steps for using GPU 2D API are:
Prepare source and destination buffers. The buffer structures are defined using the n2d_buffer_t structure.
Perform blit operations: send execution commands into the command buffer
Perform commit operation: submit pending instructions in the command buffer to GPU hardware and block until GPU processing completes
The example program mainly has two branches:
Performance test
Sample program
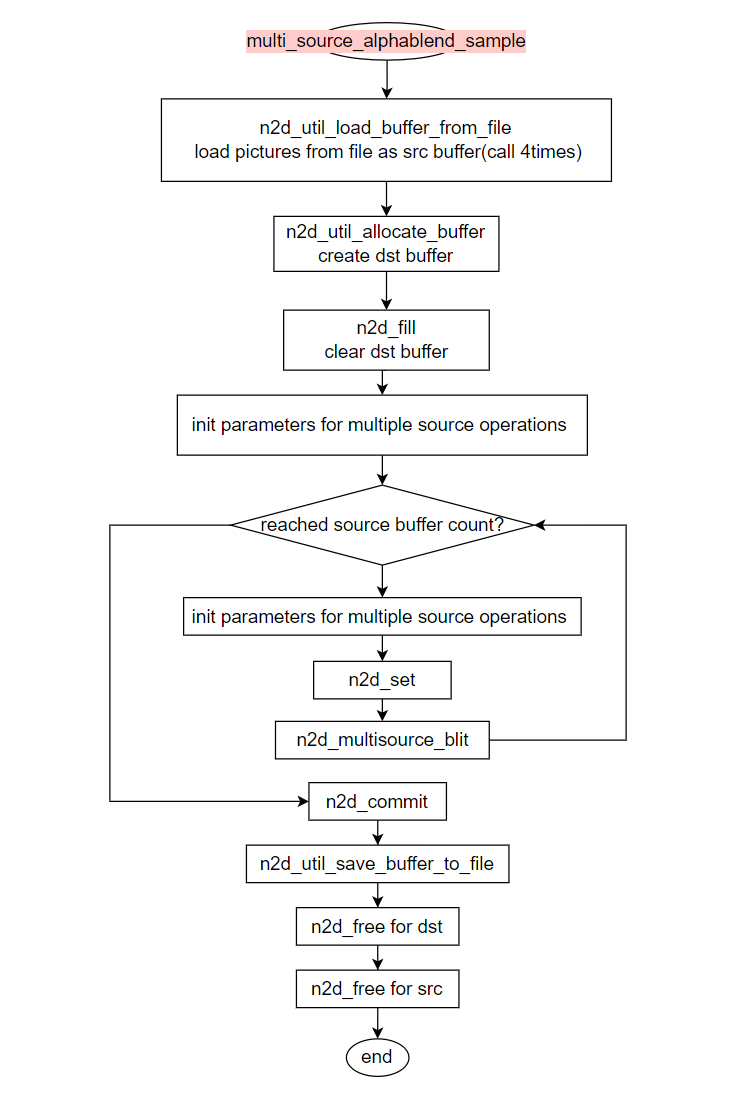
Overall Flow
Performance Test Flow
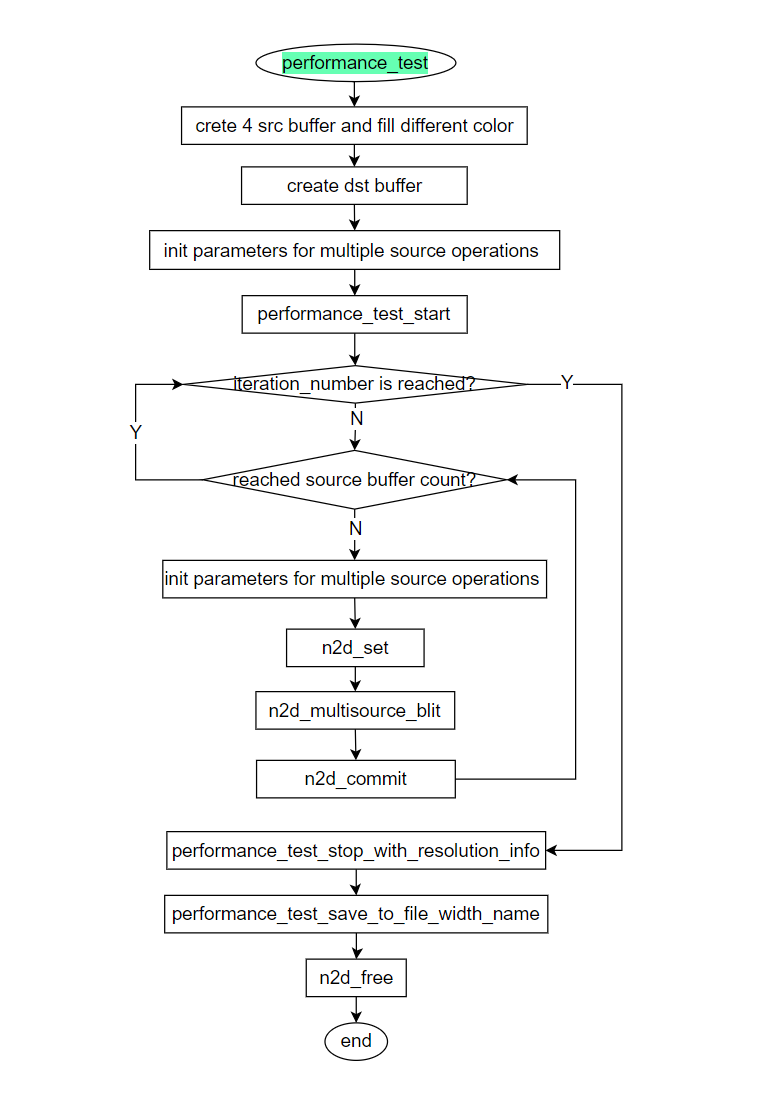
Sample Program Flow
3.10.7.2. Compilation and Deployment
Compilation
Enter the
sample_multi_source_alphablenddirectory and runmaketo compile.The output binary is
multi_source_alphablendlocated in the source directory.For detailed compilation methods, refer to the Compilation Method section.
Program Deployment
Upload the directories
sample_multi_source_alphablendandresourceto the development board’s/userdatadirectory.Enter the
sample_multi_source_alphablenddirectory and runchmod +x multi_source_alphablendto grant executable permissions.
3.10.7.3. Running
How to Run the Program
Execute the program: ./multi_source_alphablend
Program Parameter Options
Usage: multi_source_alphablend [OPTIONS]
Options:
  -m <mode>              Specify running mode (0: sample, 1: performance test)
  -c <image_width>       Specify image width (columns)
  -r <image_height>      Specify image height (rows)
  -i <iteration_number>  Specify number of iterations
  -h <help>              Show this help message
     For Example, performance test: ./multi_source_alphablend -m 1 -c 1920 -r 1080 -i 1000
     For Example, sample          : ./multi_source_alphablend (not need input param)
Examples:
./multi_source_alphablend -m 1 -c 1920 -r 1080 -i 1000: Performance test mode, specifying resolution 1920*1080, run 1000 times, finally print average execution time and frame rate../multi_source_alphablend: Run the multi-source alpha blending sample.
Running Effect
Execute command:
./multi_source_alphablend
Running log:
Run Sample[multi_source_alphablend](sample mode ignores input parameters).

Start !!!
Multi-source alphablend input file scenery0x [640*480] ==> output file ./multi_source_alphablend_sample_640_480.bmp [640*480]
Stop !!!
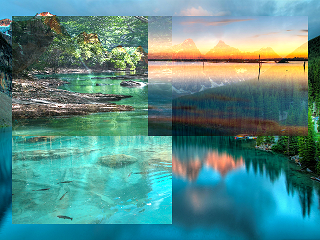
Effect description:
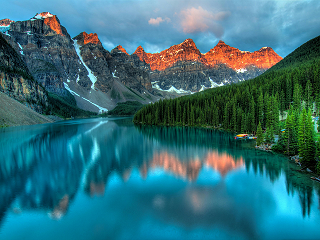
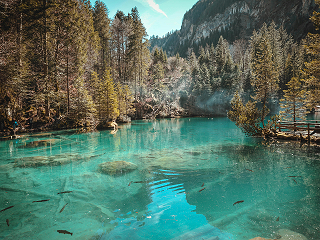
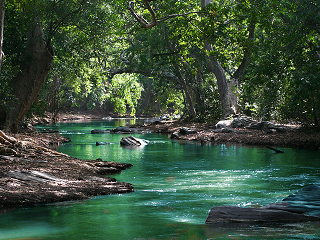
The program reads files
scenery01.bmp,scenery02.bmp,scenery03.bmp, andscenery04.bmpfrom theresourcedirectory.Each of the four images is cropped from different positions and then blended using the
N2D_BLEND_SRC_OVERblending mode with transparency.The blended result is saved to the file
multi_source_alphablend_sample_640_480.bmp.
Input files:

Output file:
3.10.8. sample_resize
3.10.8.1. Function Overview
Function description: sample_resize completes the image enlargement function and can specify different filter types.
| Filter type | Meaning | Typical uses |
|---|---|---|
| N2D_FILTER_SYNC | Synchronous filter, mostly refers to Sinc Filter or synchronous interpolation filter, which can theoretically maintain the frequency domain characteristics of the image and reduce aliasing. The calculation amount is large. | High-quality scaling, image processing with extremely high requirements for clarity. |
| N2D_FILTER_BLUR | Blur filter, performs smoothing or low-pass processing to soften the image, reduce details, and reduce noise. | Noise reduction, background blur, thumbnail generation. |
| N2D_FILTER_BILINEAR | Bilinear interpolation filtering, one of the most commonly used interpolation algorithms, fast speed and medium quality. | Real-time scaling, video playback, GUI rendering. |
| N2D_FILTER_BICUBIC | Bicubic interpolation filtering is smoother and more detailed than bilinear, but requires a large amount of calculation. | High-quality image scaling, photo processing. |
Software architecture description
Code location and directory structure
Code location
app/samples/platform_samples/sample_gpu_2dDirectory structure
sample_gpu_2d/
├── resource
│ ├── R5G6B5_640x640.bmp
│ ├── RGBA8888_640x480.bmp
│ ├── bit_filter_1920_1080.bmp
│ ├── nv12_1920x1080.yuv
│ ├── scenery01.bmp
│ ├── scenery02.bmp
│ ├── scenery03.bmp
│ └── scenery04.bmp
└── sample_resize
├── resize.c
    └── Makefile
API process description
The core steps for using the GPU 2D API are:
Prepare the source buffer and destination buffer. The source buffer and destination buffer structures use the n2d_buffer_t structure definition.
Perform blit operation: send the execution command to the instruction cache area
Execute the commit operation: send the instructions to be executed in the instruction buffer area to the GPU hardware and block waiting for the GPU hardware processing to complete.
The sample program mainly has two branches:
Performance testing
Sample program
Overall process
Performance testing process
Sample program flow
3.10.8.2. Compile and deploy
Compile
Enter the sample_resize directory and execute
maketo compileThe output product is
resizein the sample_resize source code directoryFor detailed program compilation methods, please refer to the Compilation Method chapter
Program deployment
Upload the directories
sample_resizeandresourceto the/userdatadirectory of the development boardEnter
sample_resizeand run thechmod +x resizecommand to give the program executable permissions
3.10.8.3. Run
How to run the program
Execution program: ./resize
Program parameter option description
Usage: resize [OPTIONS]
Options:
  -m <mode> Specify running mode(0:sample, 1:performance test)
  -c <image_width> Specify image width(column)
  -r <image_height> Specify image height(row)
  -i <iteration_number> Specify frames per second
  -h <help> Show this help message
     For Example, performance test: ./resize -m 1 -c 1920 -r 1080 -i 1000
     For Example, sample : ./resize (not need input param)
Example:
./resize -m 1 -c 1920 -r 1080 -i 1000: Performance test mode, the specified resolution is 1920*1080, run 1000 times, the final average printing time and frame rate./resize: Example of performing image enlargement function
Running effect
Execute command: ./resize
Running log:
Run Sample[resize](sample mode ignore input param).

Start!!!
Resize input file ../resource/nv12_1920x1080.yuv [1920*1080] ==> output file ./resize_sample_3840_2160_sync.yuv [3840*2160]
Resize input file ../resource/nv12_1920x1080.yuv [1920*1080] ==> output file ./resize_sample_3840_2160_blur.yuv [3840*2160]
Resize input file ../resource/nv12_1920x1080.yuv [1920*1080] ==> output file ./resize_sample_3840_2160_bilinear.yuv [3840*2160]
Resize input file ../resource/nv12_1920x1080.yuv [1920*1080] ==> output file ./resize_sample_3840_2160_bicubic.yuv [3840*2160]
Stop!!!
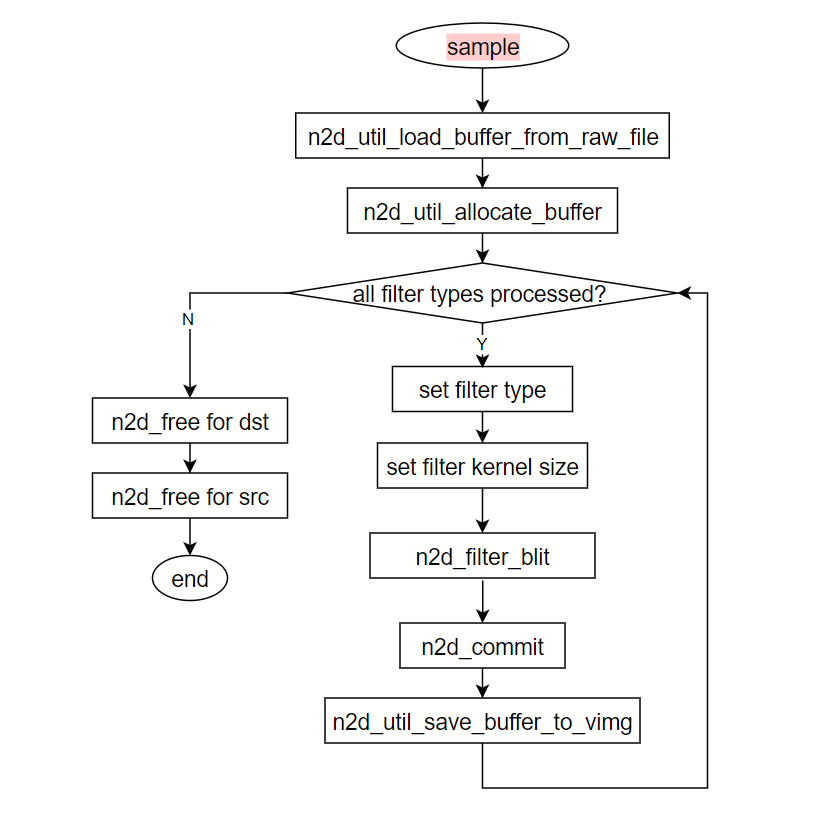
Effect description:
The program reads the file
nv12_1920x1080.yuvfrom theresourcedirectoryUse 4 filter algorithms respectively to enlarge the image twice horizontally and vertically.
Save the enlarged image to the files
resize_sample_3840_2160_sync.yuv、resize_sample_3840_2160_blur.yuv、resize_sample_3840_2160_bilinear.yuv、resize_sample_3840_2160_bicubic.yuv
Input file:
3.10.9. sample_stitch
3.10.9.1. Function Overview
Function description: sample_stitch implements stitching four input images into a single output image.
Software Architecture Diagram
Code Location and Directory Structure
Code location:
app/samples/platform_samples/sample_gpu_2dDirectory structure
sample_gpu_2d/
├── resource
│   ├── R5G6B5_640x640.bmp
│   ├── RGBA8888_640x480.bmp
│   ├── bit_filter_1920_1080.bmp
│   ├── nv12_1920x1080.yuv
│   ├── scenery01.bmp
│   ├── scenery02.bmp
│   ├── scenery03.bmp
│   └── scenery04.bmp
└── sample_stitch
    ├── stitch.c
    └── Makefile
API Workflow Description
The core steps for using GPU 2D API are:
Prepare source and destination buffers. The buffer structures are defined using the n2d_buffer_t structure.
Perform blit operations: send execution commands into the command buffer
Perform commit operation: submit pending instructions in the command buffer to GPU hardware and block until GPU processing completes
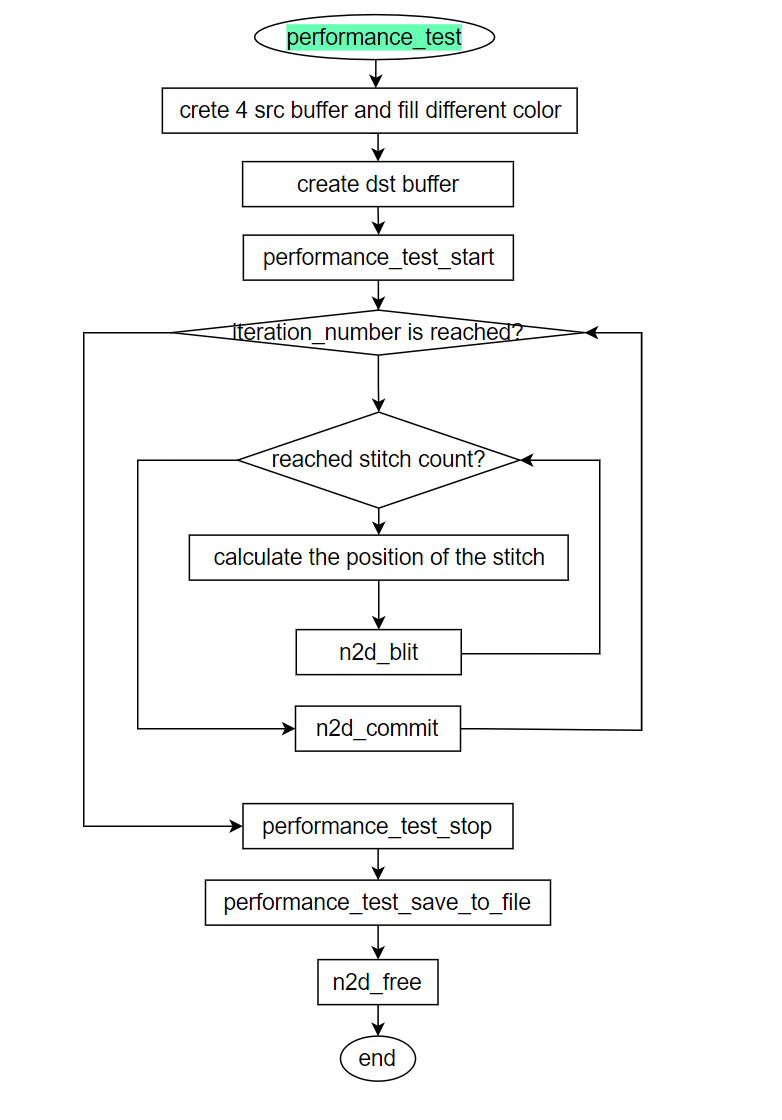
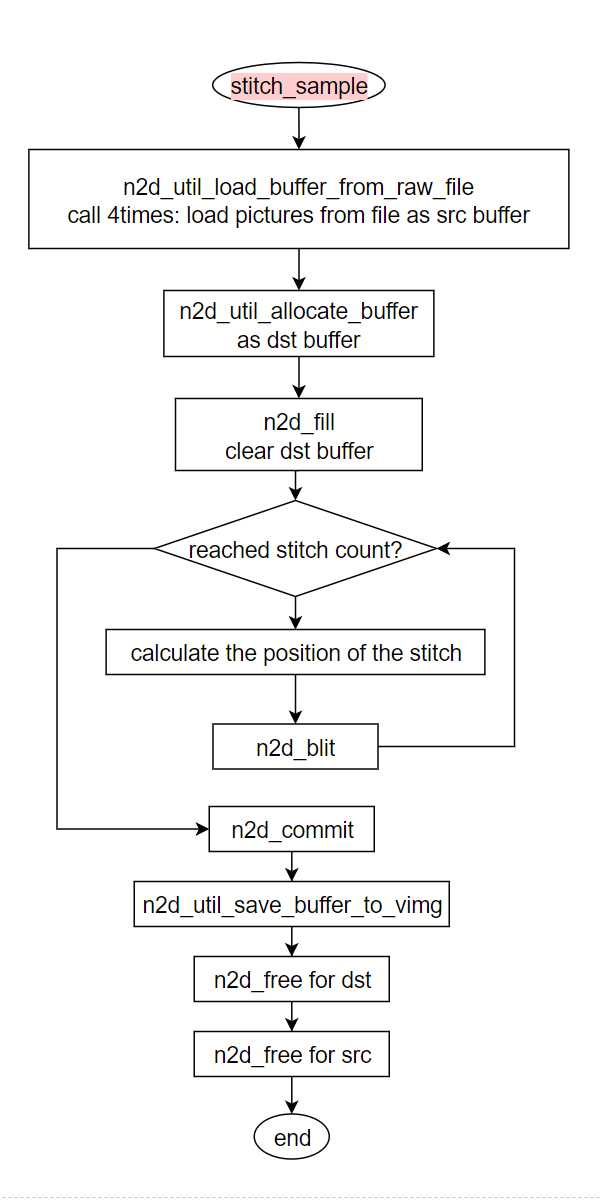
The example program mainly has two branches:
Performance Test
Sample Program
Overall Flow
Performance Test Flow
Sample Program Flow
3.10.9.2. Compilation and Deployment
Compilation
Enter the
sample_stitchdirectory and runmaketo compileThe output binary is
stitch, located in thesample_stitchsource directoryFor detailed compilation methods, refer to the Compilation Method section
Program Deployment
Upload the directories
sample_stitchandresourceto the development board’s/userdatadirectoryEnter
sample_stitchand run the commandchmod +x stitchto grant executable permissions to the program
3.10.9.3. Run
Program Execution Method
Execute the program: ./stitch
Program Parameter Options Description
Usage: stitch [OPTIONS]
Options:
  -m <mode>              Specify running mode (0: sample, 1: performance test)
  -c <image_width>       Specify image width (column)
  -r <image_height>      Specify image height (row)
  -i <iteration_number>  Specify frames per second
  -h <help>              Show this help message
     For Example, performance test: ./stitch -m 1 -c 1920 -r 1080 -i 1000
     For Example, sample          : ./stitch (not need input param)
Examples:
./stitch -m 1 -c 1920 -r 1080 -i 1000: Performance test mode, specifying resolution as 1920*1080, run 1000 iterations, finally print average processing time and frame rate./stitch: Run example that stitches 4 input images into 1 image
Execution Results
Execution command: Execution log:
Run Sample[stitch](sample mode ignore input param).

Start !!!
stitch input file pip0x [1920*1080] ==> output file ./stitch_sample_3840_2160.yuv [3840*2160]
Stop !!!
Result explanation:
The program reads files
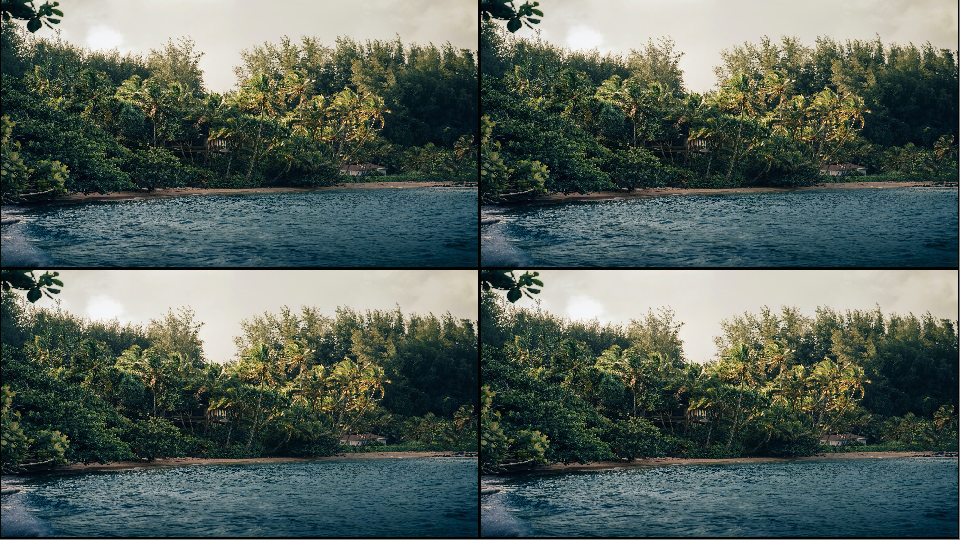
nv12_1920x1080.yuvfour times from theresourcedirectoryThe 4 input images are stitched together into one image in a 2x2 grid layout
The stitched image is saved as
stitch_sample_3840_2160.yuv
Input files:
Output file:
3.10.10. sample_create_n2d_buffer
3.10.10.1. Function Overview
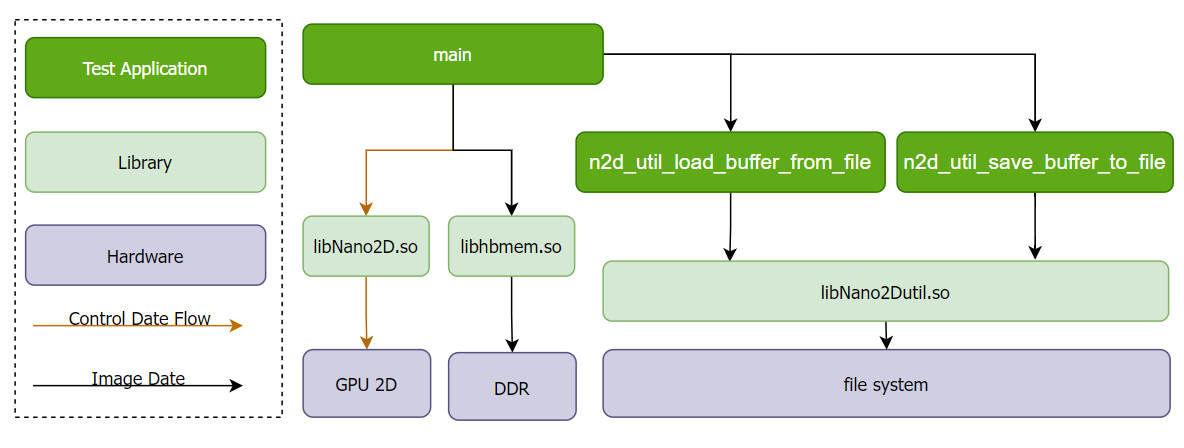
Function Description: sample_create_n2d_buffer demonstrates converting memory allocated via the following two methods into the image buffer structure n2d_buffer_t, which is used by the 2D GPU API:
Non-contiguous physical address: memory allocated using the
mallocfunctionContiguous physical address: memory allocated via the Hbmem interface
Software Architecture Description
Code Location and Directory Structure
Code location:
app/samples/platform_samples/sample_gpu_2dDirectory structure
sample_gpu_2d/
├── resource
│   ├── R5G6B5_640x640.bmp
│   ├── RGBA8888_640x480.bmp
│   ├── scenery01.bmp
│   ├── scenery02.bmp
│   ├── scenery03.bmp
│   ├── scenery04.bmp
|   └── nv12_1920x1080.yuv
└── sample_create_n2d_buffer
    ├── create_n2d_buffer.c
    ├── create_n2d_buffer_wraper.c
    ├── create_n2d_buffer_wraper.h
    └── Makefile
API Flow Description
The core steps for using the GPU 2D API are:
Prepare source and destination buffers. The buffer structures are defined using the n2d_buffer_t structure
Perform blit operations: send commands to the command buffer
Perform commit operation: submit pending commands in the command buffer to GPU hardware and block until GPU processing completes
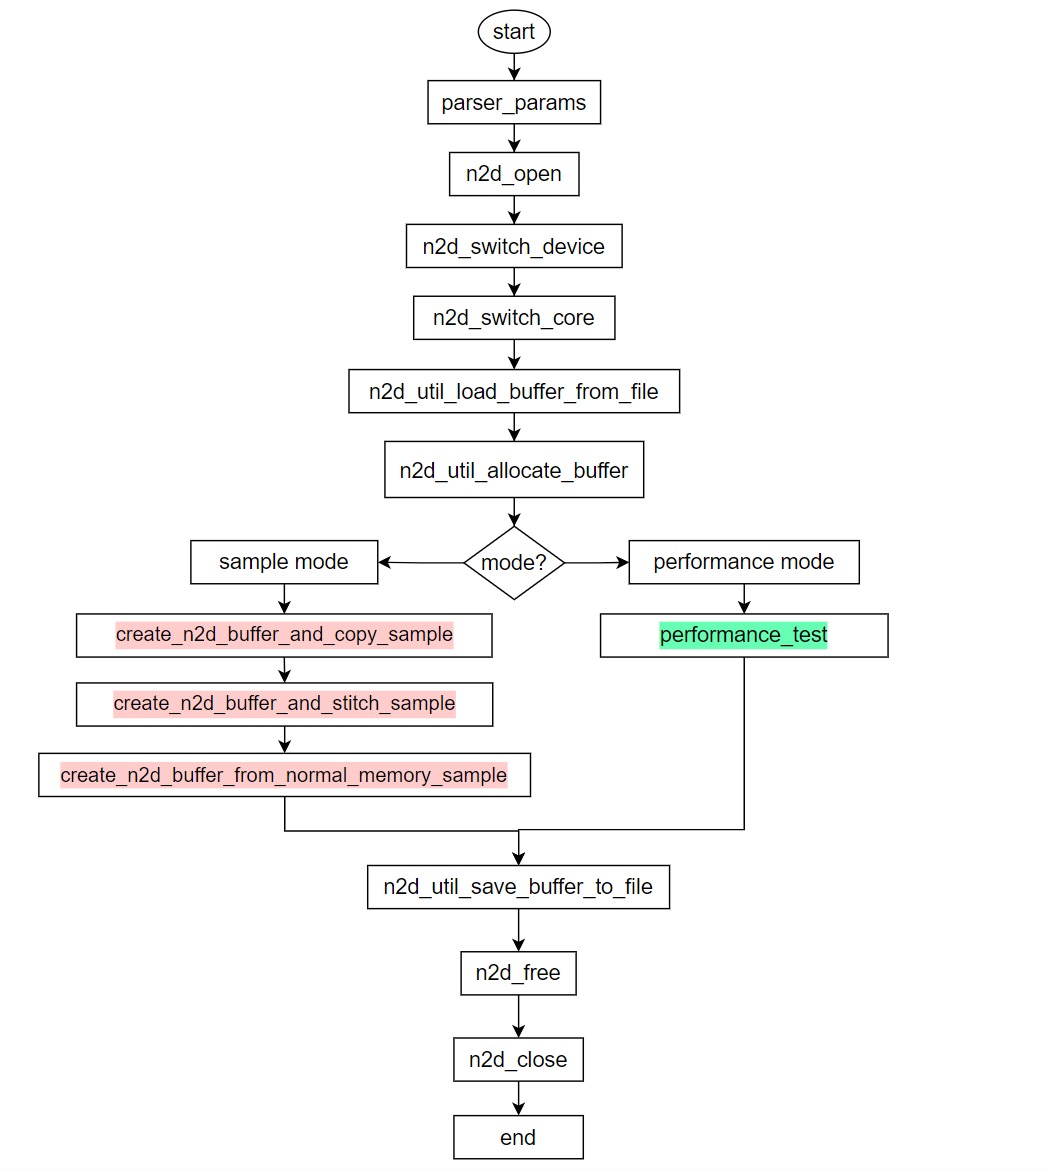
The sample program mainly has two branches:
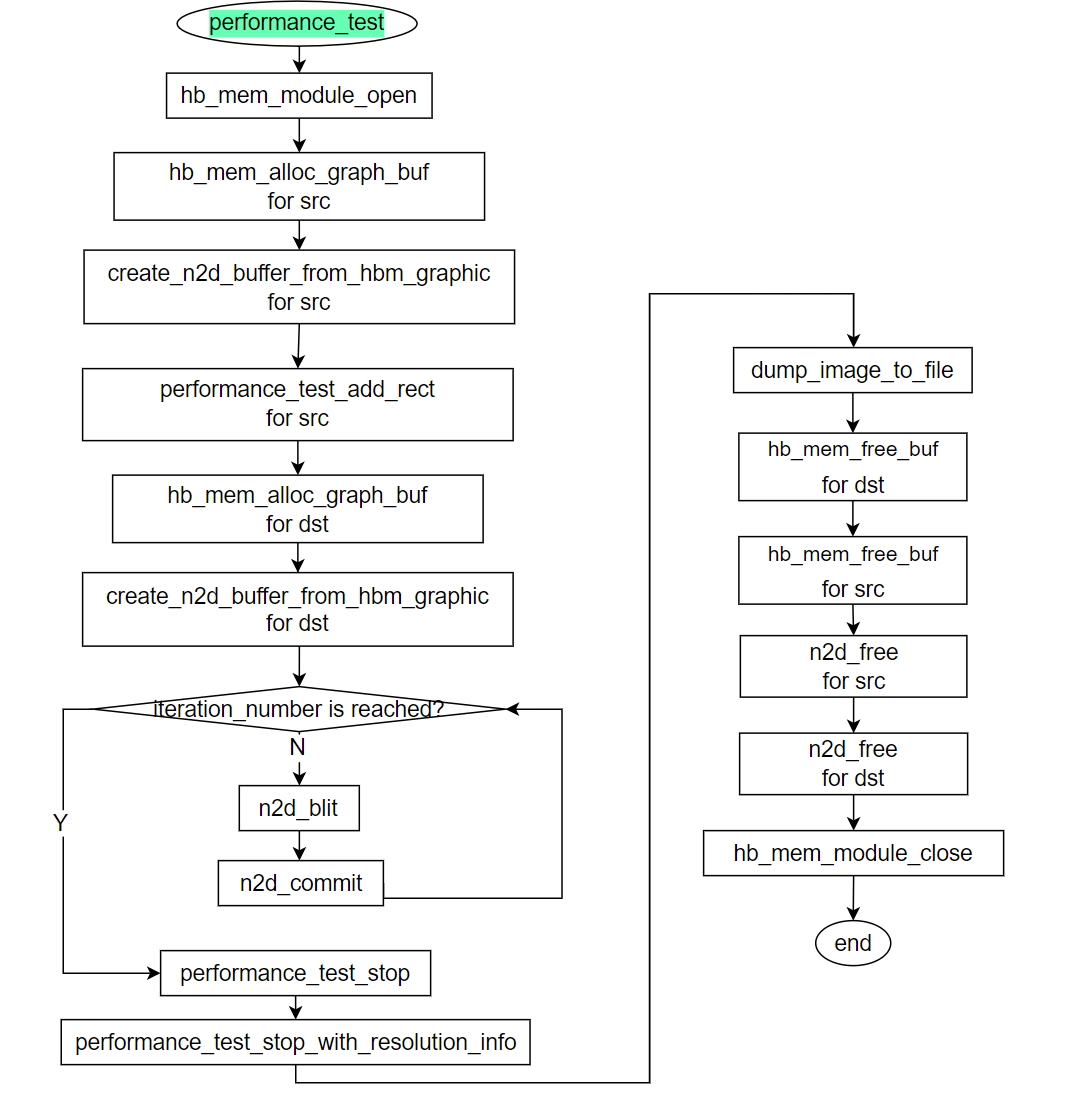
Performance test
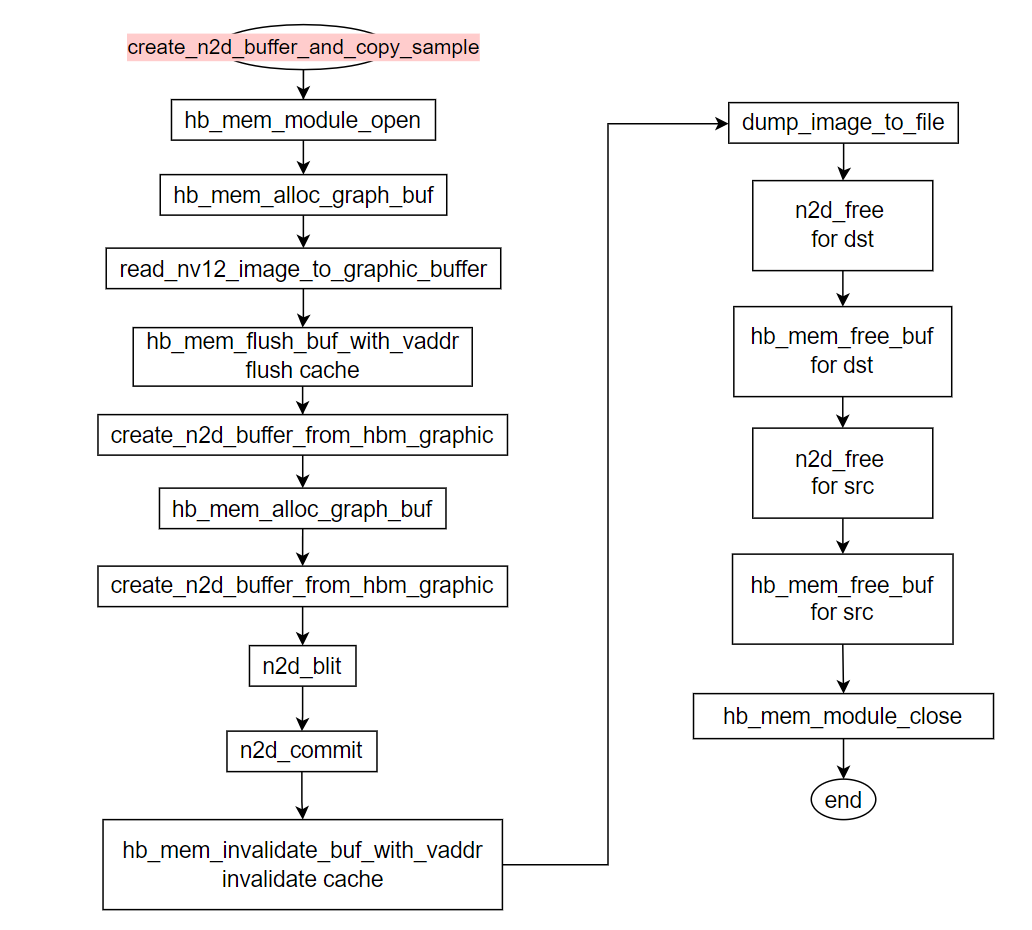
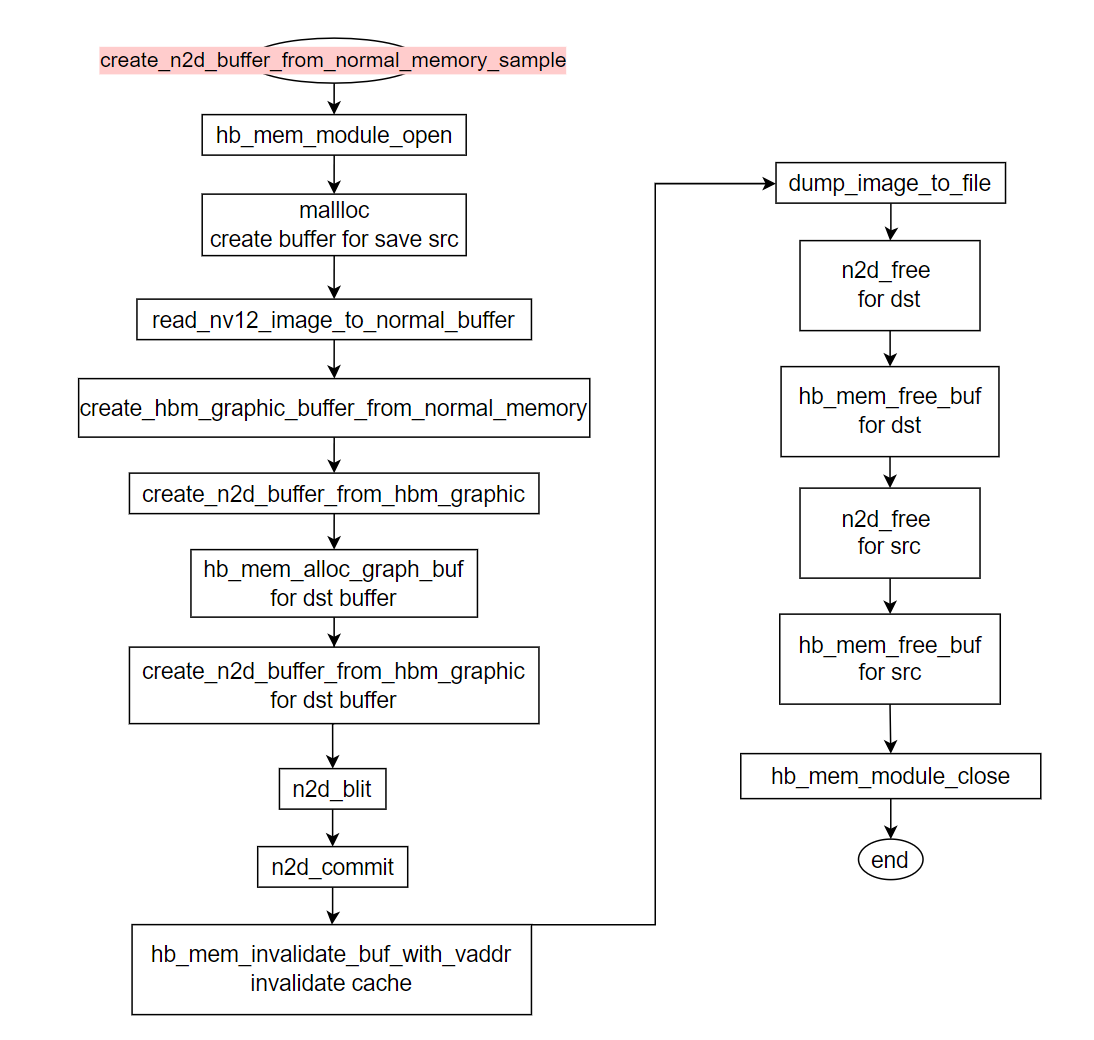
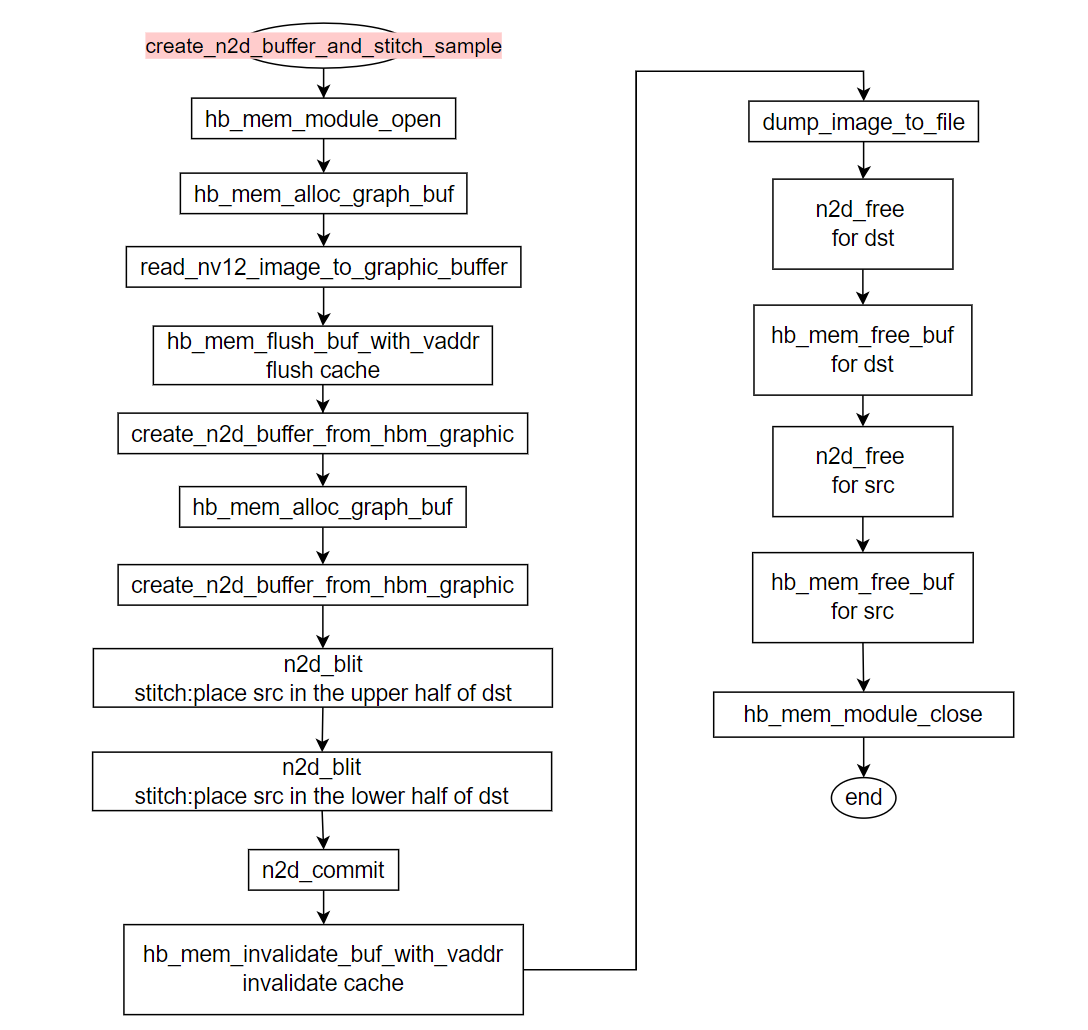
Sample program, which provides the following 3 examples:
create_n2d_buffer_and_copy_sample: Convert memory allocated via hbmem into then2d_buffer_tstructure used by the 2D GPU APIThe essence of converting hbmem-allocated memory to
n2d_buffer_t: encapsulating the memory descriptor in another form, without involving memory copy
create_n2d_buffer_from_normal_memory_sample: Convert memory allocated viamallocinto then2d_buffer_tstructure used by the 2D GPU API. The conversion steps are as follows:create_n2d_buffer_stitch: Convert hbmem-allocated memory inton2d_buffer_tand perform image stitching
Note: The sample program calls cache-related interfaces, as listed below. For details, please refer to: Hbmem
hb_mem_flush_bufhb_mem_invalidate_buf
Overall Flow of Sample Program
Performance Test Flow
Flow of create_n2d_buffer_and_copy_sample Example
Flow of create_n2d_buffer_from_normal_memory_sample Example
Flow of create_n2d_buffer_stitch Example
3.10.10.2. Compilation and Deployment
Compilation
Enter the
sample_create_n2d_bufferdirectory and runmaketo compileThe output binary is
create_n2d_buffer, located in thesample_create_n2d_buffersource directoryFor detailed compilation methods, refer to the Compilation Method section
Program Deployment
Upload the directories
sample_create_n2d_bufferandresourceto the development board’s/userdatadirectoryEnter
sample_create_n2d_bufferand run the commandchmod +x create_n2d_bufferto grant executable permissions to the program
3.10.10.3. Run
Program Execution Method
Execute the program: ./create_n2d_buffer
Program Parameter Options Description
Usage: create_n2d_buffer [OPTIONS]
Options:
  -m <mode>              Specify running mode (0: sample, 1: performance test)
  -c <image_width>       Specify image width (column)
  -r <image_height>      Specify image height (row)
  -i <iteration_number>  Specify frames per second
  -h <help>              Show this help message
     For Example, performance test: ./create_n2d_buffer -m 1 -c 1920 -r 1080 -i 1000
     For Example, sample          : ./create_n2d_buffer (not need input param)
Examples:
./create_n2d_buffer -m 1 -c 1920 -r 1080 -i 1000: Performance test mode, specifying resolution as 1920*1080, run 1000 iterations, finally print average processing time and frame rate./create_n2d_buffer: Run example that converts external memory inton2d_buffer_tsupported by the 2D GPU API
Execution Results
Execution command:
./create_n2d_buffer
Execution log:
Run Sample[create_n2d_buffer](sample mode ignore input param).

Start !!!
Dump image to file(./create_n2d_buffer_copy_sample_hbn_1920_1080.yuv), size(3110400) succeeded
Dump image to file(./create_n2d_buffer_stitch_sample_hbn_1920_2160.yuv), size(6220800) succeeded
Dump image to file(./create_n2d_buffer_normal_memory_sample_hbn_1920_1080.yuv), size(3110400) succeeded
Stop !!!
Result explanation:
The program reads the file
nv12_1920x1080.yuvfrom theresourcedirectoryPerforms three operations on the input image:
a. Allocate physically contiguous memory using the Hbmem interface, convert it to
n2d_buffer_t, use 2D GPU API to complete image copy, and save the result to filecreate_n2d_buffer_copy_sample_hbn_1920_1080.yuvb. Using Hbmem, the operation on a is enhanced by incorporating a 2D GPU interface to enable vertical and horizontal stitching functionality. The resulting output is saved to the file create_n2d_buffer_stitch_sample_hbn_1920_2160.yuv.
c. Allocate non-contiguous physical memory using
malloc, convert it ton2d_buffer_t, use 2D GPU API to complete image copy, and save the result to filecreate_n2d_buffer_normal_memory_sample_hbn_1920_1080.yuv