I2C Interface
Interface Overview
The I2C (Inter-Integrated Circuit) interface is an efficient, low-cost two-wire serial bus. It uses a clock line (SCL) and a data line (SDA) for communication between a host chip and multiple peripherals. I2C supports multiple devices on the same bus, uses few pins, and is easy to extend. It is widely used with sensors, EEPROM, display modules, and other low-speed peripherals.
Case Objective
Control a display through the I2C interface.
Required Hardware
-
RDK X5 development board
-
Female-to-female jumper wires
-
I2C OLED display
Hardware Connection
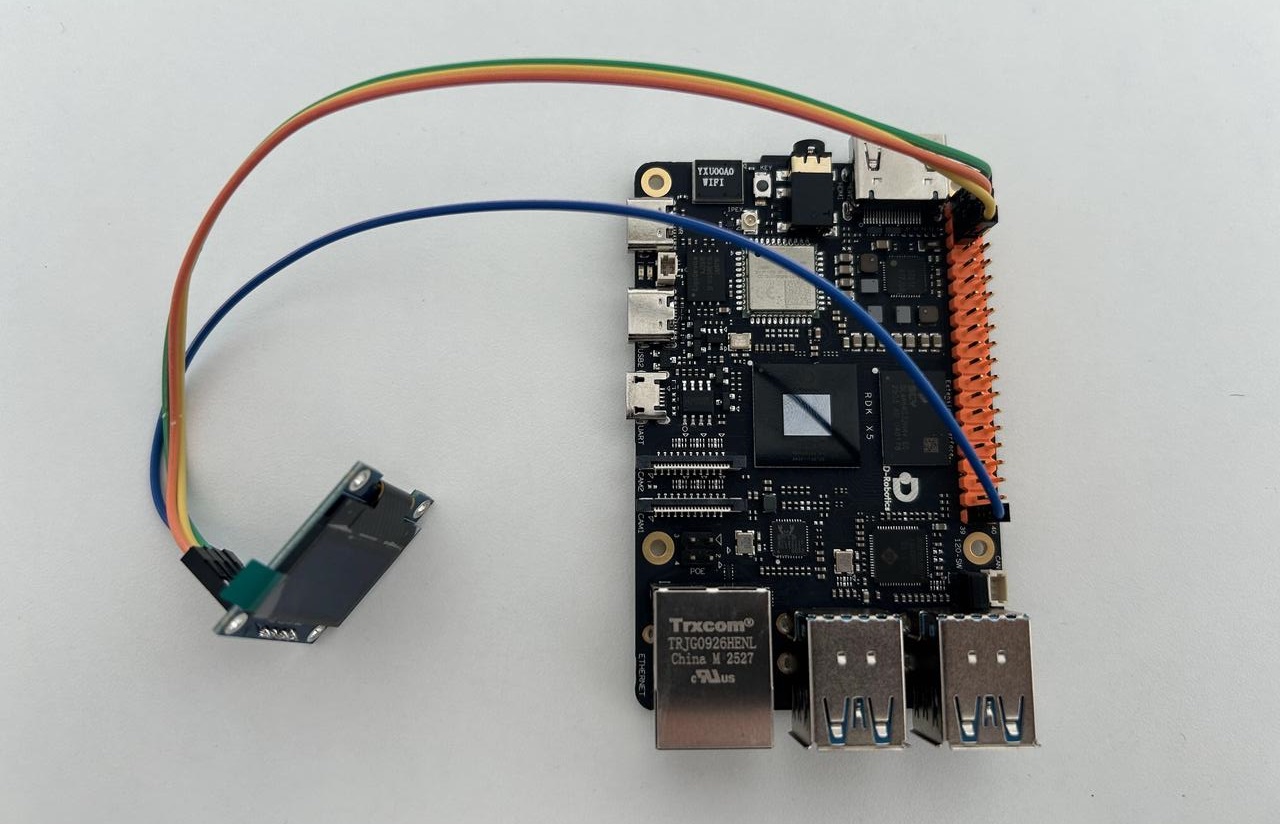
Pin Mapping
| OLED pin | Board pin | Function |
|---|---|---|
| VCC | 1 | Power |
| GND | 39 | Ground |
| SDA | 3 | I2C data |
| SCL | 5 | I2C clock |
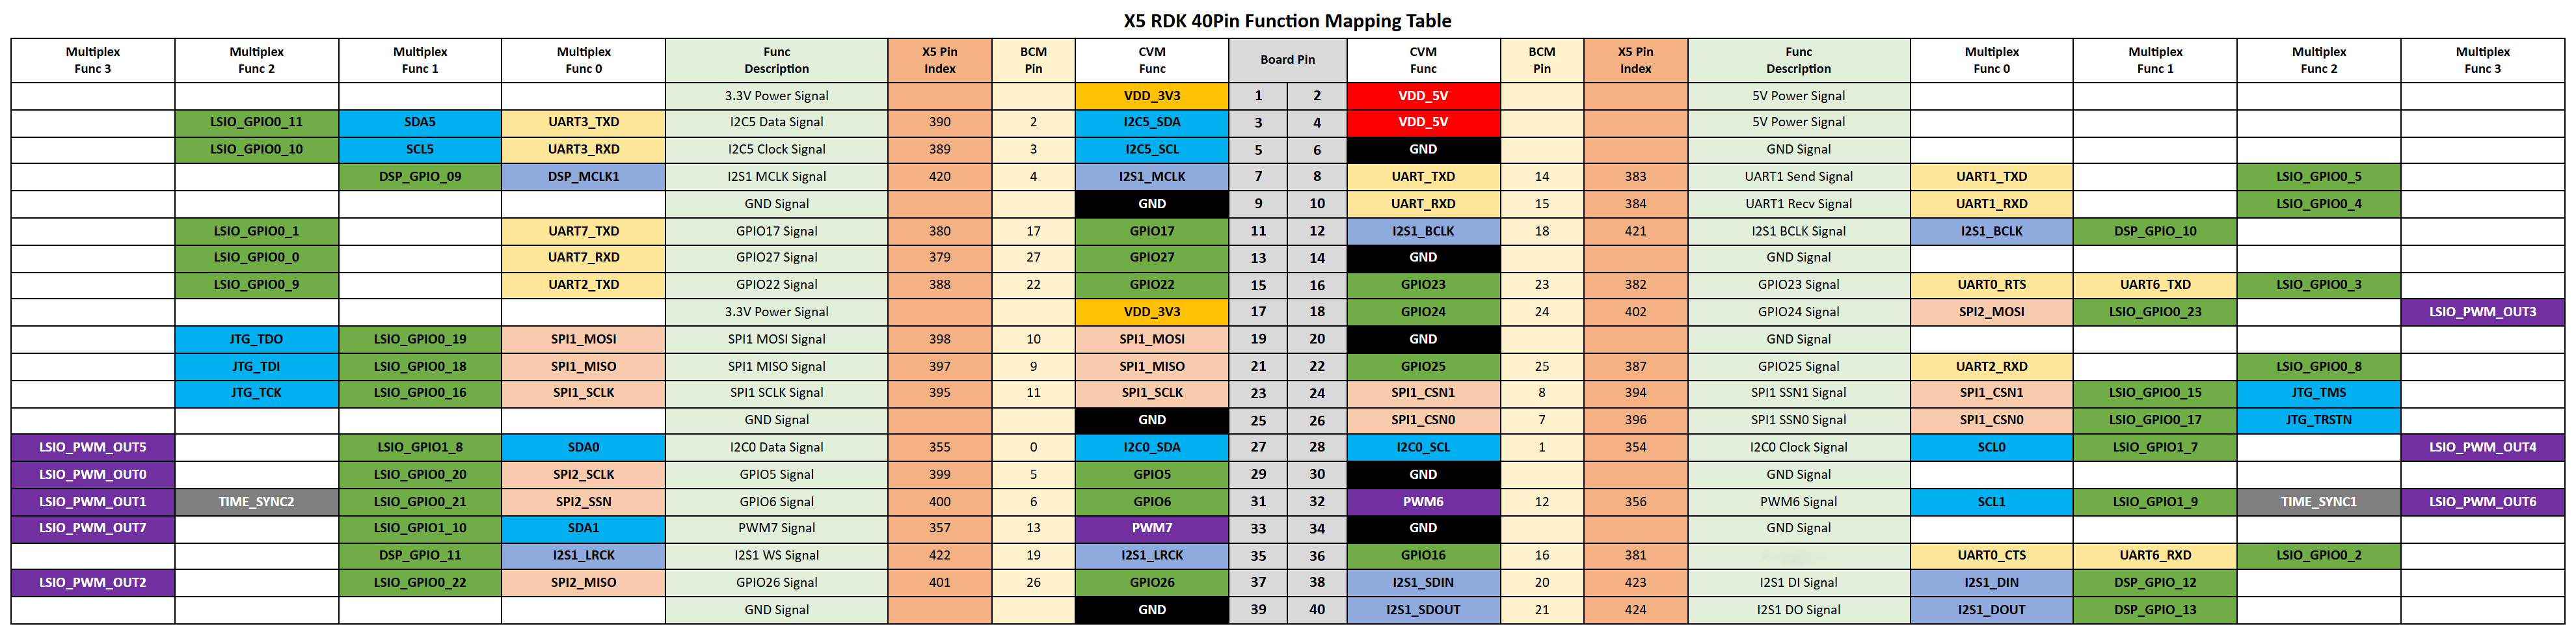
40-Pin Header Definition
Sample Code
Install Dependencies
# Install the package
pip install luma.oled
Create i2c_display.py
Create an i2c_display.py file and paste the following code:
#!/usr/bin/env python3

import time

from luma.core.interface.serial import i2c
from luma.oled.device import ssd1306
from PIL import Image, ImageDraw, ImageFont

# 初始化 I2C OLED
serial = i2c(port=5, address=0x3C)
device = ssd1306(serial)
font = ImageFont.load_default()

while True:
    image = Image.new("1", (128, 64))
    draw = ImageDraw.Draw(image)

    draw.text((0, 0), "RDK X5", font=font, fill=255)
    draw.text((0, 18), "I2C OLED Demo", font=font, fill=255)
    draw.text((0, 36), time.strftime("%H:%M:%S"), font=font, fill=255)

    device.display(image)

    time.sleep(1)
Run the Sample
Run the sample with the following command:
python3 i2c_display.py
After it starts, the screen shows text and the current time.