2.5 Connect an AI model
Moss needs a working model to answer questions and operate devices. Most new users can rely on the default after sign-in; manual setup is mainly for corporate model endpoints or running a small model locally.
Three paths
| Situation | Path |
|---|---|
| Fresh install, just want it working | After sign-in, use the built-in recommended models |
| Team already has a model service or keys | Settings → AI engine |
| Want a fast local small model | AI capabilities → Local LLM: install and pull a model |
Default models
After sign-in you can usually go straight to the workbench—no keys required first.
If the composer shows “fast/reasoning model not configured” or “model unreachable,” use AI model settings or Local model from the hint to jump to the right page.
Bring your own model service
If your team provided an endpoint, open Settings → AI engine and set it as the reasoning or fast model.
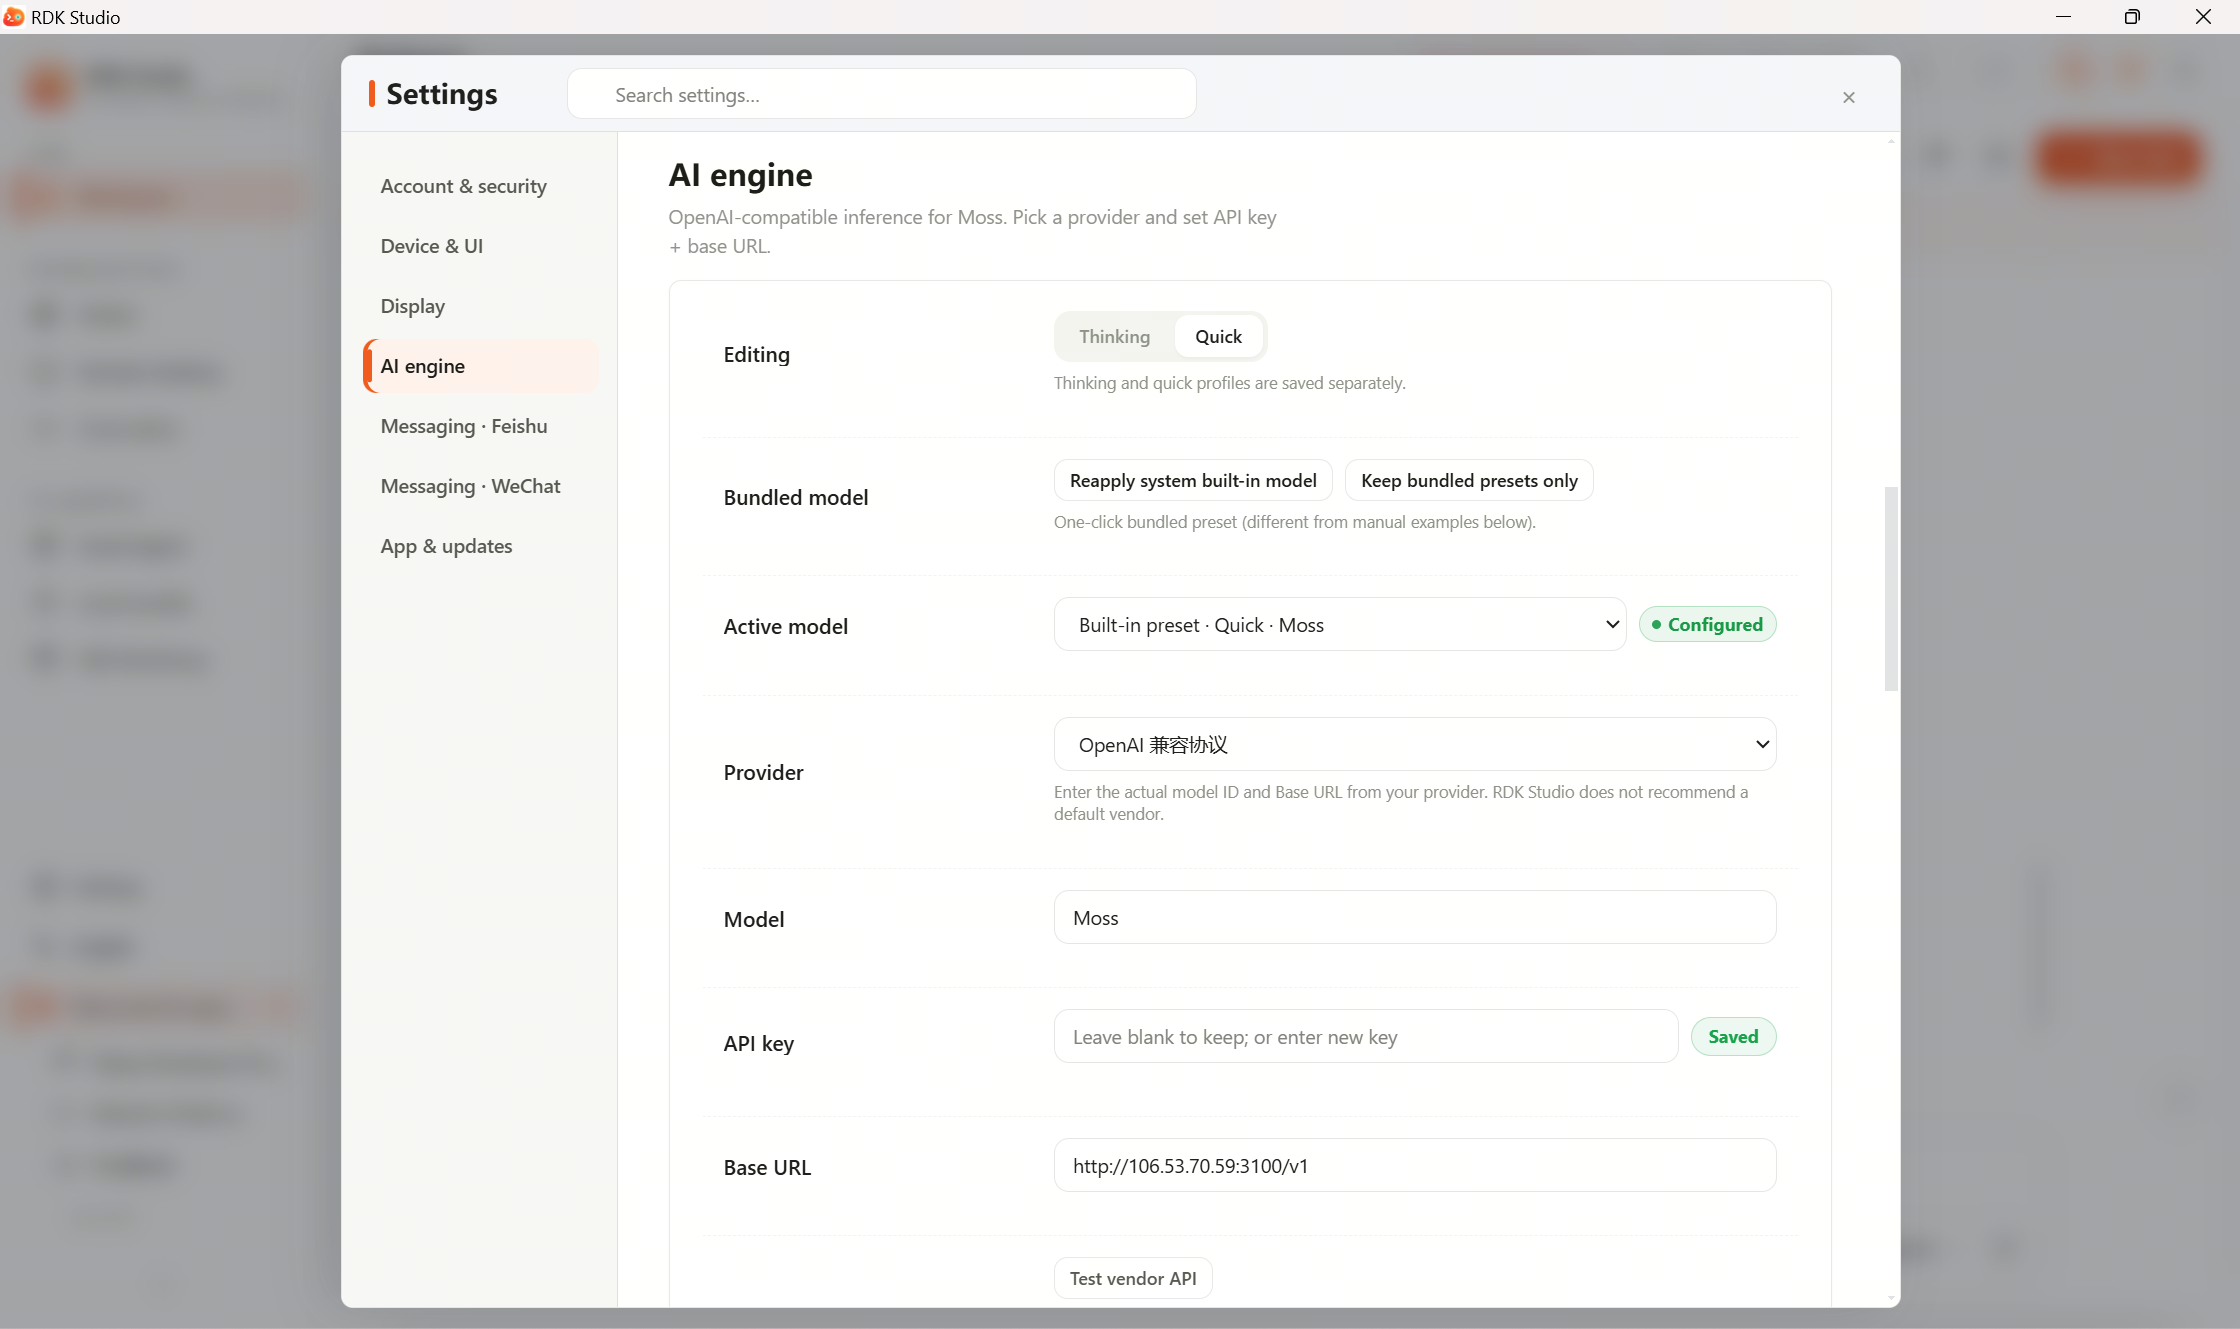
| Mode | Role |
|---|---|
| Reasoning | Main chat, complex tasks, planning, troubleshooting |
| Fast | Short Q&A, summarizing results, light file browsing |
Common fields:
| Field | What to enter |
|---|---|
| Display name | Friendly label for this configuration |
| Provider | Match your team’s platform |
| Model name | Name from your team or provider |
| Base URL | API base from your team; leave empty if using the platform default |
| API key | Key from your team or provider (enter in the settings page) |
If unsure, share the provider’s field guide or a redacted screenshot (hide the key) with Moss to map fields. Do not paste API keys into chat.
Local Ollama
Local LLM lets you:
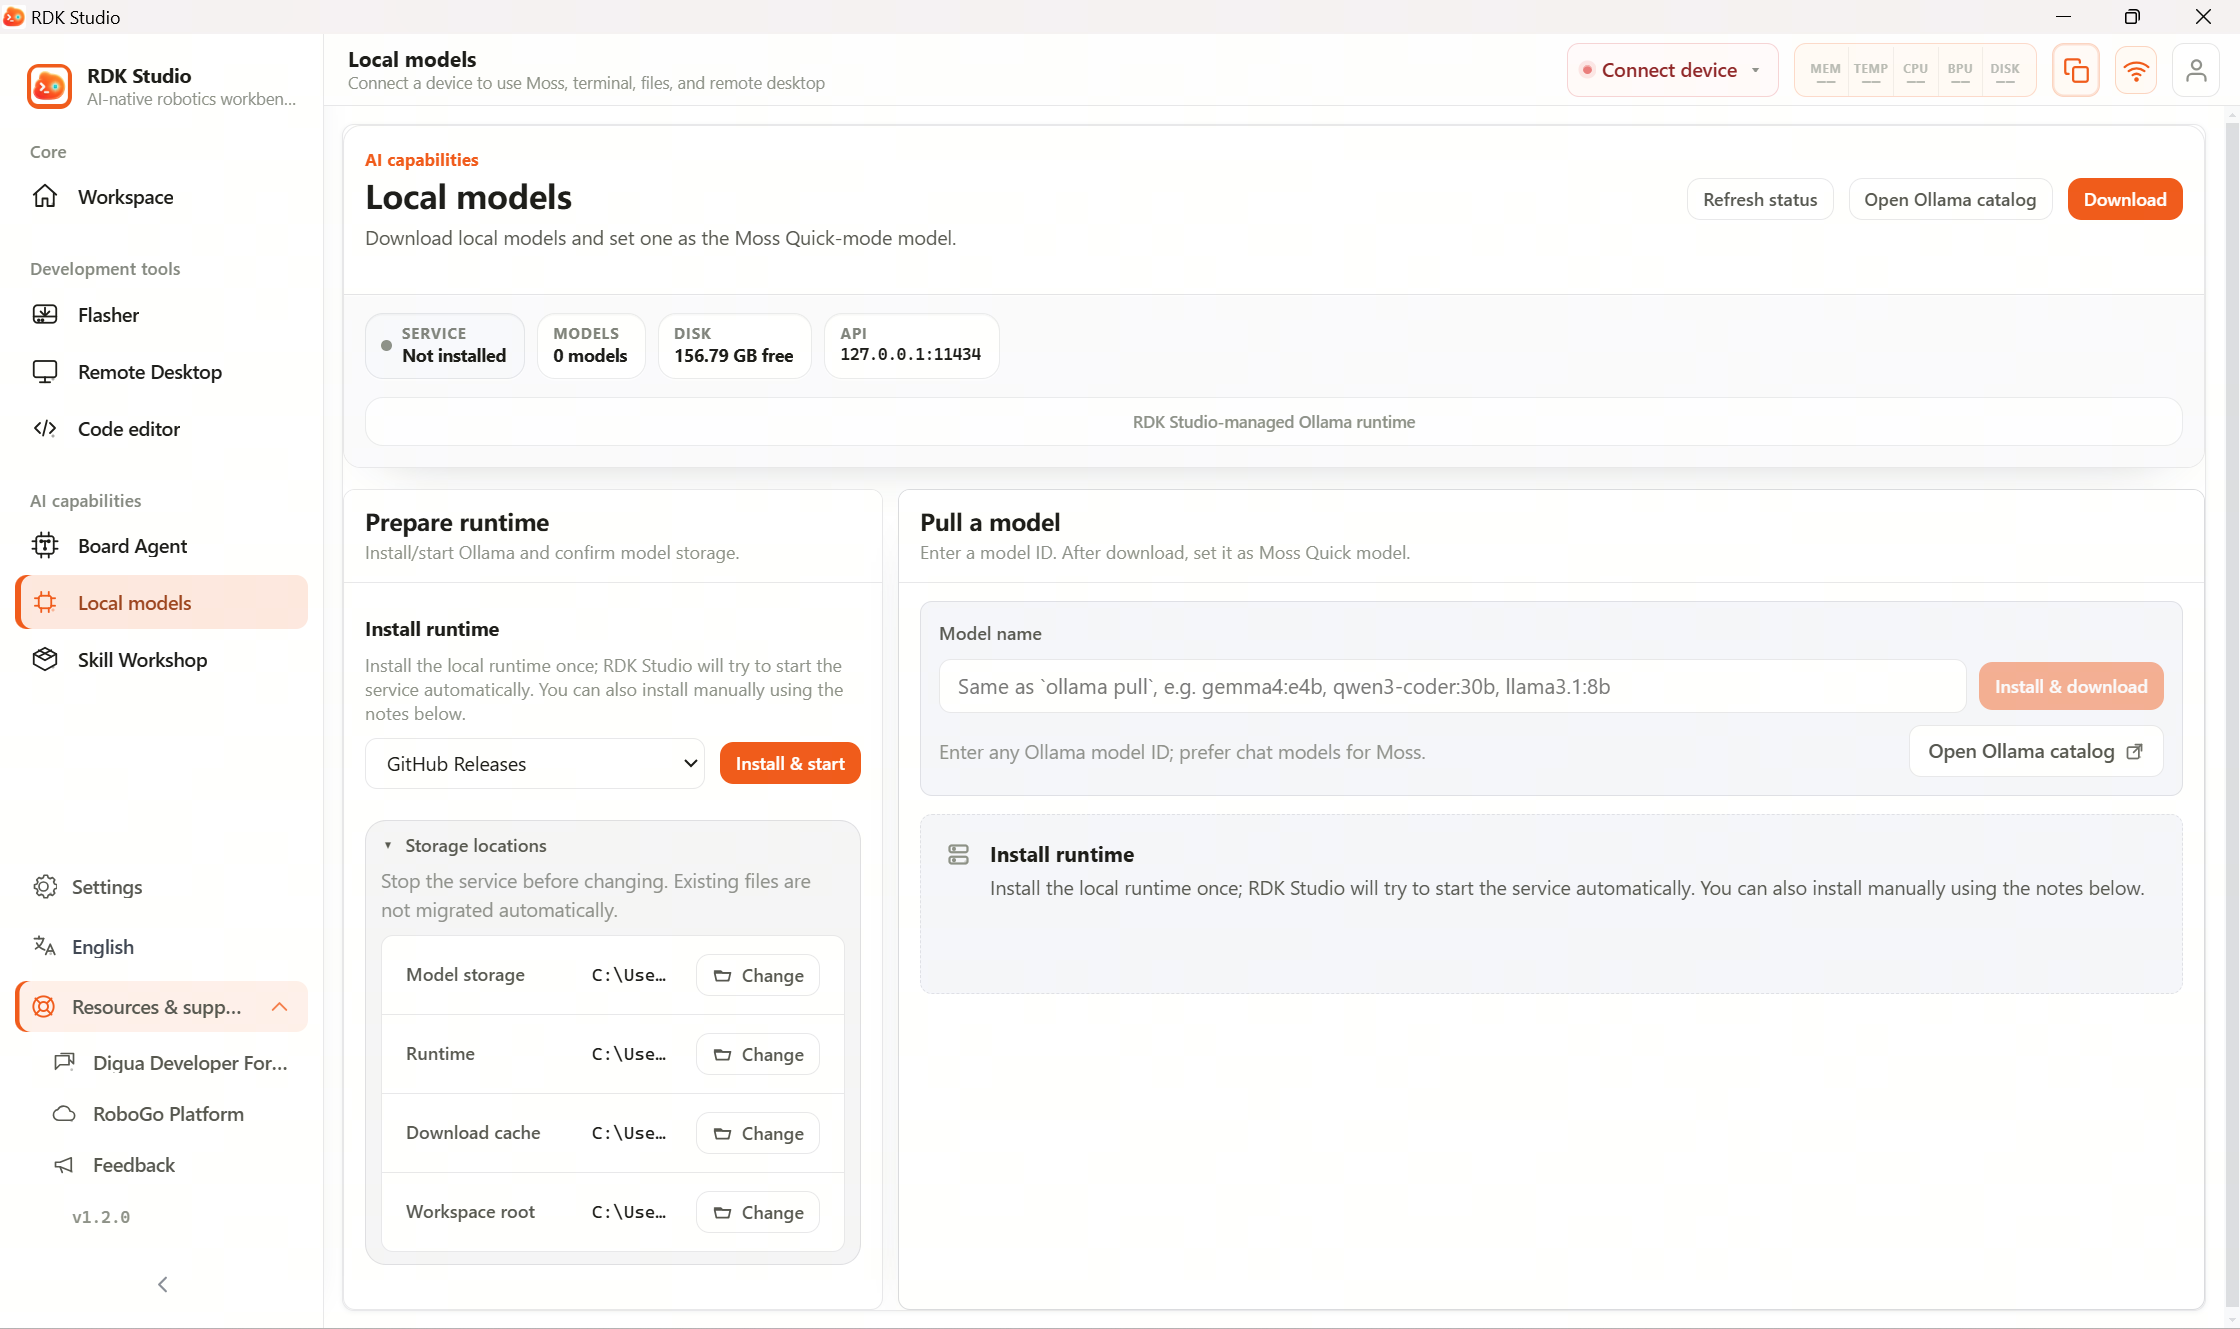
- Install or detect local Ollama.
- Start the local model server.
- Enter a model name to pull.
- Run a one-shot chat test.
- One-click set as Moss fast model.
Local models suit quick answers, summaries, and light Q&A. They run on your PC; board-side OpenClaw needs its own agent settings on the device.
Next steps
When models work, continue to 2.6 First conversation.
Deeper docs: