7.2.8 USB Gadget User Guide
This chapter describes how to use the USB Gadget feature on the development board, including configuring the USB 2.0 Type-C interface for ADB mode and RNDIS mode.
Hardware Limitations
USB Interface Overview
The RDK S100 development board provides the following USB interfaces:
| Interface Type | Location | Quantity | Operating Mode | Purpose |
|---|---|---|---|---|
| USB Type-C | J16 | 1 | Device Only | Image flashing, debug serial port, USB Gadget |
| USB 3.0 Type-A | J19/J20 | 4 | Host Only | Connect USB peripherals (USB drives, keyboard, mouse, etc.) |
- USB Type-C (J16) supports Device mode only. It does not support Host mode and cannot be used to read USB drives or connect other USB devices.
- USB 3.0 Type-A (J19/J20) supports Host mode only and cannot be configured as Gadget mode.
- The USB Type-C interface includes a debug serial port function. The CH340 chip converts debug serial ports from the Main domain and MCU domain into a USB interface.
- Note the USB 2.0 camera connection limitations. For details, see the USB Camera documentation in the Basic Application chapter.
The RDK S600 development board provides the following USB interfaces:
| Interface Type | Location | Quantity | Operating Mode | Purpose |
|---|---|---|---|---|
| USB Type-C | J4 | 1 | Device Only | Image flashing, debug serial port, USB Gadget |
| USB 3.2 Gen 1x1 Type-A | J7/J8/J9 | 6 | Host Only | Connect USB peripherals (USB drives, keyboard, mouse, etc.) |
- USB Type-C (J4) supports Device mode only. It does not support Host mode and cannot be used to read USB drives or connect other USB devices.
- USB 3.2 Type-A (J7/J8/J9) supports Host mode only and cannot be configured as Gadget mode.
- The USB Type-C interface includes a debug serial port function. The CH340 chip converts debug serial ports from the Main domain and MCU domain into a USB interface.
- Note the USB 2.0 camera connection limitations. For details, see the USB Camera documentation in the Basic Application chapter.
USB Gadget Feature Overview
USB Gadget is a framework provided by the Linux kernel that allows a device to connect to a host as a USB peripheral (Device). Through the USB Gadget framework, RDK development boards can emulate various USB device functions.
RDK development boards support the following Gadget functions through the usb-gadget.sh script:
| Function | Description |
|---|---|
| adb | Android Debug Bridge, used for ADB debugging |
| rndis | Remote NDIS, virtual network adapter function that enables USB network sharing |
Usage
Switch to ADB Mode
ADB (Android Debug Bridge) mode allows users to debug and transfer files through the USB Type-C interface.
Start ADB mode:
usb-gadget.sh start adb
Example output:
Detecting platform:
 board : D-Robotics RDK S100 V0P5
 udc   : 39820000.dwc3
Creating the USB gadget
Loading composite module
Mount ConfigFS and create Gadget
Creating gadget directory g_comp
OK
init configfs...
Setting Vendor and Product ID's
OK
...
Creating ACM gadget functionality
OK
Binding USB Device Controller
OK
usb-gadget start succeed.
Stop ADB mode:
usb-gadget.sh stop adb
Switch to RNDIS Mode
RNDIS (Remote Network Driver Interface Specification) mode virtualizes the USB Type-C interface as a network adapter, enabling USB network sharing. After connecting to a PC, a remote network adapter device appears on the computer.
Start RNDIS mode:
usb-gadget.sh stop adb
usb-gadget.sh start rndis
Example output:
Stopping the USB gadget
Stoping & Delete usb-gadget g_comp
waiting...
...
OK
Bind functions...
Bind functions according to .usb-config file
bind gadget rndis...
Creating RNDIS gadget functionality
OK
Pre run userspace daemons(eg. adb)...
0
waiting
.
OK
Binding USB Device Controller
OK
Run some userspace daemons(eg. usb_camera)...
usb-gadget start succeed.
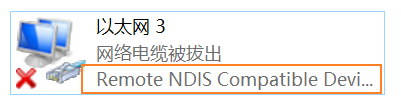
After connecting to a PC, you can see the Remote NDIS Compatible Device network adapter on the computer's network configuration page:
Configure network IP:
Configure the USB network adapter IP address on the development board:
ifconfig usb0 192.168.1.110
Configure the remote network adapter IP address on the PC (must be on the same subnet as the development board):
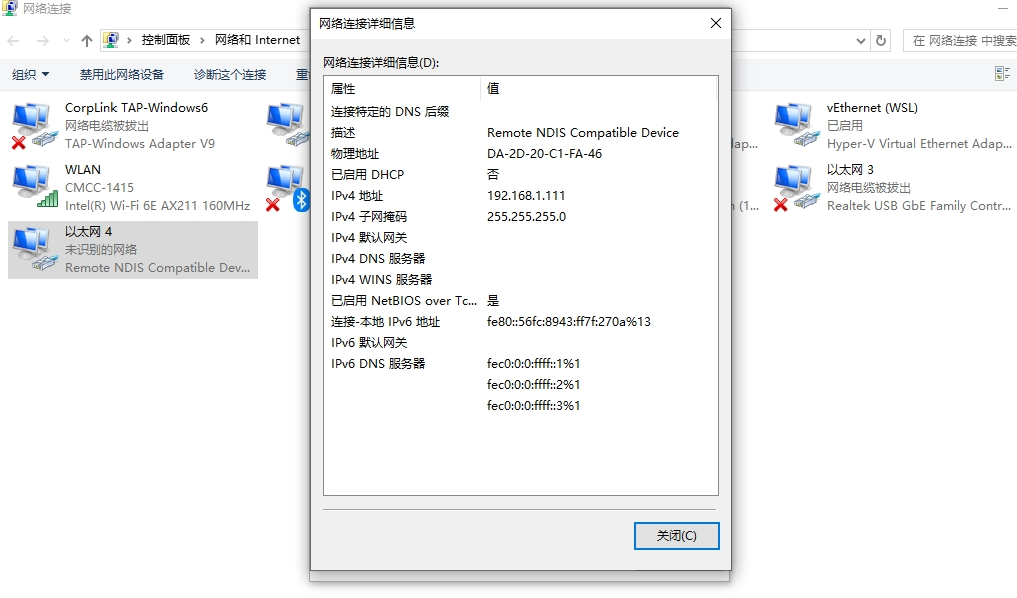
Verify network connectivity:
Ping the PC IP from the development board:
ping 192.168.1.111
Stop RNDIS mode:
usb-gadget.sh stop rndis
FAQ
Windows Cannot Recognize RNDIS Device
If the RNDIS device is not recognized correctly after connecting on Windows, possible causes include:
-
OS descriptors not loaded on first connection: Windows records device information in the registry. If the correct OS descriptors were not present on the first connection, subsequent connections will not request them again.
Solution: Delete the device record in the registry:
HKLM\SYSTEM\CurrentControlSet\Control\usbflags\[USB_VID+USB_PID+bcdRelease]\osvc -
Manual driver installation: In Device Manager, find the unrecognized device, right-click and select "Update driver", choose "Browse my computer for drivers", then select "Let me pick from a list of available drivers on my computer", and choose "Network adapters" -> "Microsoft" -> "Remote NDIS Compatible Device".
ADB Device Not Recognized
If the ADB device is not recognized on the PC:
- Confirm that the ADB driver is installed (Windows) or the adb tool is installed (Linux/macOS)
- Check whether the USB cable supports data transfer
- Use the
adb devicescommand to check whether the device is recognized
Device Not Recognized After Switching Modes
If the PC does not recognize the new device after switching Gadget modes:
- Disconnect and reconnect the USB cable
- Run
usb-gadget.sh stopto stop the current mode, then start the new mode