Upgrade miniboot
miniboot is the minimum boot image for RDK hardware, containing low-level firmware such as miniboot and U-Boot. It is responsible for device initialization and boot loading after power-on. The device ships with the latest firmware matching the hardware pre-installed. Downgrading to an older version is strictly prohibited, as it may prevent the device from booting.
There are two ways to upgrade miniboot:
- If the system can boot normally and is connected to the network, use the rdk-miniboot-update command (more convenient).
- If the system cannot boot normally, or you want to use a PC tool for flashing, use XBurn.
Both methods can upgrade miniboot. Choose based on the device state.
Use the rdk-miniboot-update command
Prerequisites: The system is running normally and connected to the network. Run the following commands in the development board's terminal (via serial console or SSH).
Common commands:
- Update to the latest version:
sudo rdk-miniboot-update - Use a specific image file:
sudo rdk-miniboot-update -f /userdata/miniboot.img - Check which image file will be used:
rdk-miniboot-update -l
For more options, see the rdk-miniboot-update command reference.
Use XBurn
XBurn is a PC-side flashing tool that connects to the development board via USB and serial port to write miniboot firmware to the onboard NAND. It can be used whether the system can boot or not.
Environment setup
Install drivers and dependencies (varies by operating system; must be completed before flashing, otherwise XBurn will not recognize the device).
Firmware download
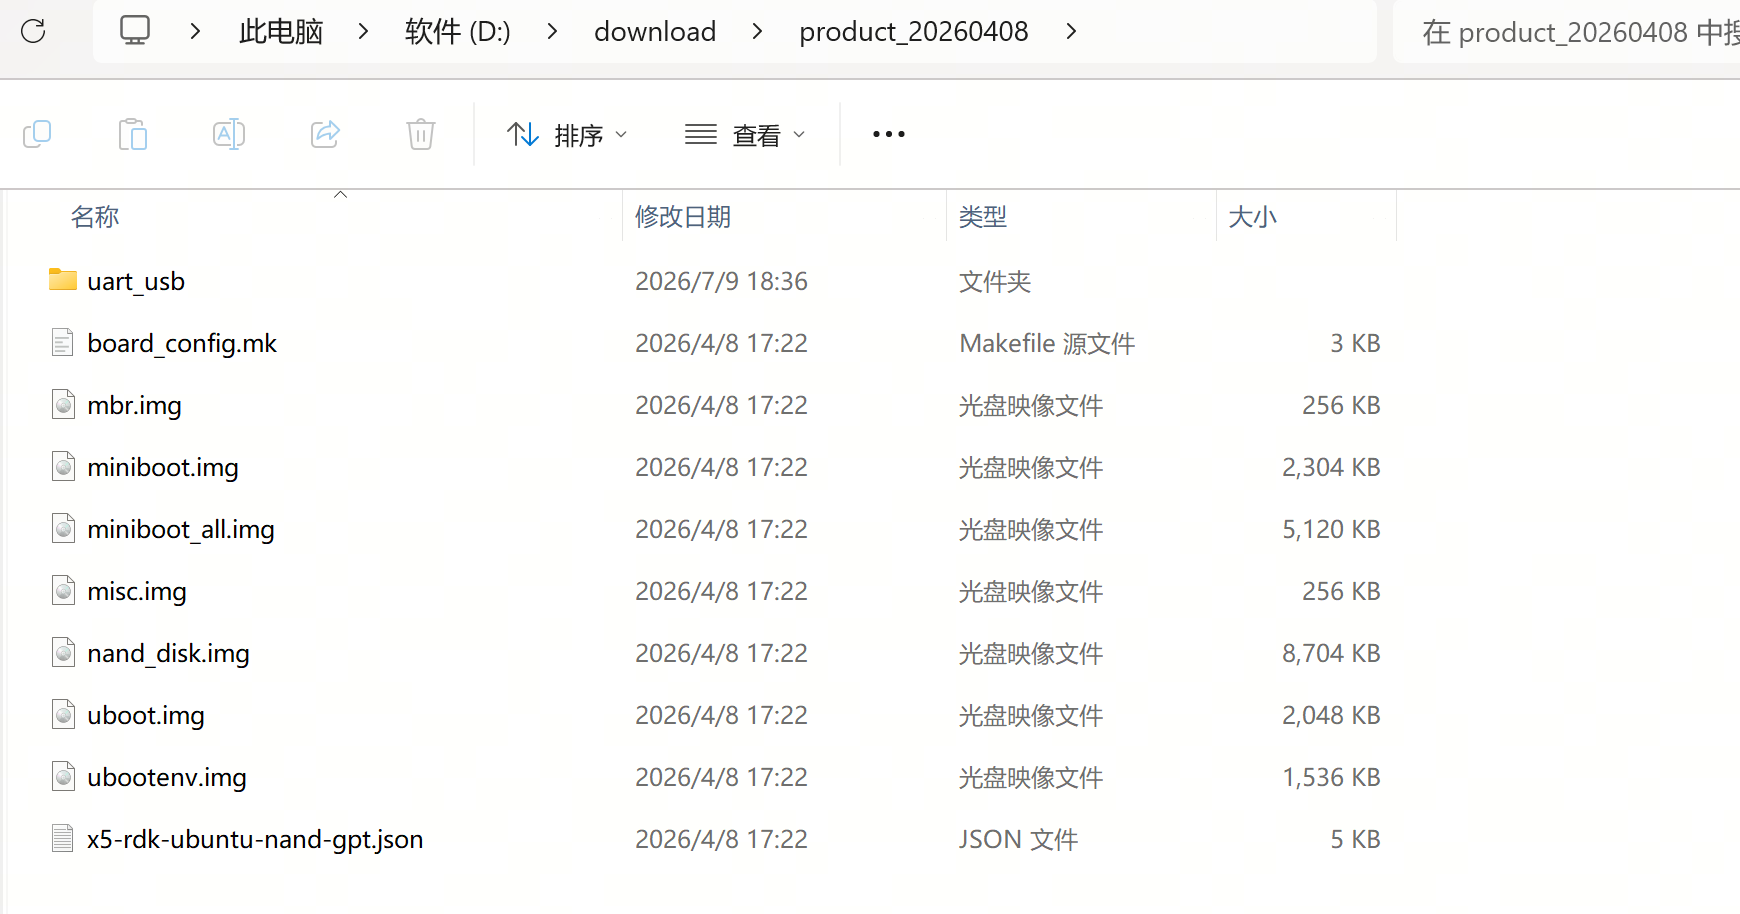
Click here to go to the miniboot firmware download directory. Download the latest archive (e.g., product 20260408.zip) and extract it for use.
Hardware connection
- Serial to PC: Micro-USB (debug serial port, for Xmodem transfer and logs)
- Flashing port to PC: USB Type-C
- Power: USB Type-C, requires a 5V/5A power adapter
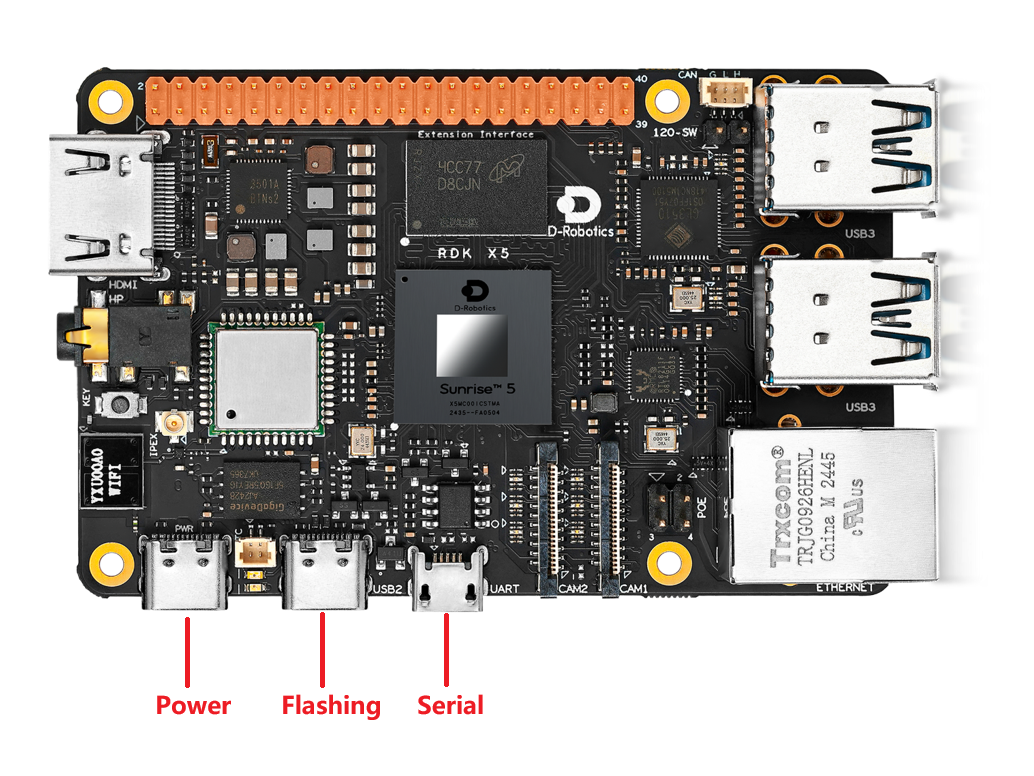
- Serial to PC: Micro-USB (debug serial port, for Xmodem transfer and logs)
- Flashing port to PC: USB Type-C
- Power: USB Type-C, requires a 5V/5A power adapter
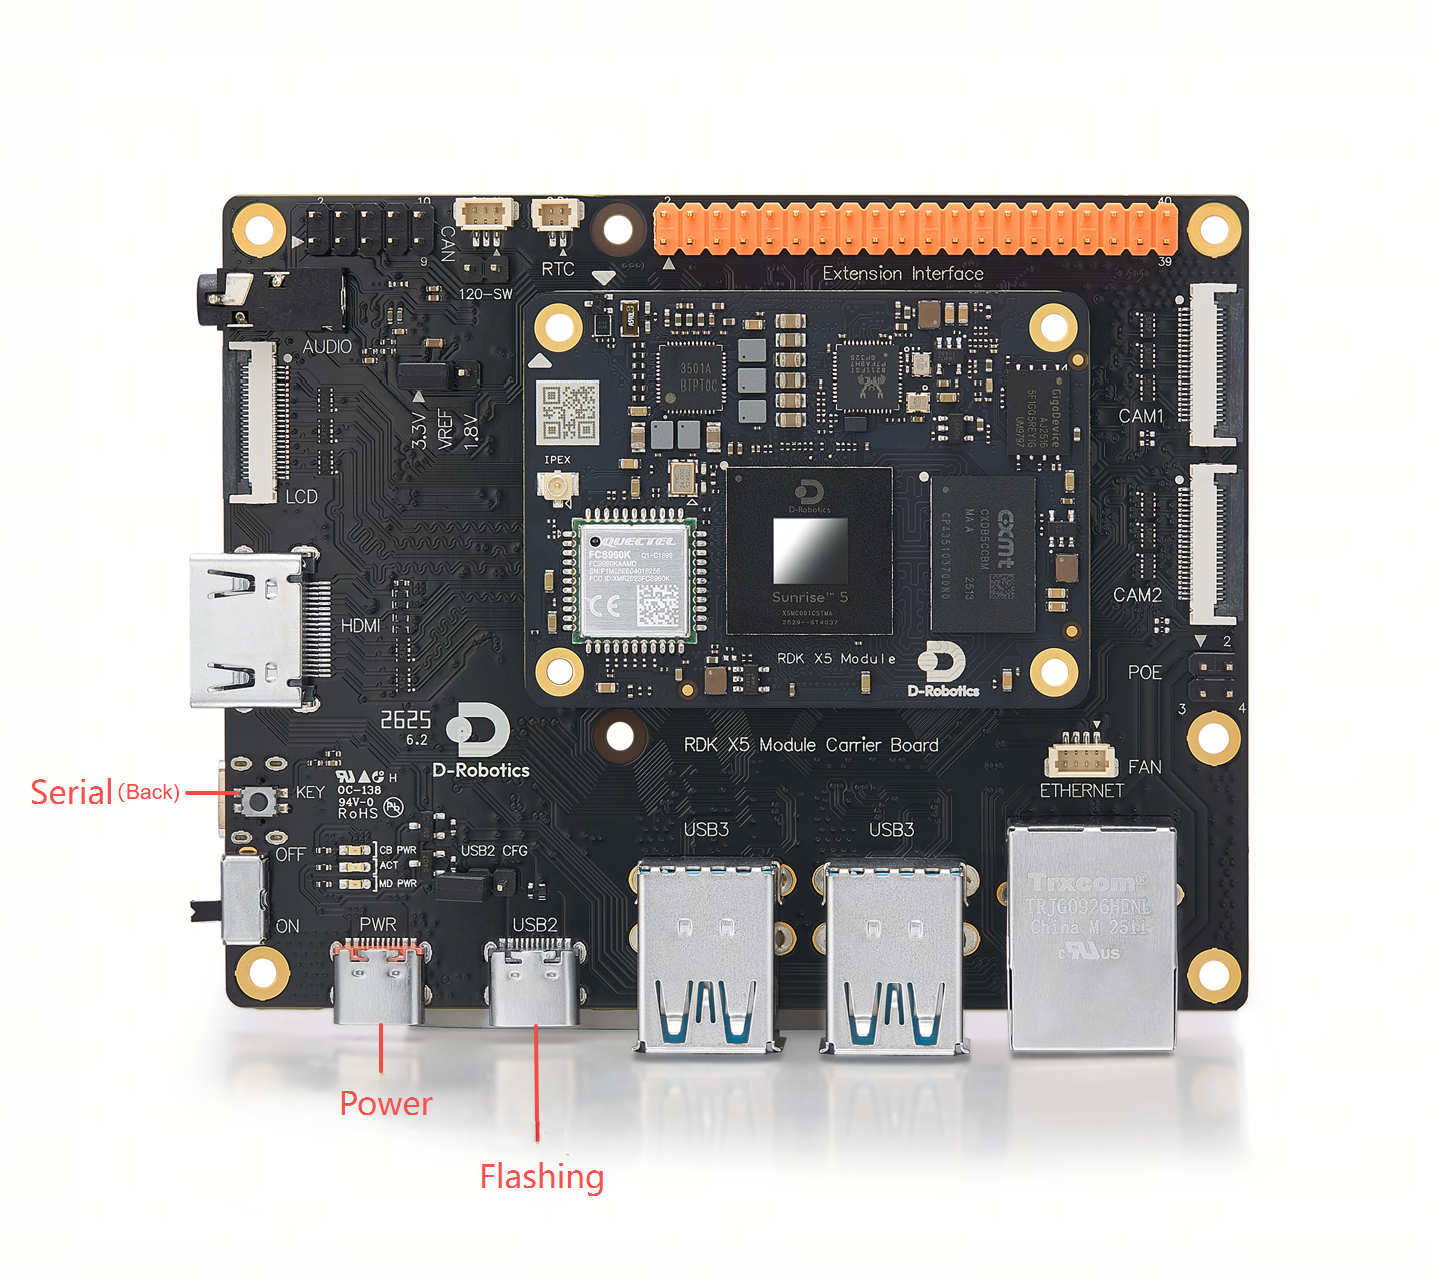
The development board is powered via USB Type-C. Use a 5V/5A power adapter. Do not use a computer USB port, as insufficient power may cause unexpected shutdowns and repeated reboots. The Type-C USB port is for power only.
Flashing parameters
Set Product type to RDK X5. The storage medium is fixed to NAND and the firmware type is fixed to secure. The connection type determines the available download modes and where to enter the serial port settings:
| Connection type | Available download modes | Serial port / baud rate | Applicable scenarios |
|---|---|---|---|
Serial+USB | xmodem_fastboot / fastboot | Enter the Serial port and Baud rate in the Board section of XBurn (X5: 115200, X5 Module: 921600) | Serial port guides via Xmodem, USB transfers via Fastboot. Works for empty boards or non-empty boards. Use when the device cannot boot normally. |
USB | fastboot | Options do not appear; view logs in MobaXterm or minicom | Requires the device's U-Boot to be functional. Manually enter Fastboot (press and hold the Space key after power-on to enter U-Boot, then enter fastboot 0). |
Flash Bootloader
Writes Bootloader firmware such as miniboot and U-Boot to the onboard NAND. Applicable when the device cannot boot normally, the Bootloader is damaged, or you need to upgrade the low-level boot program.
-
Fill in the Basic configuration according to Flashing parameters. Set Image directory to the folder extracted in Firmware download.
-
(Optional) To flash multiple devices simultaneously, see the XBurn manual on Batch flashing (software limit: 8 devices, recommended ≤4. Stability decreases with more devices and depends on hardware factors such as cables, hubs, and power supply; the software does not guarantee success). When batch flashing, it is recommended to disable Auto reboot after flashing below to prevent a single device from rebooting and affecting others.
-
(Optional) Expand Advanced configuration and enable Auto reboot after flashing. The device will automatically reboot after flashing, eliminating the need to manually power off, switch to normal boot mode, and power on again. For details, see the XBurn manual on auto reboot and boot check.
-
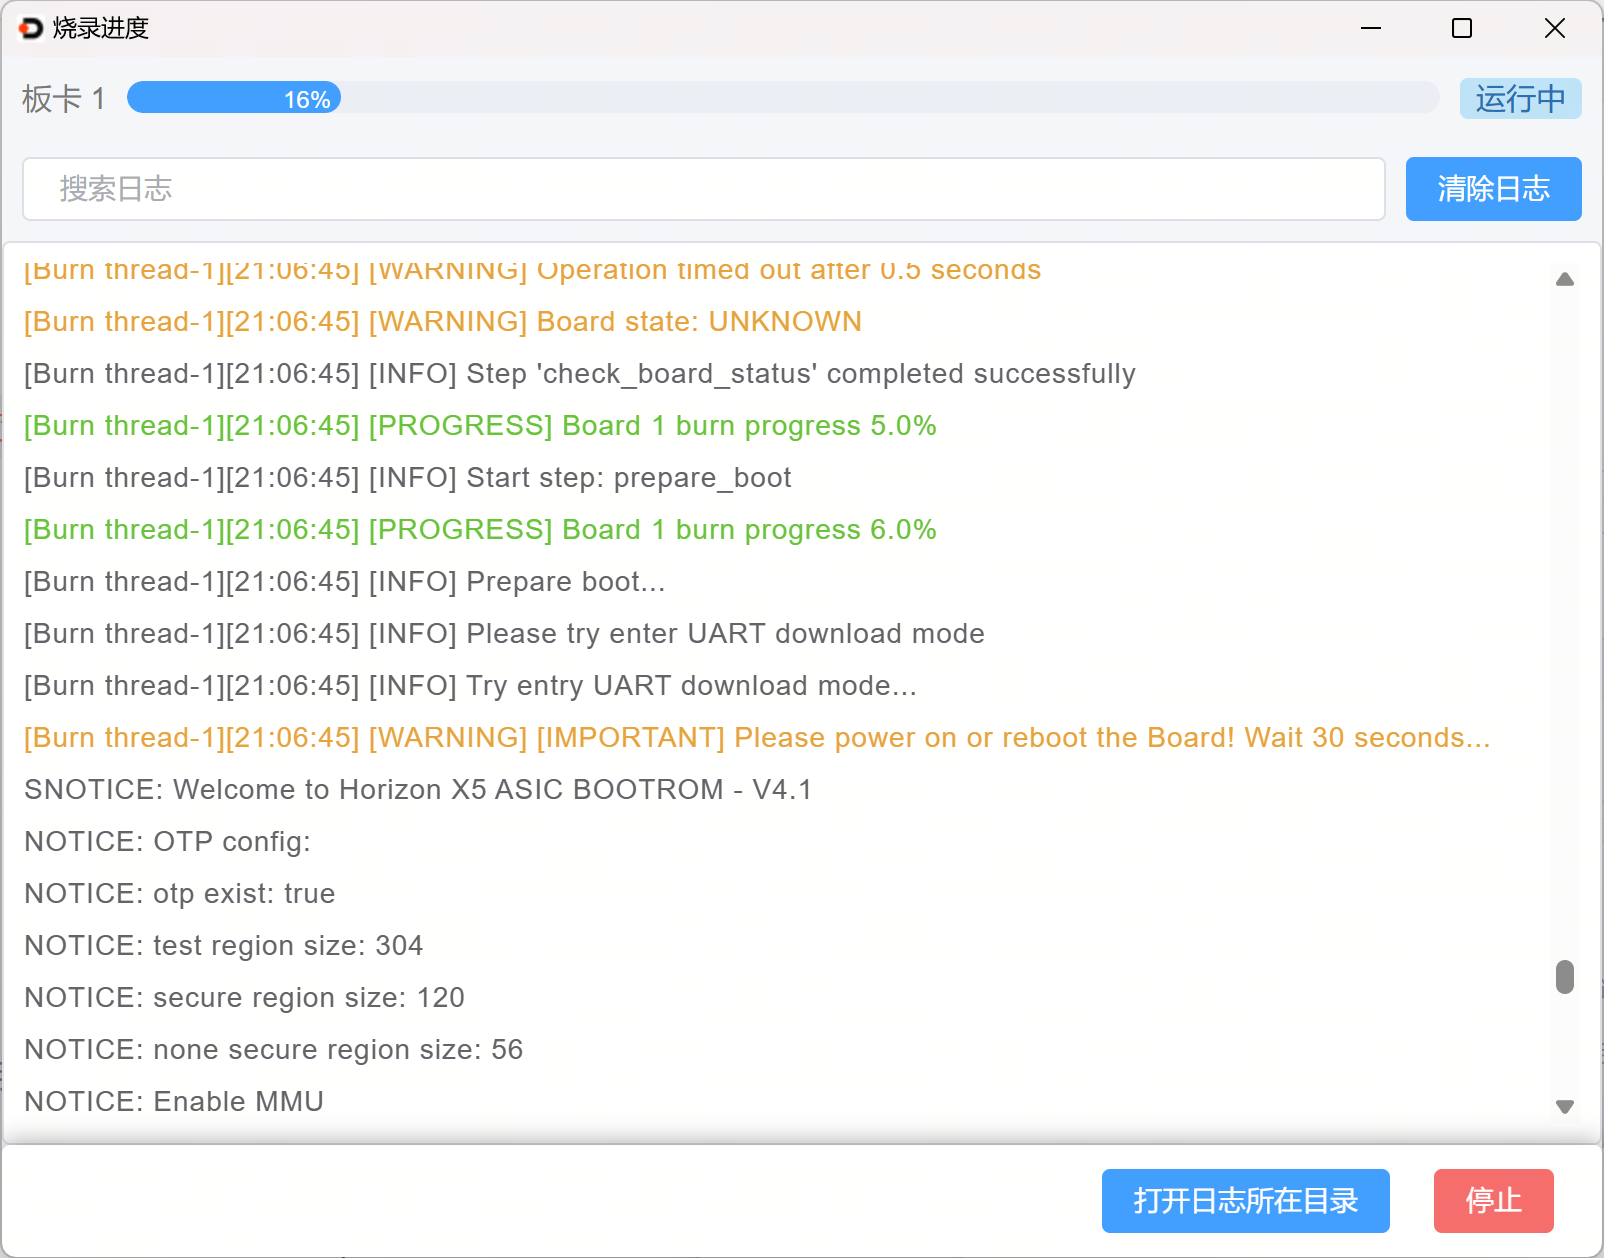
Click Start upgrade. When prompted, unplug and replug the power. If the serial port is lost after unplugging, do not power on yet; wait for the prompt before powering on the device.
-
After powering on, the upgrade begins. Wait for it to complete.

Boot verification
The system performs its default environment configuration on first boot, which takes about 45 seconds.
- Desktop version: Connect to a display via HDMI. The Ubuntu system desktop indicates a successful boot.
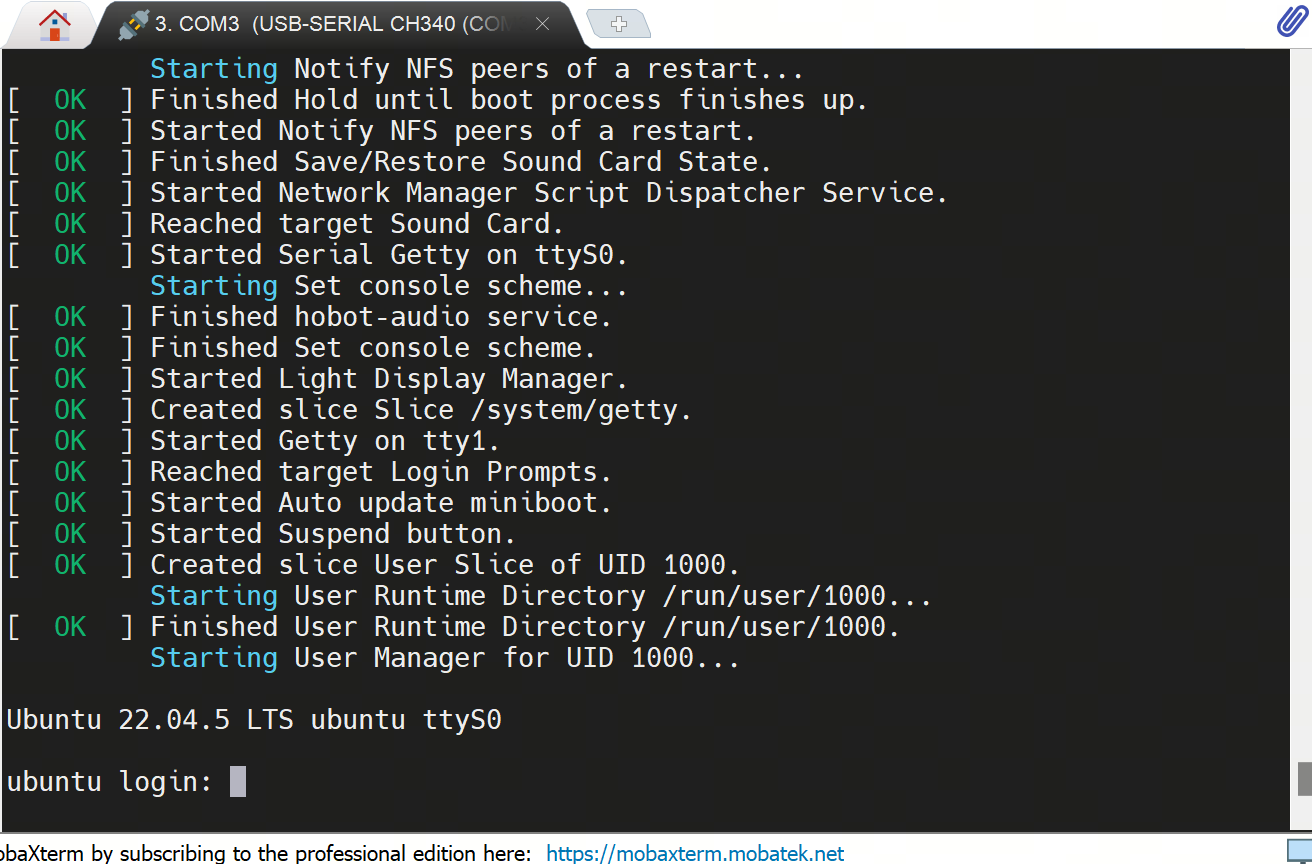
- Server version: Connect to the development board via the debug serial port. Open MobaXterm, click Session > Serial, select the serial port detected by the PC, and click OK. The username login prompt indicates a successful boot.
Green LED on: power is normal. Orange LED blinking: system boot is complete.
If the serial output shows nothing for more than 2 minutes, or the log stops, and the device cannot boot, re-flash. For troubleshooting, see the XBurn manual on boot issues.