1.4 Remote Login
This section aims to introduce users who need to remotely access the development board from a personal computer (PC) to methods of remote login via serial port and network (SSH).
Default Login Accounts
The system provides two default accounts for first-time users:
- Normal User: Username
sunrise, Passwordsunrise - Super User (root): Username
root, Passwordroot
Before logging in remotely via the network, the development board needs to be connected to the network via wired Ethernet or wireless Wi-Fi, and the development board's IP address must be configured. For IP address information under the two connection methods, refer to the description below:
- Wired Ethernet:
- The eth1 interface of the development board uses static IP mode by default, with IP address
192.168.127.10, mask255.255.255.0, gateway192.168.127.1 - The eth0 interface of the development board uses DHCP mode by default, the IP address is generally assigned by the router. You can check the IP address of the eth0 network using the
ifconfigcommand in the device command line.
- The eth1 interface of the development board uses static IP mode by default, with IP address
- Wireless Wi-Fi: The development board's IP address is generally assigned by the router. You can check the IP address of the wlan0 network using the
ifconfigcommand in the device command line.
- Wired Ethernet:
- The eth2 and eth3 interfaces of the development board are still under debugging and are not yet supported for use.
- The eth1 interface of the development board uses static IP mode by default, with IP address
192.168.127.10, mask255.255.255.0, gateway192.168.127.1 - The eth0 interface of the development board uses DHCP mode by default, the IP address is generally assigned by the router. You can check the IP address of the eth0 network using the
ifconfigcommand in the device command line.
- Wireless Wi-Fi: The development board's IP address is generally assigned by the router. You can check the IP address of the wlan0 network using the
ifconfigcommand in the device command line.
Serial Port Login
Connecting Serial Port on Windows
Before logging in via the serial port, you need to ensure that the development board's serial port cable is correctly connected to the computer. For connection methods, refer to the debug serial port section of the corresponding development board:
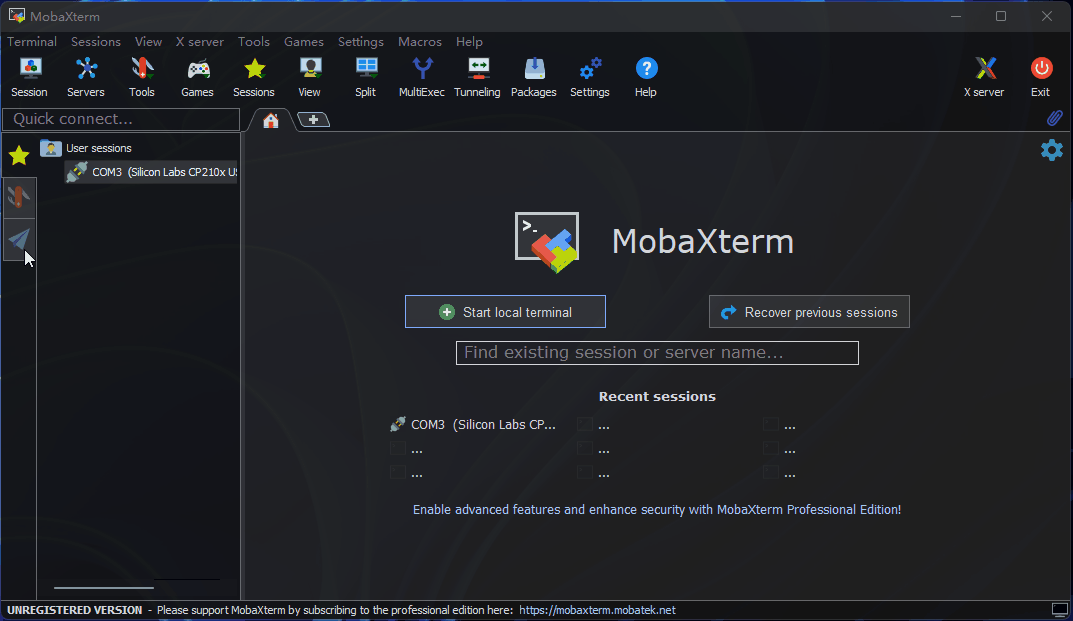
Serial port login requires a PC terminal tool. Commonly used tools include Putty, MobaXterm, etc. Users can choose according to their habits. The port configuration process for different tools is basically similar. The following uses MobaXterm as an example to introduce the process of creating a new serial port connection:
- When the serial port USB adapter board is plugged into the computer for the first time, you need to install the serial port driver. The driver can be obtained from the Tools subsection of the Resource Center. After the driver is installed, the Device Manager can properly recognize the serial port board port, as shown below:

-
Open the
MobaXtermtool, clickSession, then selectSerial -
Configure the port number, e.g.,
COM3. The actual serial port number used depends on the port recognized by the PC. -
Set the serial port configuration parameters as follows:
Configuration Item Value Baud rate 921600 Data bits 8 Parity None Stop bits 1 Flow Control None -
Click
OK, log in to the device by entering username:root, password:root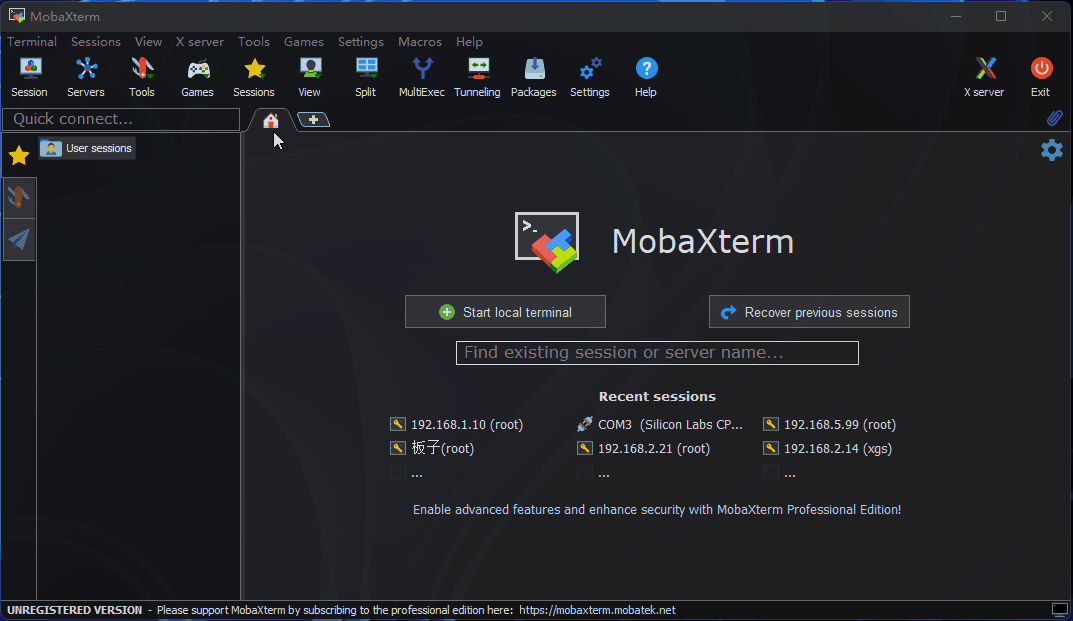
At this point, you can use the ifconfig -a command to query the development board's IP address, where eth0/eth1 and wlan0 represent wired and wireless networks respectively:
eth0: flags=4099<UP,BROADCAST,MULTICAST>  mtu 1500
        ether c8:30:76:63:2d:93  txqueuelen 1000  (Ethernet)
        RX packets 7547  bytes 2230733 (2.2 MB)
        RX errors 0  dropped 2  overruns 0  frame 0
        TX packets 1126  bytes 108615 (108.6 KB)
        TX errors 0  dropped 0 overruns 0  carrier 0  collisions 0
        device interrupt 93

eth1: flags=4163<UP,BROADCAST,RUNNING,MULTICAST>  mtu 1500
        inet 192.168.127.10  netmask 255.255.255.0  broadcast 192.168.127.255
        inet6 fe80::e0b2:71ff:fea0:6ba7  prefixlen 64  scopeid 0x20<link>
        ether e2:b2:71:a0:6b:a7  txqueuelen 1000  (Ethernet)
        RX packets 43  bytes 3882 (3.8 KB)
        RX errors 0  dropped 1  overruns 0  frame 0
        TX packets 46  bytes 6234 (6.2 KB)
        TX errors 0  dropped 0 overruns 0  carrier 0  collisions 0
        device interrupt 99

lo: flags=73<UP,LOOPBACK,RUNNING>  mtu 65536
        inet 127.0.0.1  netmask 255.0.0.0
        inet6 ::1  prefixlen 128  scopeid 0x10<host>
        loop  txqueuelen 1000  (Local Loopback)
        RX packets 46  bytes 6342 (6.3 KB)
        RX errors 0  dropped 0  overruns 0  frame 0
        TX packets 46  bytes 6342 (6.3 KB)
        TX errors 0  dropped 0 overruns 0  carrier 0  collisions 0

wlan0: flags=4099<UP,BROADCAST,MULTICAST>  mtu 1500
        ether 28:d0:43:83:63:57  txqueuelen 1000  (Ethernet)
        RX packets 0  bytes 0 (0.0 B)
        RX errors 0  dropped 0  overruns 0  frame 0
        TX packets 0  bytes 0 (0.0 B)
        TX errors 0  dropped 0 overruns 0  carrier 0  collisions 0
eth0: flags=4099<UP,BROADCAST,MULTICAST>  mtu 1500
        ether 7a:5e:ca:06:4b:a1  txqueuelen 1000  (Ethernet)
        RX packets 0  bytes 0 (0.0 B)
        RX errors 0  dropped 0  overruns 0  frame 0
        TX packets 0  bytes 0 (0.0 B)
        TX errors 0  dropped 0 overruns 0  carrier 0  collisions 0
        device interrupt 136

eth1: flags=4163<UP,BROADCAST,RUNNING,MULTICAST>  mtu 1500
        inet 192.168.127.10  netmask 255.255.255.0  broadcast 192.168.127.255
        inet6 fe80::58de:11ff:fe64:e19c  prefixlen 64  scopeid 0x20<link>
        ether 5a:de:11:64:e1:9c  txqueuelen 1000  (Ethernet)
        RX packets 0  bytes 0 (0.0 B)
        RX errors 0  dropped 0  overruns 0  frame 0
        TX packets 3  bytes 425 (425.0 B)
        TX errors 0  dropped 0 overruns 0  carrier 0  collisions 0
        device interrupt 192

eth2: flags=4099<UP,BROADCAST,MULTICAST>  mtu 1500
        ether 02:8f:6f:81:99:10  txqueuelen 1000  (Ethernet)
        RX packets 0  bytes 0 (0.0 B)
        RX errors 0  dropped 0  overruns 0  frame 0
        TX packets 0  bytes 0 (0.0 B)
        TX errors 0  dropped 0 overruns 0  carrier 0  collisions 0
        device interrupt 201

eth3: flags=4099<UP,BROADCAST,MULTICAST>  mtu 1500
        ether ee:71:51:40:ac:ad  txqueuelen 1000  (Ethernet)
        RX packets 0  bytes 0 (0.0 B)
        RX errors 0  dropped 0  overruns 0  frame 0
        TX packets 0  bytes 0 (0.0 B)
        TX errors 0  dropped 0 overruns 0  carrier 0  collisions 0
        device interrupt 218

lo: flags=73<UP,LOOPBACK,RUNNING>  mtu 65536
        inet 127.0.0.1  netmask 255.0.0.0
        inet6 ::1  prefixlen 128  scopeid 0x10<host>
        loop  txqueuelen 1000  (Local Loopback)
        RX packets 224  bytes 21518 (21.5 KB)
        RX errors 0  dropped 0  overruns 0  frame 0
        TX packets 224  bytes 21518 (21.5 KB)
        TX errors 0  dropped 0 overruns 0  carrier 0  collisions 0

wlan0: flags=4099<UP,BROADCAST,MULTICAST>  mtu 1500
        ether f0:68:e3:22:7e:90  txqueuelen 1000  (Ethernet)
        RX packets 8280  bytes 654536 (654.5 KB)
        RX errors 0  dropped 5898  overruns 0  frame 0
        TX packets 1138  bytes 139677 (139.6 KB)
        TX errors 0  dropped 0 overruns 0  carrier 0  collisions 0
Connecting Serial Port on Mac
Under the macOS system, use the minicom tool to connect to the serial port. The steps are as follows:
- Use the minicom command to connect to the serial port for verification (
minicom -D /dev/tty.wchusbserial* -b 921600 -8)minicom # Start the minicom terminal tool for serial communication
-D # Specify the serial port device to use
-b # Set the serial port baud rate
-8 # Set the number of data bits to 8 bits
- Verify connection to the development board
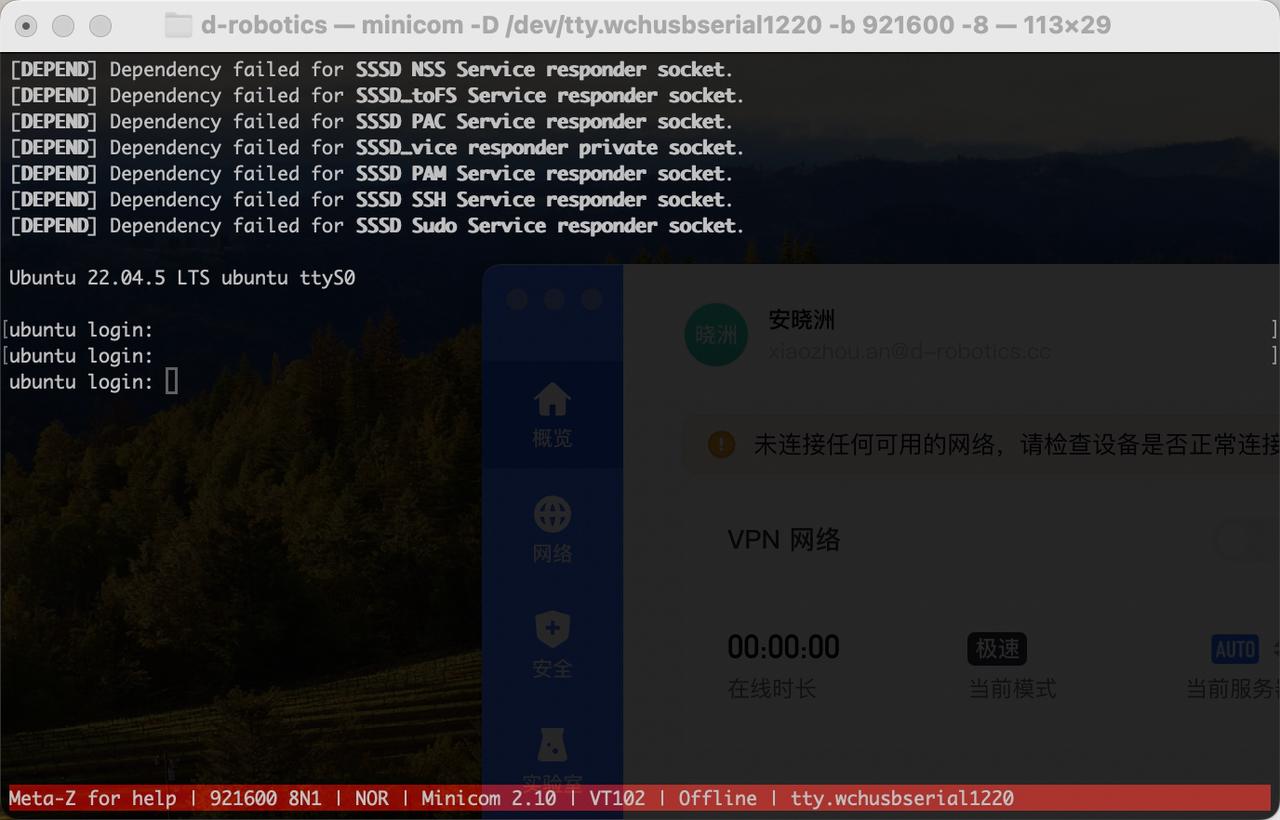
If you experience garbled text when using minicom, please refer to Garbled text on serial port using macOS system laptop
Network Status Confirmation
Before using remote login, you need to ensure that the computer and development board have normal network communication. If you cannot ping them, follow these steps to confirm:
- Confirm the IP address configuration of the development board and computer. Generally, the first three segments need to be the same, for example: Development board:
192.168.127.10Computer:192.168.127.100 - Confirm that the subnet mask and gateway configuration of the development board and computer are consistent.
- Confirm whether the computer's network firewall is turned off.
The outer wired Ethernet port (eth1) of the development board uses static IP mode by default, with IP address 192.168.127.10. For direct network connection between the development board and computer, simply configure the computer with a static IP, ensuring it is on the same network segment as the development board. Taking the WIN10 system as an example, the method to modify the computer's static IP is as follows:
- Find the corresponding Ethernet device in Network Connections and double-click to open it.
- Find the Internet Protocol Version 4 option and double-click to open it.
- Fill in the corresponding network parameters in the red box area in the figure below and click OK.

If you need to configure the development board's wired network to DHCP mode for dynamic acquisition, refer to the Wired Network section.
SSH Login
The following describes the steps to create a connection using terminal software and the terminal command line.
Terminal Software
Commonly used terminal tools include Putty, MobaXterm, etc. Users can choose according to their habits. The port configuration process for different tools is basically similar. The following uses MobaXterm as an example to introduce the process of creating a new SSH connection:
- Open the
MobaXtermtool, clickSession, then selectSSH - Enter the development board's IP address, e.g.,
192.168.127.10 - Select
specify usernameand entersunrise - After clicking OK, enter the username (sunrise) and password (sunrise) to complete the login
Computer Command Line
Users can also log in via SSH using the command line. The steps are as follows:
- Open a terminal window and enter the SSH login command, e.g.,
ssh sunrise@192.168.127.10 - When a connection confirmation prompt appears, enter YES
- Enter the password (sunrise) to complete the login
NoMachine Login
The NoMachine feature requires software package support on the S100/S600 side. See NoMachine Configuration for configuration guidance.
This section is for users using the Ubuntu Desktop system version and describes how to achieve remote desktop login via NoMachine. The following sections use the S100 as an example. The operation for the S600 is the same as for the S100, just replace S100 in the link name with S600.
Connecting to the Development Board
- Open the
NoMachineclient and clickAddto add a host configuration.

- In the pop-up interface, fill in the host information for
RDK100/RDKS600, then clickAdd.

- Return to the main interface and double-click the host you just created.

- A login interface will appear. Enter the username and password, then click OK to complete the remote login.

