1.3.2 Getting Started Configuration
Default Login Accounts
Before configuring the system, you need to log in first. The RDK S600 system provides two default accounts:
- Standard user: username
sunrise, passwordsunrise - Superuser (root): username
root, passwordroot
Connecting to Wi-Fi
- Desktop
- Server
Refer to the Ubuntu 24.04 Wi-Fi connection tutorial.
Connect via serial port or SSH, and refer to the following commands to complete the connection:
# Scan for Wi-Fi networks
sudo nmcli device wifi rescan
sudo nmcli device wifi list # List detected Wi-Fi networks
sudo wifi_connect "SSID" "PASSWD" # Connect to the specified Wi-Fi
After successfully executing the above commands, successfully xxx will appear. Use ifconfig to obtain the board's Wi-Fi IP address.
Enabling SSH Service
The current system version has the SSH login service enabled by default. You can use the following methods to turn the SSH service on or off.
- Desktop
- Server
Use the systemctl command to check the current status of the SSH service, as follows:
sudo systemctl status ssh
After executing this command, detailed status information of the SSH service will be displayed. If the service is running, the output will show Active: active (running); if it is not running, it will show Active: inactive (dead) or similar information.
The following are control commands for SSH:
sudo systemctl start ssh   # Start the SSH service
sudo systemctl stop ssh    # Stop the SSH service
sudo systemctl enable ssh  # Enable SSH service to start on boot
sudo systemctl disable ssh # Disable SSH service from starting on boot
sudo systemctl restart ssh # Restart the SSH service
For using SSH, please refer to Remote Login - SSH Login.
Setting Login Mode
Automatic Login on Character Terminal
Modify the serial-getty@ttyS0.service file to set up password-less login as follows:
- Open
serial-getty@ttyS0.service.
# Log in as root user
vim /usr/lib/systemd/system/serial-getty@ttyS0.service

# Log in as sunrise user
sudo vim /usr/lib/systemd/system/serial-getty@ttyS0.service
- Change the line containing
ExecStart=-/sbin/agettyto:
ExecStart=-/sbin/agetty -a root --keep-baud 921600,115200,38400,9600 %I $TERM
Parameter explanation: The -a parameter specifies the username for automatic login.
- After restarting, the user will be logged in automatically.
Setting Up Chinese Environment
- Install the command packages:
sudo apt install language-pack-zh-hans language-pack-zh-hans-base fonts-wqy-microhei language-pack-gnome-zh-hans language-pack-gnome-zh-hans-base
language-pack-zh-hans: Contains Chinese language translation files, allowing the system interface to display in Chinese.language-pack-zh-hans-base: Base language pack providing basic Chinese support.fonts-wqy-microhei: Installs Chinese fonts.language-pack-gnome-zh-hans: Chinese language translation files for GNOME.language-pack-gnome-zh-hans-base: Base language pack for GNOME providing basic Chinese support.
- Generate locale:
sudo sed -i 's/# zh_CN.UTF-8 UTF-8/zh_CN.UTF-8 UTF-8/' /etc/locale.gen
sudo locale-gen zh_CN.UTF-8
- Set locale:
sudo update-locale LANG=zh_CN.UTF-8 LANGUAGE=zh_CN:zh
Note:
This document configures only
LANGandLANGUAGE; there is no need to setLC_ALL.LC_ALLis primarily used to temporarily override all locale settings and is not recommended as a system default; therefore, it is not configured here.
4.Refresh fonts and restart the system:
sudo fc-cache -f -v
sudo reboot
Setting Up Chinese Input Method
After setting up the Chinese environment, the system's built-in input method is supported by default. Press the Super (Windows key) + Space key combination to switch between different input methods.
Setting Up RDK Studio
RDK Studio is an AI-native desktop workspace designed for robotics development. It integrates Moss conversation, project workspace, device connection, remote development, flashing, local models, and on-board agents into a single native window.
For the usage instructions of RDK Studio, please refer to the RDK Studio User Manual.
NoMachine Configuration
NoMachine currently does not support apt download. You need to obtain the deb package from the official website.
Official NoMachine download URL: NoMachine Download
Download the installation package
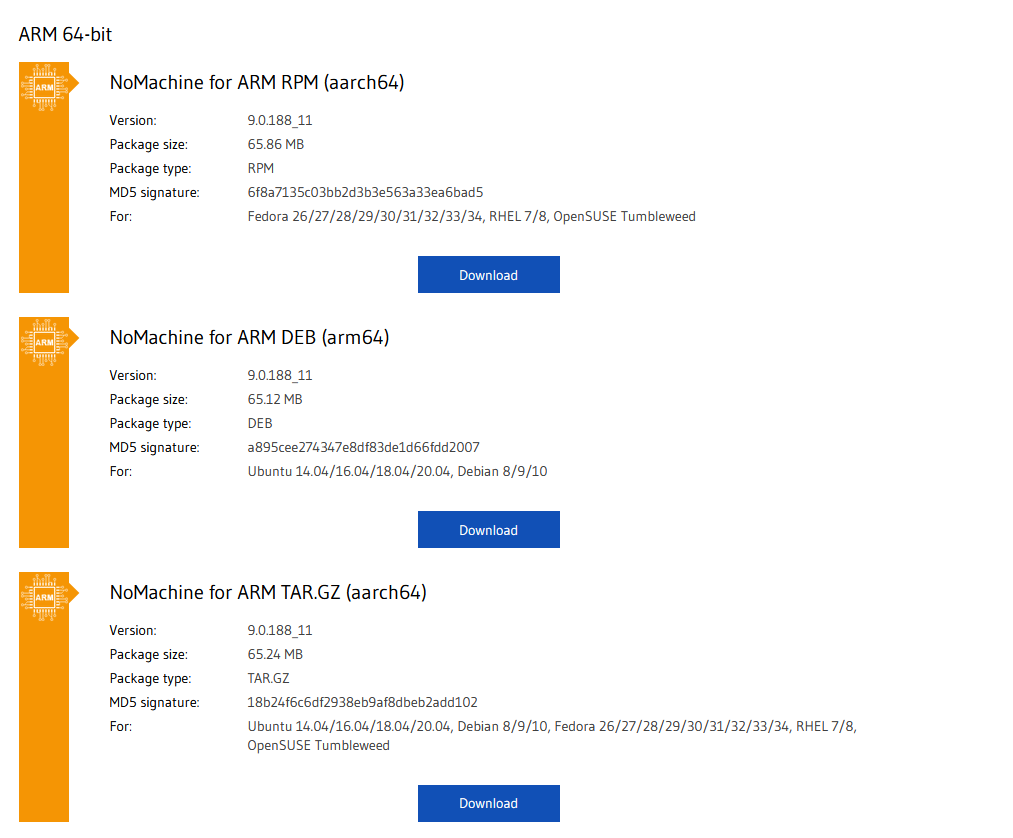
After entering the official website, find the ARM64 version of the installation package suitable for RDK S600 and click Download.
Installation
sudo apt update; sudo apt upgrade -y   // Ensure the current software is up to date
dpkg -i nomachine_*_arm64.deb
Configuration and Startup
-
Configure the server to allow remote connections:
sudo systemctl start nxserver -
Set
NoMachineto start on boot:sudo systemctl enable nxserver -
Set
EGL Capturetoyes. This is a screen capture feature provided byNoMachine, mainly used to improve the remote desktop experience in specific display server environments:sudo /etc/NX/nxserver --eglcapture yesThis command takes effect after a reboot. You can double-check with the following command;
EGL Capture has been enabledindicates that the feature has been written to the configuration file.if [ -f "/usr/lib/systemd/user/org.gnome.Shell@wayland.service" ] && grep -q "nxpreload.sh" "/usr/lib/systemd/user/org.gnome.Shell@wayland.service" && [ -f "/usr/share/applications/org.gnome.Shell.desktop" ] && grep -q "nxpreload.sh" "/usr/share/applications/org.gnome.Shell.desktop" && [ -f "/usr/NX/etc/node.cfg" ] && grep -q "EnableEGLCapture 1" "/usr/NX/etc/node.cfg"; then echo "EGL Capture has been enabled"; else echo "Not enabled"; fi -
Restart the
NoMachineservice:sudo systemctl restart nxserver
Restart the S600
Due to NXServer configuration issues, connecting directly after performing the above operations will result in a black screen. A reboot is required before use.
For using NoMachine, please refer to Remote Login - NoMachine Login.
User Management
Changing the username
Using the new username usertest as an example:
# Terminate all processes of the sunrise user
sudo pkill -u sunrise
# Rename the sunrise user to usertest
sudo usermod -l usertest sunrise
# Change the user's home directory to /home/usertest
sudo usermod -d /home/usertest -m usertest
# Change the user password
sudo passwd usertest
Finally, update the automatically logged-in username for the desktop service:
- gdm: RDK S100 default desktop service. Change
AutomaticLogin = sunrisein the/etc/gdm3/custom.conffile toAutomaticLogin = usertest. - lighttdm: Change
autologin-user=sunrisein the/etc/lightdm/lightdm.conf.d/22-hobot-autologin.conffile toautologin-user=usertest.
Adding a new user
Using the new user usertest as an example:
sudo useradd -U -m -d /home/usertest -k /etc/skel/ -s /bin/bash -G disk,kmem,dialout,sudo,audio,video,render,i2c,lightdm,vpu,gdm,weston-launch,graphics,jpu,ipu,vps,misc,gpio usertest
sudo passwd usertest
sudo cp -aRf /etc/skel/. /home/usertest
sudo chown -R usertest:usertest /home/usertest
You can also refer to the username change method to set the newly added user as the automatically logged-in user.