7.5.2. System Image Upgrade
7.5.2.1. Upgrade Methods
There are 3 approaches to update the system software:
Use the OTA commands to perform the OTA upgrade on the dev board
Use the HBUpdate tool to perform the OTA upgrade on the main device
Use the HBUpdate tool to perform the UART/U-Boot upgrade on the main device
Tip
If the system can boot up normally, we recommend using OTA to update the system image on the dev board.
If the dev board cannot be started, you can only use the UART/U-Boot method in HBUpdate.
7.5.2.2. Upgrading J5 DVB Image via OTA
Note
OTA upgrade does not support downgrade. If you want to roll back to the previous version after the OTA upgrade, perform the upgrade using the serial port instead (see Upgrading J5 DVB Image via Serial Port ).
7.5.2.2.1. Preparation
7.5.2.2.1.1. Get the installation files
The system software installation files can be obtained by executing the resolve.sh in the bsp directory of the OE package, and the file name is J5-Img-{version}.zip.
The all_in_one_signed.zip file the OTA upgrade requires can be obtained from the decompressed packages folder and all dependencies required for U-Boot upgrade are in the package folder.
7.5.2.2.1.2. Get the proper upgrade tool
The upgrade tools by using the OTA command line on the dev board is otaupdate, which is stored in the /usr/bin/otaupdate path on the board by default.
The development board upgrade tool hbupdate can be obtained by executing the resolve.sh in the bsp/tools directory of the OE package.
In addition to the installation package for Windows 64-bit system, you can also get the HBUpdate tools of two Linux versions, where gui is the graphical interface and cli is the command line interface.
Attention
HBUpdate may vary in different versions, which is subject to the latest tool in the OE package.
7.5.2.2.1.3. Install the serial port driver
Please install the serial port driver in the main device system before connecting the dev board for upgrading, otherwise the main device system may not recognize the dev board. Download the serial driver to your main device and complete the installation.
The serial port driver can be obtained by executing the resolve.sh in the bsp/tools directory of the OE package.
7.5.2.2.2. OTA Upgrade Using HBUpdate Tool
Launch dev board upgrade tool HBUpdate and configure it as follows:
Upgrade Configurations:
Language: English
Product Type: J5
Download Mode: OTA
Download Method: SFTP
SDRAM Type: (Leave as it is)
File Selection: Unzip the image package under the
bspfolder in the OE package, open the unzipped folder, and select the zip package namedall_in_one-secure_signed.zip.Product Configurations:
CP IP Address: IP address of the dev board with a successful ping
Gateway Address: (Leave as it is)
MAC Address: (Leave as it is)
Subnet Mask: (Leave as it is)
PC Configurations:
Serial Port: (Leave as it is)
PC IP Address: (Leave as it is)
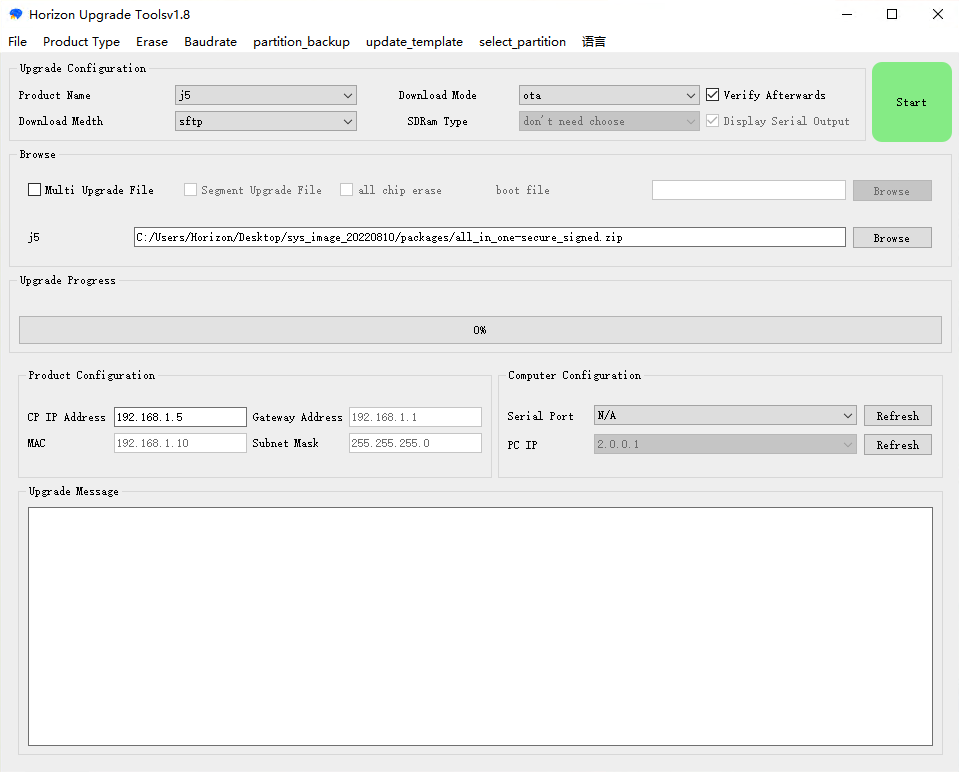
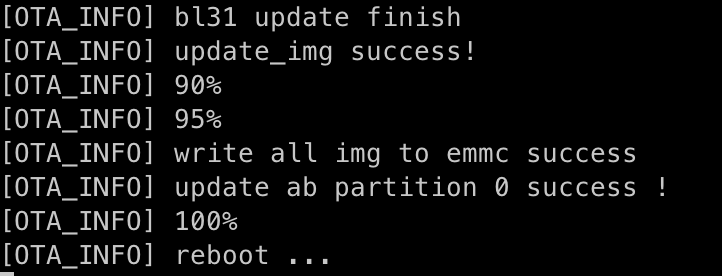
After the configuration, click Start in the upper right corner. When the dev board finishes the upgrade, log in to the dev board, and then run cat /etc/version to verify the upgrade by checking the version number.
7.5.2.2.3. OTA Upgrade from Command Line
First use SCP command to copy the OTA package to /userdata on the dev board. Log in to the dev board, change to the /userdata directory
and run /usr/bin/otaupdate all all_in_one-secure_signed.zip.
The dev board will start the upgrade and then reboot itself automatically after the upgrade. Reconnect to the dev board and run cat /etc/version to verify the upgrade by checking the version number.
7.5.2.3. Upgrading J5 DVB Image via Serial Port
7.5.2.3.1. Preparation
7.5.2.3.1.1. Install the driver
Install the serial driver CDM21228_Setup.zip in the tools/Windows_USB_Driver directory in the OE package and then restart the PC.
Connect the dev board and the PC with a serial cable, press Ctrl+Shift+ESC to open Device Manager and see if there are 4 new COMs. You can set the baud rate of all these 4 COMs to 921600.
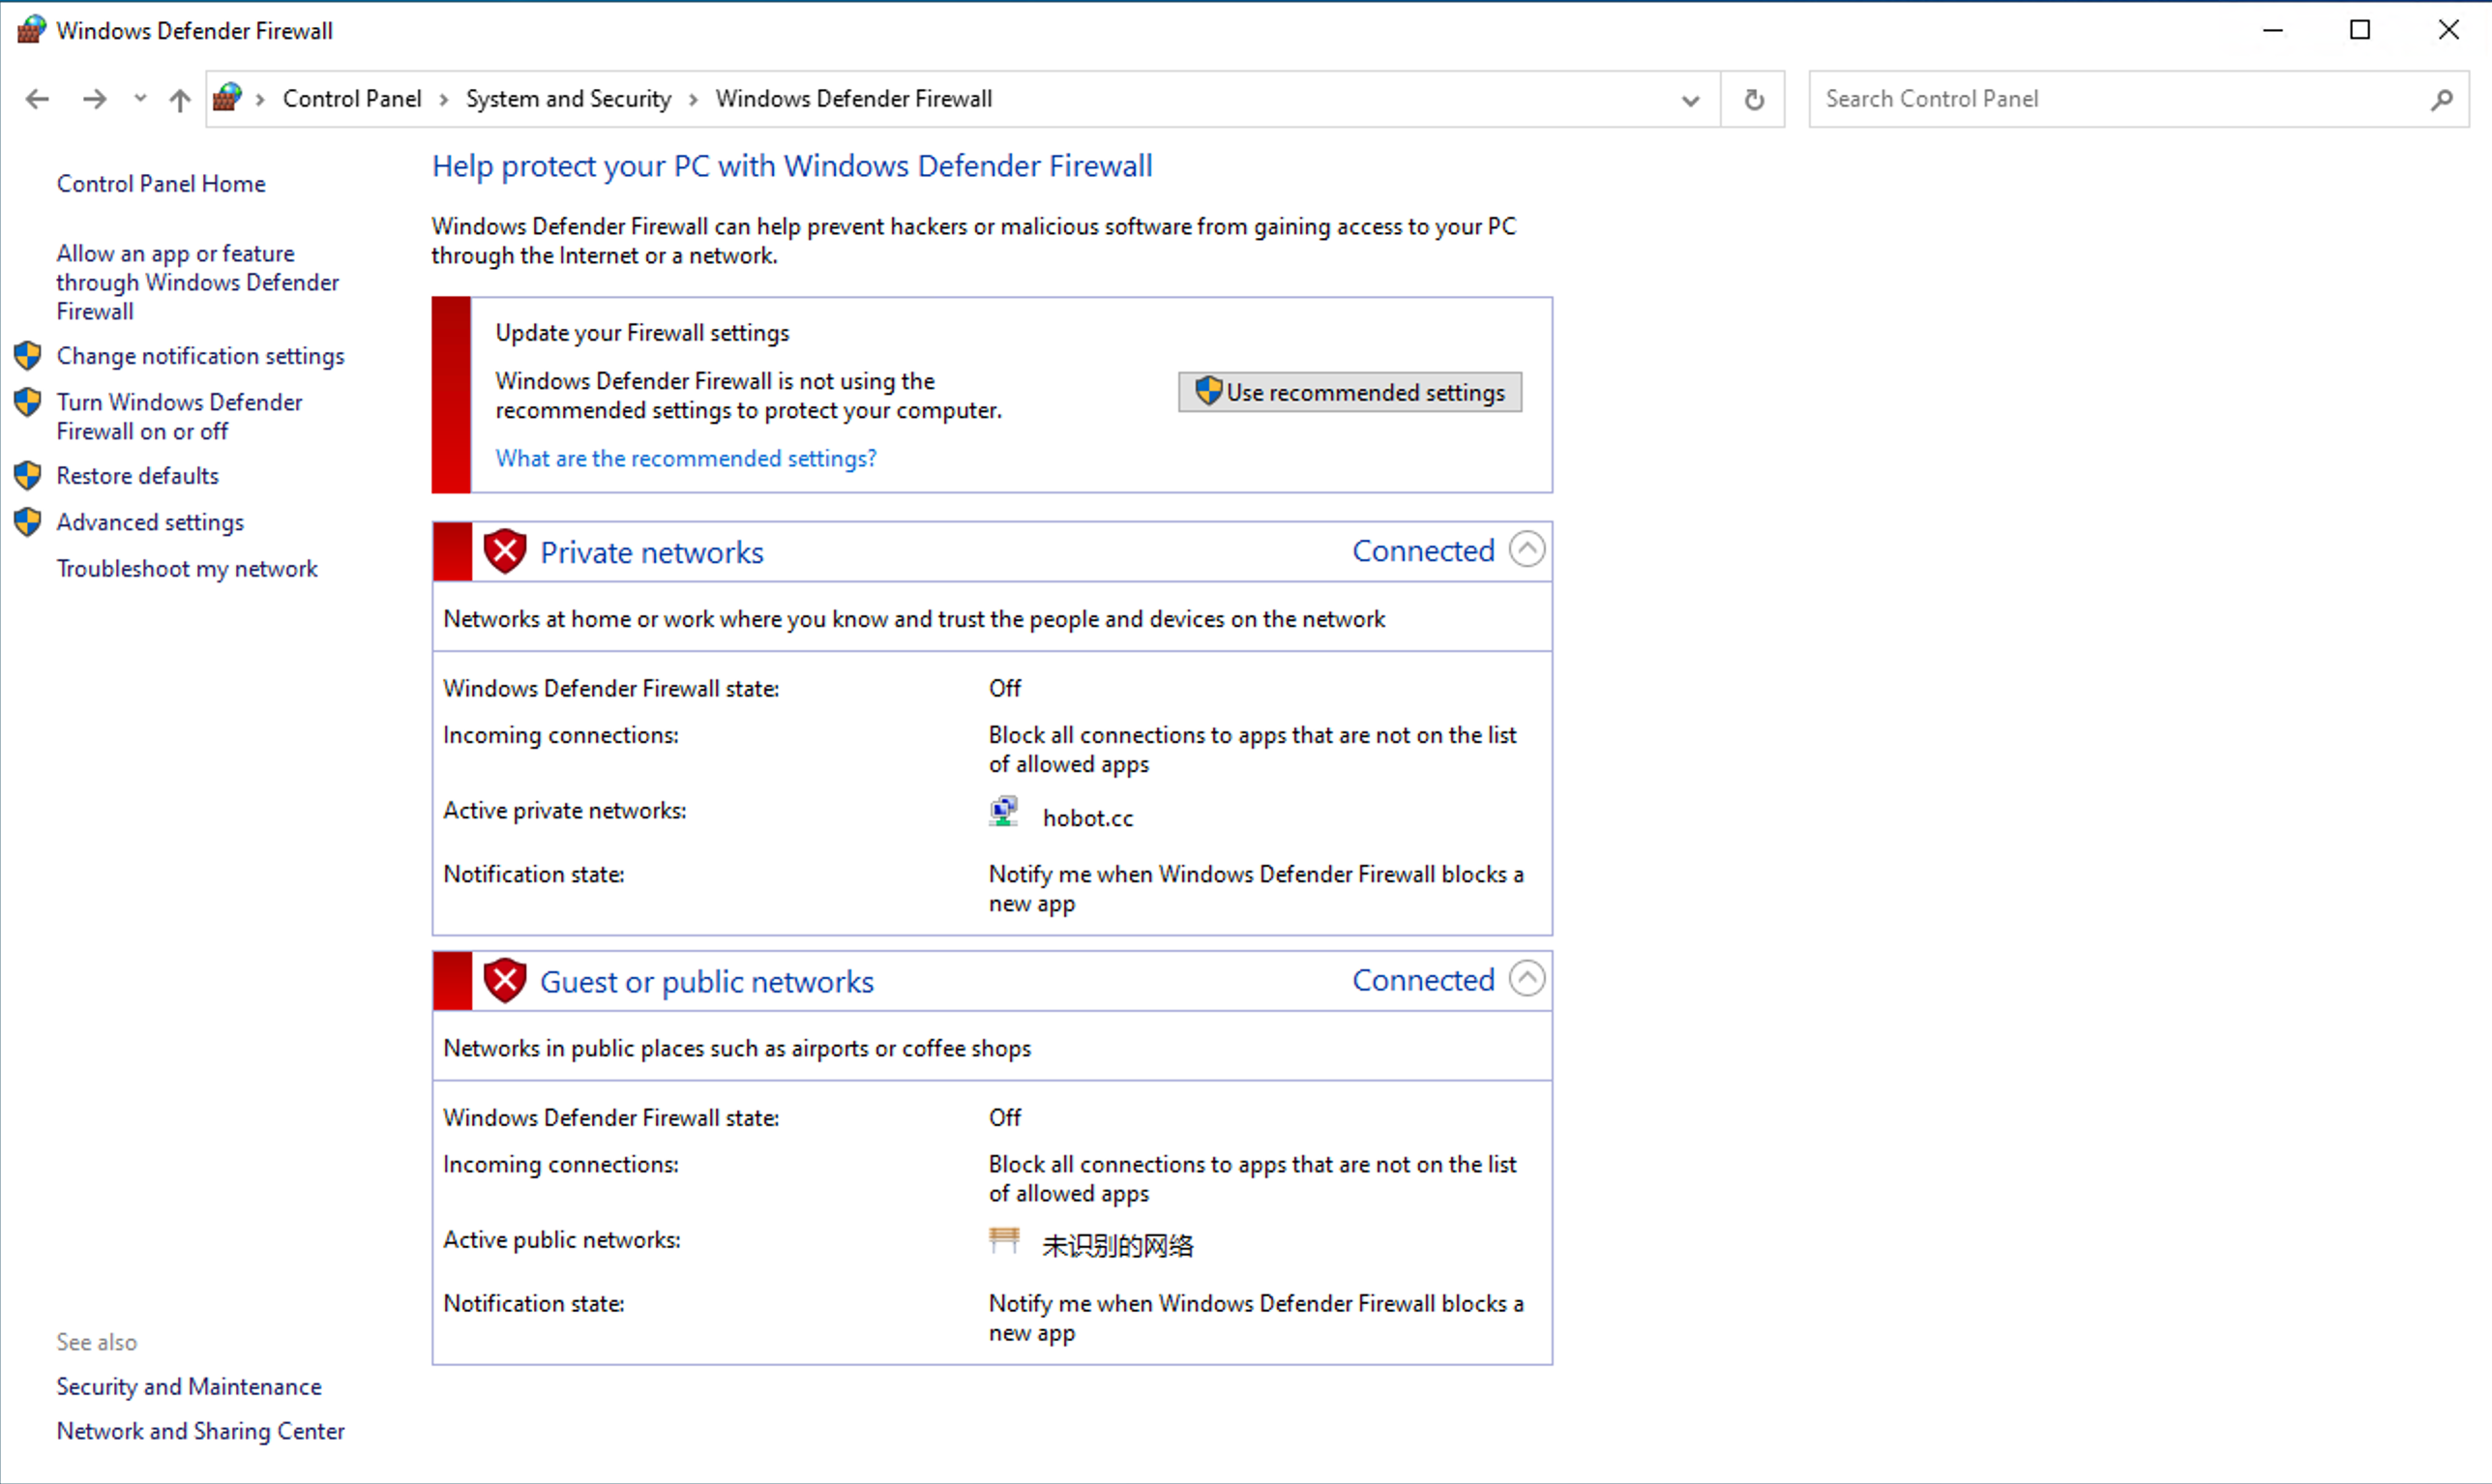
7.5.2.3.1.2. Turn off the firewall in Windows
To guarantee the connectivity between the PC and dev board, we need to temporarily turn off the firewall on the Windows PC.
To turn off the firewall, do one of the following:
Press Win+X. On the pop-up menu, select Powershell (Admin) or WindowsTerminal (Admin). In the terminal, run the following commands:
Set-NetFirewallProfile -Profile Private -Enabled False
Set-NetFirewallProfile -Profile Public -Enabled False
Get-NetFirewallProfile
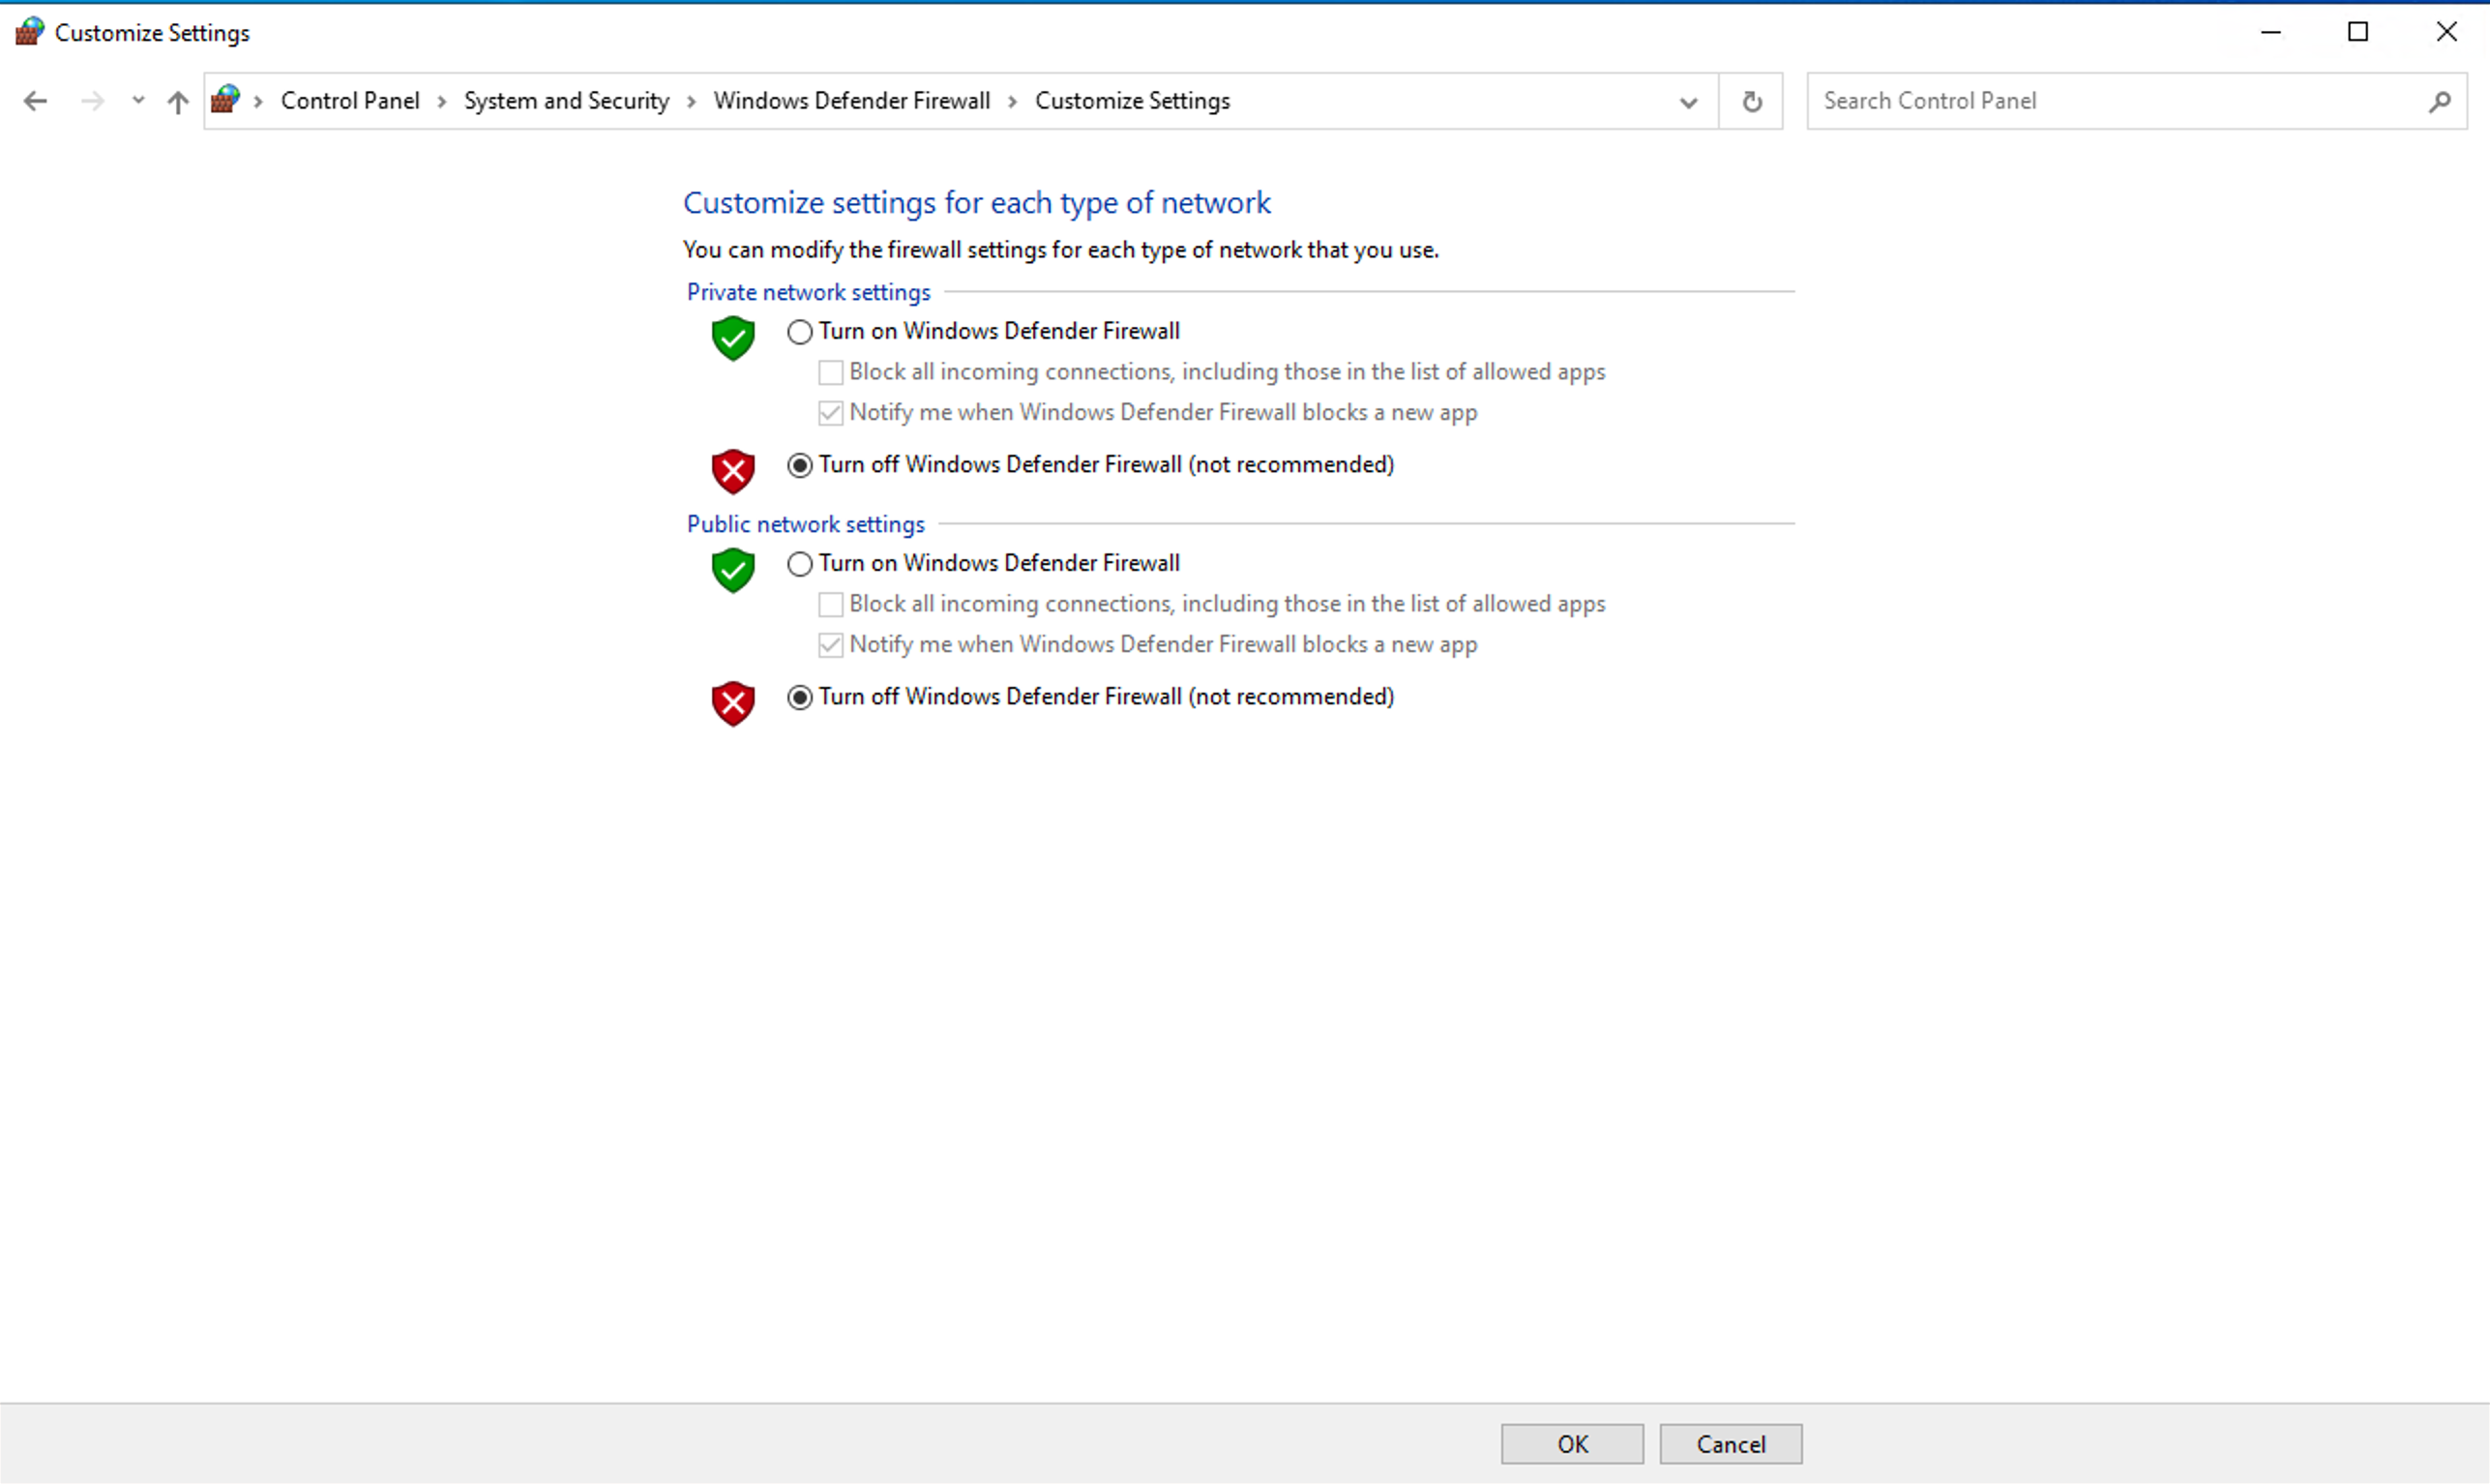
Open the Control Panel, click System and Security, Windows Defender Firewall. Select Turn Windows Defender Firewall on or off on the left side and then disable the firewall for both private and guest/public networks.
7.5.2.3.1.3. Set the network adapter to full duplex
Open the Network Connections (Control Panel > Network and Internet > Network and Sharing Center > Change adapter settings).
Right-click the network you are currently using, on the context menu, click Properties.
On the dialog, click Configure. Switch to the Advanced tab, scroll down the Property list and select Speed and Duplex, set the Value to 100 Mbps Full Duplex and then click OK save and close the dialog.
7.5.2.3.1.4. Set PC IP to the same network segment as dev board
Open the Network Connections (Control Panel > Network and Internet > Network and Sharing Center > Change adapter settings).
Right-click the network you are currently using, on the context menu, click Properties.
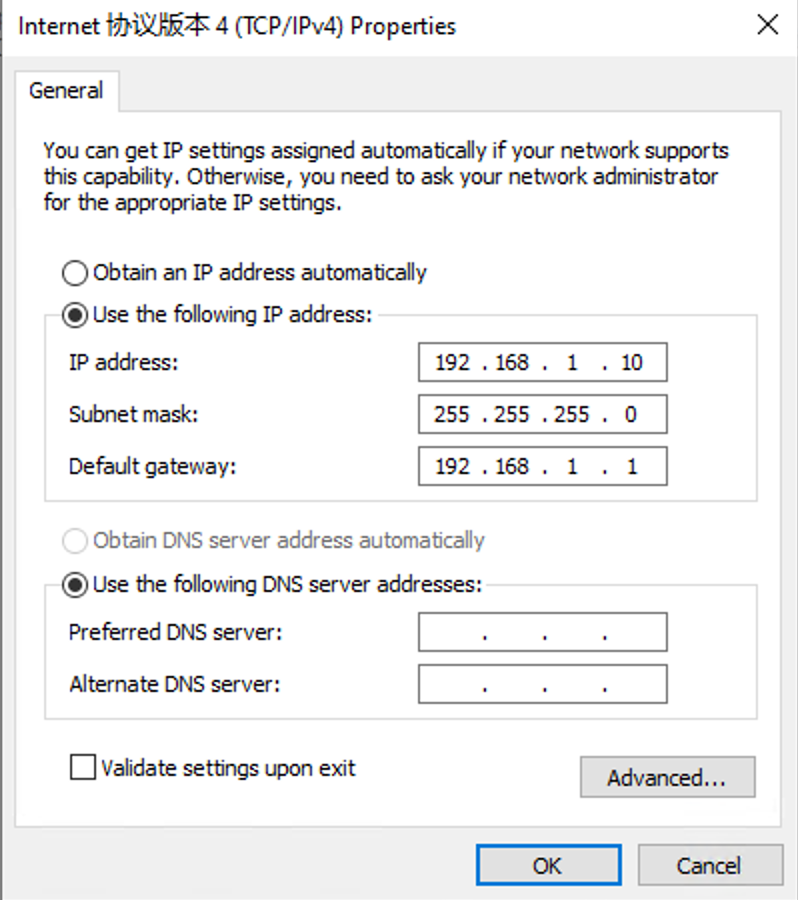
On the dialog, double-click Internet Protocol Version 4 (TCP/IPv4) and set the IP address to the same network segment as the dev board. As the PC connects directly to the dev board via the network port, we set the IP address as follows:
IP Address: 192.168.1.xxx
Subnet Mask: 255.255.255.0
Default Gateway: 192.168.1.1
7.5.2.3.2. UART/U-Boot Upgrade via Serial Port
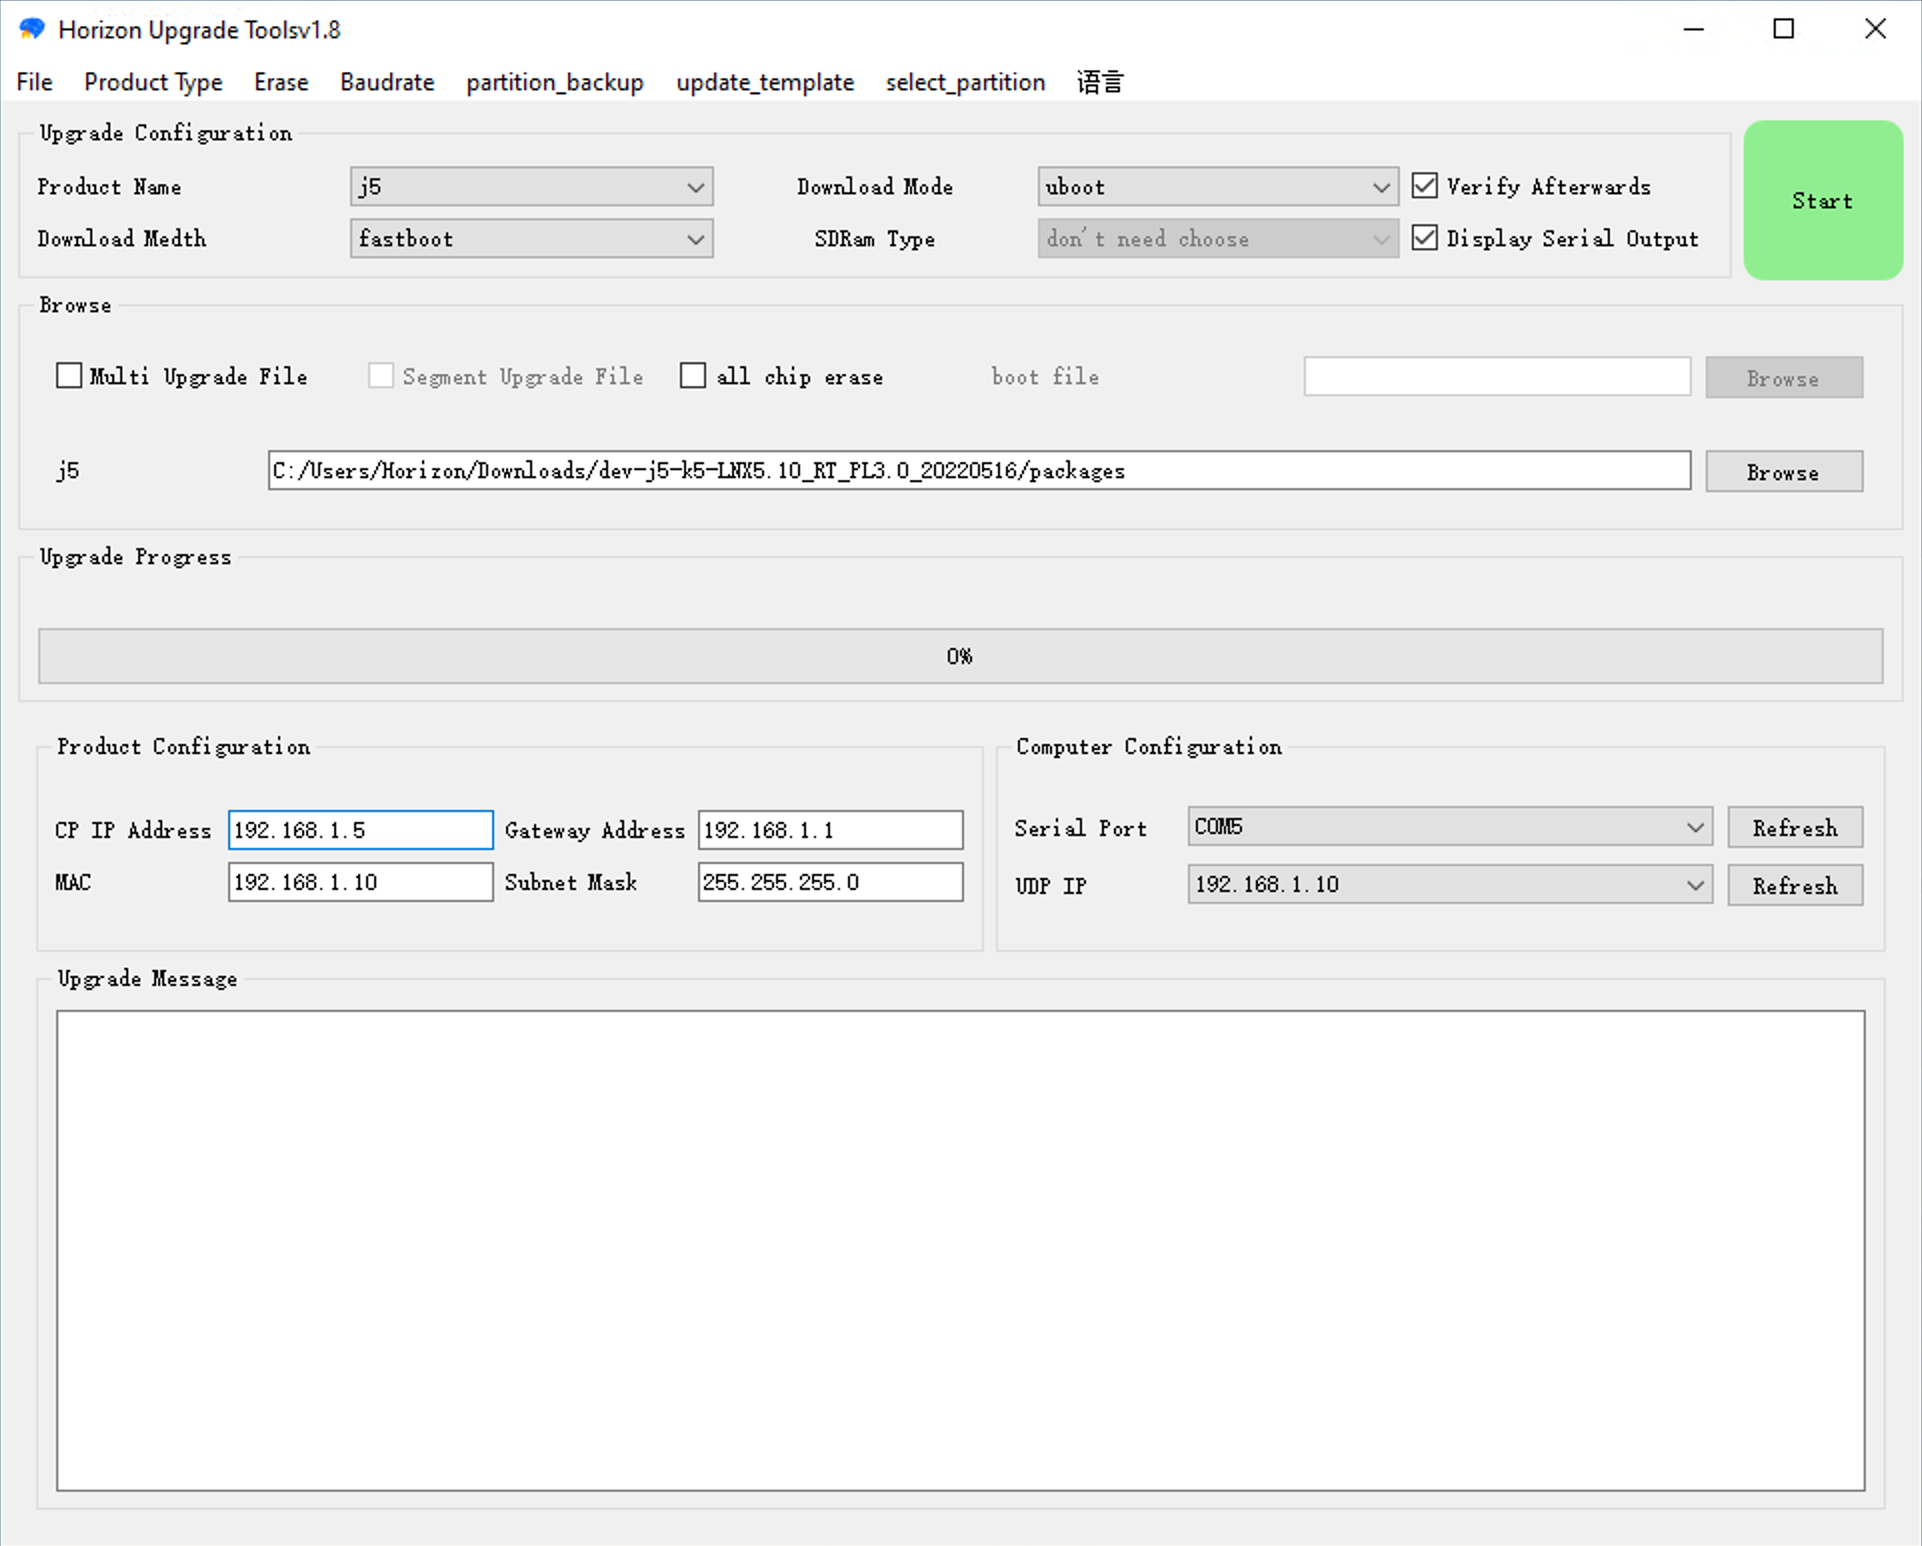
Launch dev board upgrade tool HBUpdate and configure it as follows.
Upgrade Configurations:
Language: English
Product Type: J5
Download Mode: U-Boot
Download Method: Fastboot
SDRAM Type: (Leave as it is)
File Selection: Unzip the image package under the
bspfolder in the OE package, open the unzipped folder, and select the zip package namedpackage.
3. Product Configurations - CP IP Address: IP address of the dev board in the U-Boot state, make sure it is in 192.168.1.xxx format - Gateway Address: 192.168.1.1 - MAC Address: (MAC address of Windows PC, read-only) - Subnet Mask: 255.255.255.0
4. PC Configurations: - Serial Port: Choose the bottom second port - UDP IP Address: Select the 192.168.1.xxx set above
After the configuration, click Start in the upper right corner. When the dev board finishes the upgrade, log in to the dev board via the serial port or IP, and then run cat /etc/version to verify the upgrade by checking the version number.
7.5.2.4. FAQ
7.5.2.4.1. OTA with HBUpdate Reporting an Error
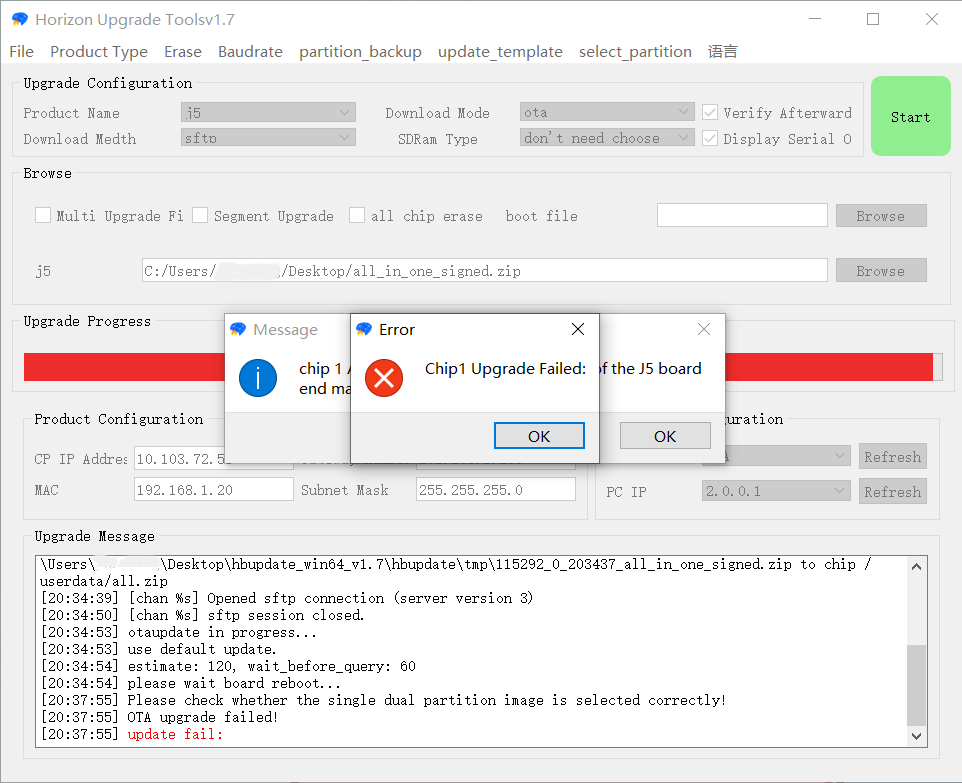
If during the OTA upgrade with the HBUpdate tool, it reports the following error:
Please check whether the single dual
partition image is selected correctly?
Reason: The upgrade may fail when using an unencrypted OTA package to update an encrypted board.
You need to use all_in_one-secure_signed.zip instead to perform the upgrade.
7.5.2.4.2. Serial Port Selection
When the serial cable is connected to the PC, four COM ports will appear in the Device Manager, of which only one can be used to connect to the board.
You may need to try them one by one to determine the correct one.
Suggestion: As experience shows that the second-last port on the drop-down list might be the correct COM port, we recommend you starting from this one.